Changing Client Status
Overview
Client status will inevitably change after the initial enrollment. The status of a client can be updated in the Client screen, and the system will record the new date, the created date, and the modified date of this change. This helps ensure timely and accurate billing and scheduling.
Changing Client Status
To change client status, go to the Main Menu, then click Clients. Filter for the appropriate client, then click on the client's name. Finally, update the client's status. If the status is Former, be sure to fill in the reason next to If former, Reason: for recordkeeping, if your organization uses this field.
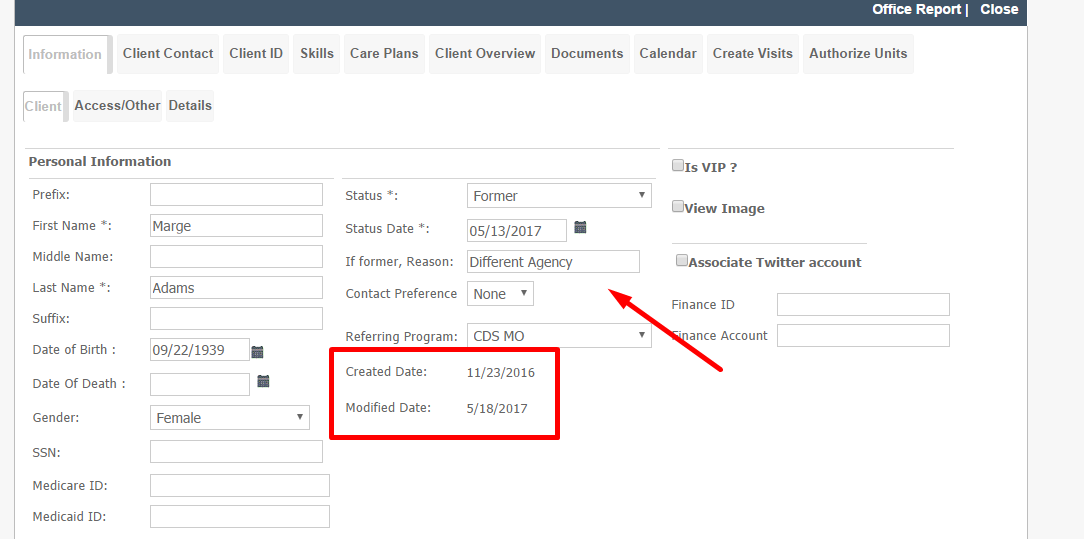
For closer management of prospects, see the CRM management article.
Making Clients Active: Password Field is Mandatory
When client status is changed, an error of Password Field is Mandatory will appear if a user login was created for the client's profile.
To successfully change the status, follow these steps:
- Select Client Information.
- Select the Access/Other tab.
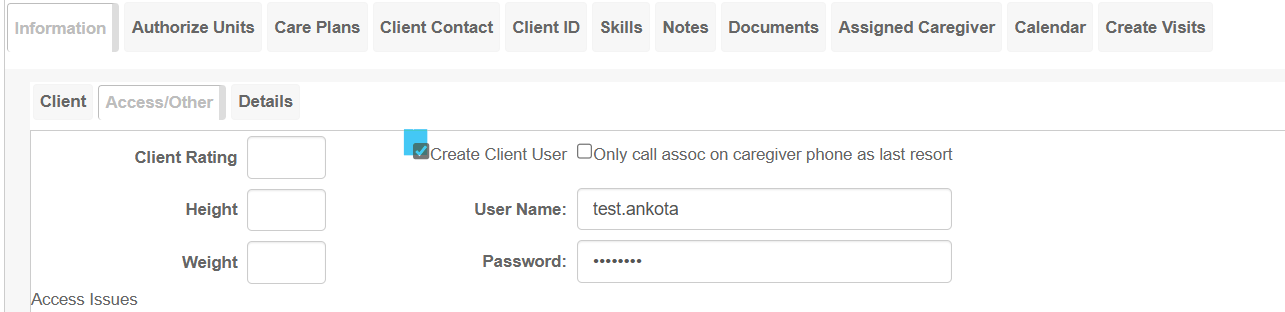
- Uncheck Create Client User.
- Save.
- Go back to the Client's tab.
- Move the Status.
- Save.