Client Addresses
Overview
Addresses can be managed in Ankota a variety of different ways. Addresses can be added (multiple times if needed), changed, retroactively changed, and even auto-coded in some cases.
This article includes the following sections:
- Enter Address
- Add/Change Address (Automatic)
- Change Address (Manual)
- Setting up Multiple Addresses
- Georgia Second Address Automatic Reason Coding
Enter Address
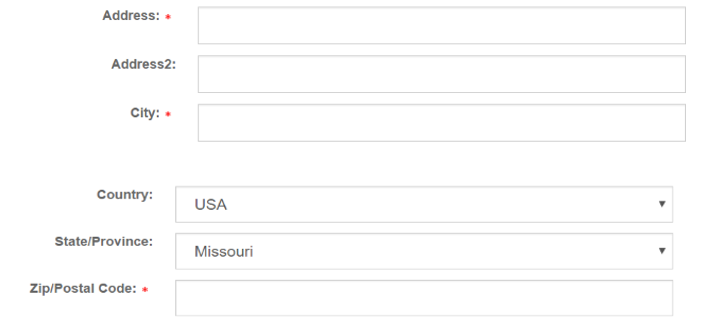
Setting the address is part of the standard client and caregiver set-up. Client registration for the address usually looks like this:
Additional addresses can be entered manually in the profile:
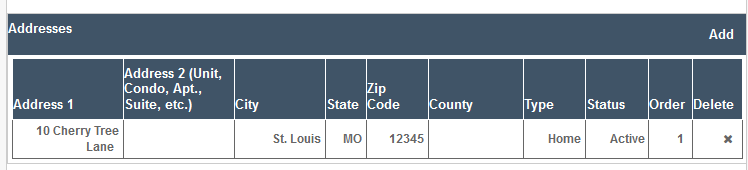
In the case of clients, address changes are critically important because visits may not be billable if they are billed with the wrong client address.
Add/Change Address (Automatic)
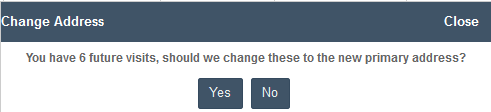
If you need to edit an existing address, simply click the address (street address) and open the address pop-up, then correct as needed. If visits are already scheduled, a question will appear regarding changing future visits to the new primary address. Normally this offer should be accepted to change future addresses.
IMPORTANT NOTE: If there are visits in the past at this new address, affected visits must be manually changed. See the next section below.
Change Address (Manual)
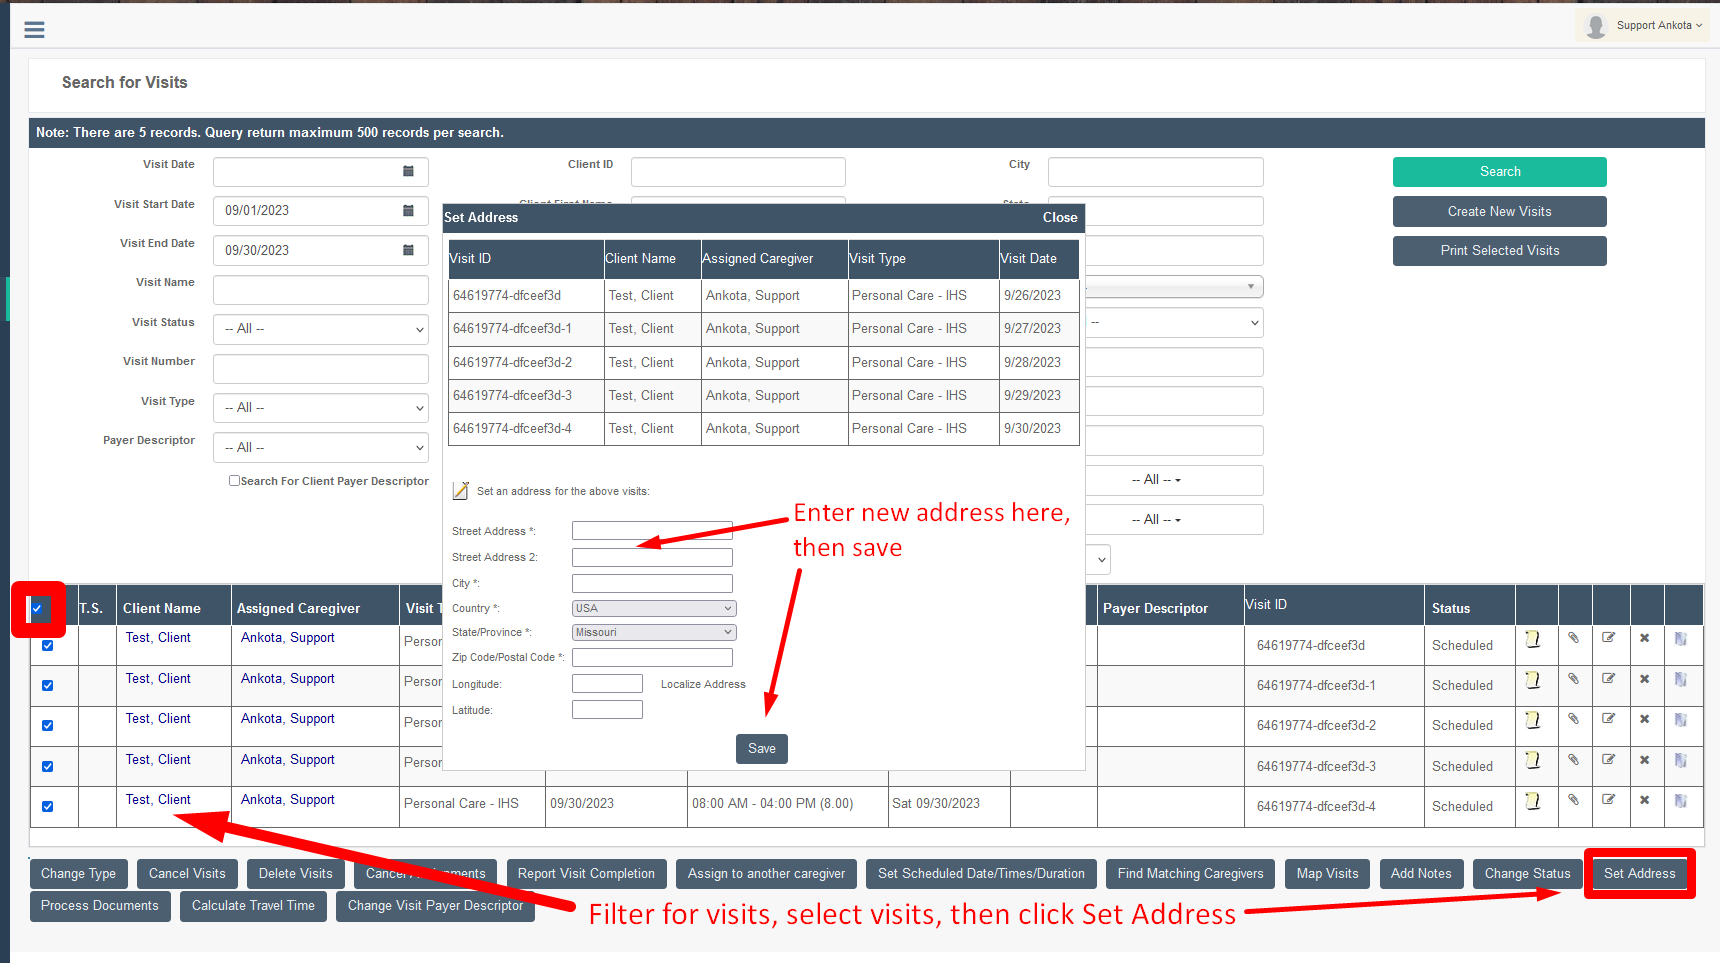
To manually change the address of past (or future) visits:
- Go to the Visits page.
- Filter for the visits (be sure to pick the correct date range!).
- Select the visits.
- Click the Set Address button.
- Enter the new address.
- Click Save.
Setting Up Multiple Addresses
To set up multiple addresses, follow these steps:
- Go to Clients and search for the appropriate client and open their record.
- On the main information page (the client's facepage), go to the address field.
- Click "Add" to add another location.

- Enter the new address fields. (Reminder: If the address has an apartment number, this information goes in Address 2.)
- Save the new address.
The new address will now be added to the approved list of addresses; when the caregiver reports arrival and departure, both addresses will be checked for accurate GPS verification.

Georgia Second Address Automatic Reason Coding
Currently, if Georgia clients have a second approved address, Tellus is accepting the visit but then marking it as Unmatched in the Work List. Even though the expected location matched the actual location, if the location isn't what Tellus expected, it gets flagged.
To simplify this process, Ankota has built a care code that automatically reason codes these visits to ensure approval (9134). By putting a second approved location into the client's profile, Ankota understands the second location has been preauthorized, and Ankota will reason code the visit to ensure Tellus will accept it without issue.
How it works:
- Email Ankota Support with a request to turn on this feature.
- Enter the client's first address with type: Home.
- Enter the client's other approved addresses with type: [anything but Home].
- When a caregiver clocks in/out of a visit at the non-home location, Ankota will automatically reason code the visit with the 9134 exception (approved alternate location).
Note: The caregiver must be within the geofence of the second location for this to work; otherwise, the visit will be flagged like any visit where the caregiver clocked in/out at an unapproved location.