Client Concerns Notifications
Overview
The client concerns functionality allows caregivers to report client concerns via telephony or the mobile app in a special client concerns field. These concerns are then visible in the Action Center (or Actions/Requests page, depending on how the section is named) to appropriate caregivers. An organization can determine which roles should see these concerns (typically RNs), and those caregivers can be assigned to clients via the Assigned Caregivers tab.
The basic Client Concerns functionality must be turned on by an Ankota specialist. After that, caregiver assignments can be controlled directly. The following walkthrough covers setting up and using the Client Concerns functionality.
Roles for Client Concerns Notifications
When an Ankota specialist asks which roles should be notified, they are referring to caregiver roles. These are created at the Organization Detail level, under the Roles subcategory.
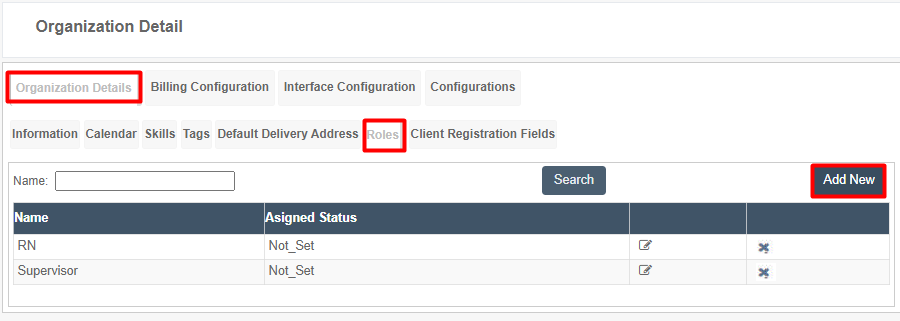
These roles are then assigned as appropriate to caregivers.
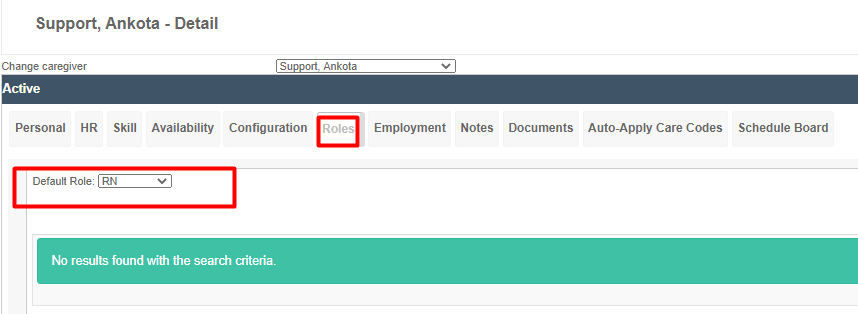
When the specialist is told to allow a role to see client concerns, these are the roles being referenced.
Assign Caregivers to Clients
For caregivers to see appropriate client notifications, designated caregivers (likely RNs) must be assigned to the clients whose notifications they should see.
To do so:
-
Log into the environment.
-
Click Clients.
-
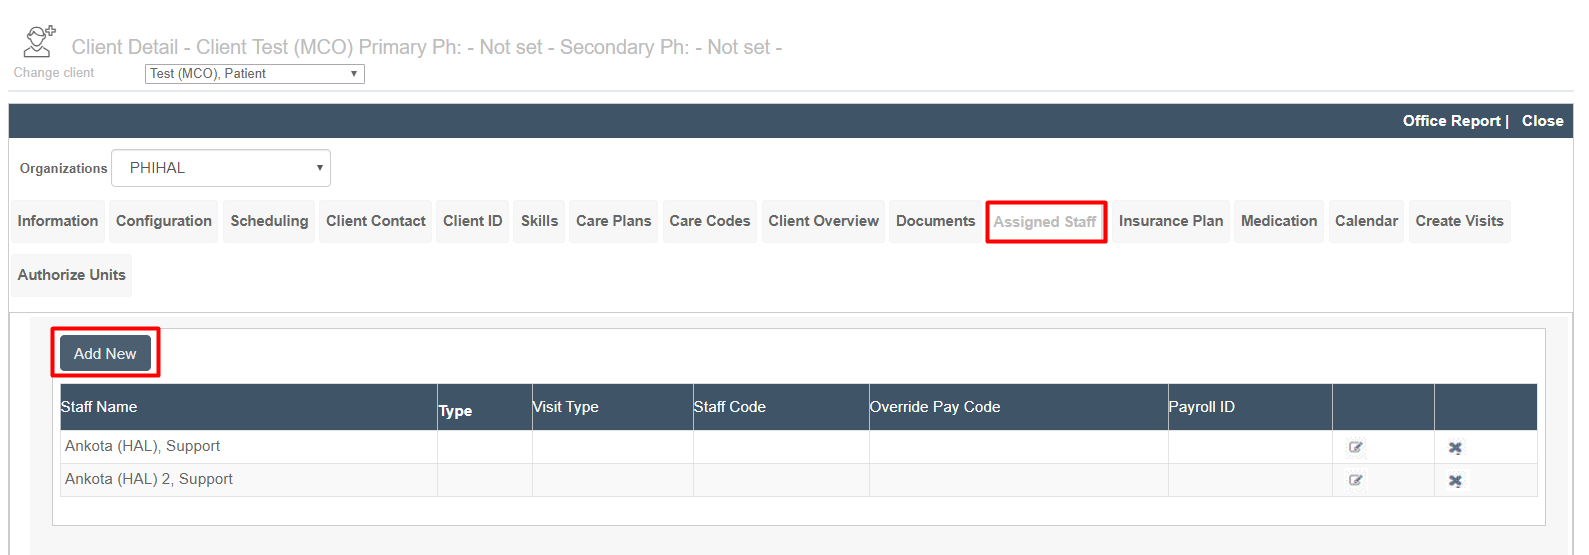
Click the Assigned Caregiver (or Assigned Attendant, or Assigned Staff...) tab.
-
Assign the caregiver by clicking the Add New button and selecting the caregiver.
-
No other settings need to be selected for this functionality.
-
Click Save.
Client Concerns Pre-set Choices
Some organizations may wish to create a pre-set list of client concerns choices. These can be configured at the organization level, or a list can be sent to Ankota support to be configured on the organization's behalf.
To create a new list of client concerns choices:
-
Click Settings.
-
Click Org. Settings.
-
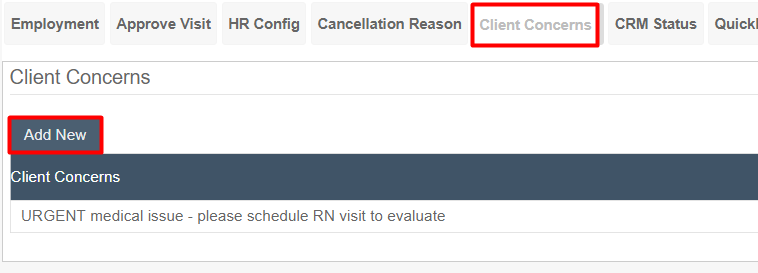
Click the Configurable Lists tab.
-
Click the Client Concerns tab.
-
Click Add New.
-
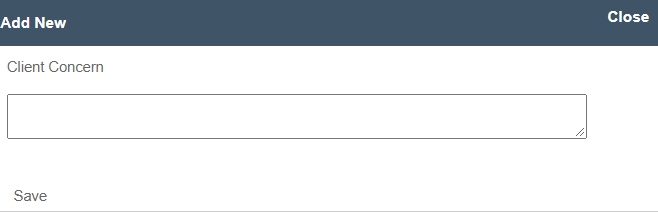
Add the new pre-set concern.
-
Click Save.
Escalate Client Concern to Office via Email
In the mobile caregiver app, if the caregiver reports a client concern, the visit will be set to "needs approval" and an email will be sent to the office/admin when the caregiver clocks out of the visit. An Ankota specialist needs to configure a setting before an email address can be set.
The email to the office will read:
Subject: "Client Concerns reported for [client first name, client last initial] by [caregiver first name, caregiver last name]."
Body: "The following concerns were reported for client [client first name, client last initial] by [caregiver first name, caregiver last name]. The noted concern is ----"
To add an email address:
-
Log in to Ankota.net.
-
Click the Settings menu.
-
Click Organization Details.
-
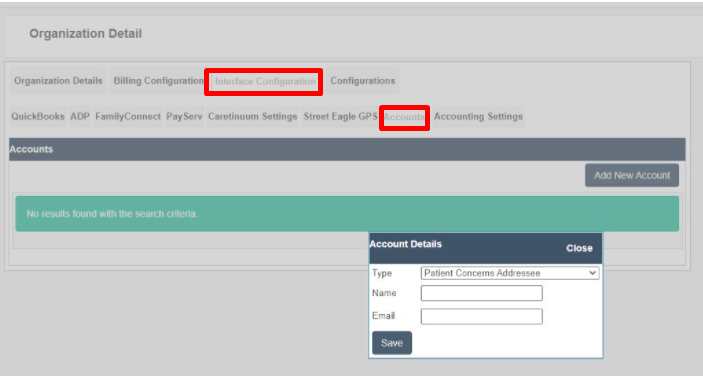
Click the Interface Configurations tab.
-
Click the Accounts subtab.
-
Add a new account: Client Concerns Addressee (could also say: Patient Concerns Addressee). Multiple addresses can be added, separated with a semicolon.