Client Management›Client Profile Overview & Notes

Client Profile Overview & Notes

Overview

In addition to being able to create and send notes to caregiver and client profiles from the Action Center, notes can also be added directly into caregiver and client profiles. If these tabs are not configured for your clients and you would like to add them, reach out to your Ankota specialist or Support to have it configured.

For clients, there are two forms of notes which can be taken. The first are notes on the Overview tab. One of the advantages of the client Overview tab is that information from this page can be shared with staff during check-in for Adult Day Care clients. Another advantage is that for companies that do not wish to use complex notetaking, the Overview tab has a simplified form of notetaking.

Clients also have a separate tab for dedicated Notes management which provides more in-depth functions, including the ability to tag notes as they are entered.

This article includes:

  • Creating Overviews in Client Profiles
  • Creating Notes from the Client Overview
  • The Client Overview and Adult Day Care Check-in Notifications
  • The Notes Tab

Creating Overviews in Client Profiles

On each client profile there is a tab called Client Overview. At the top of this tab is a blank section where a short overview can be written for overall guidance. Simply type in the window and click Save Note.
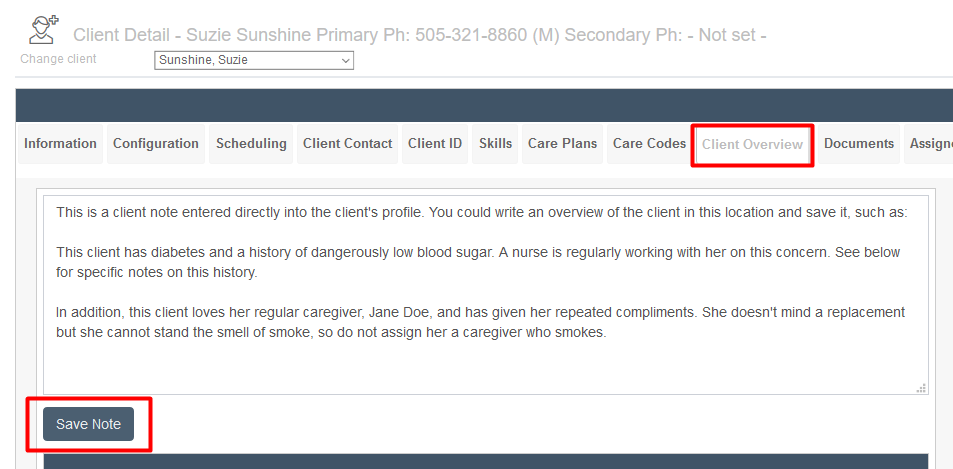
The Client Overview tab on the Client Detail page for Suzie Sunshine displays a text area for entering client notes and overview information, with a "Save Note" button below; the note describes the client's medical history (diabetes and low blood sugar) and caregiver preferences.

Any information in this section will copy to the Notes section on the initial Information tab of the client profile.
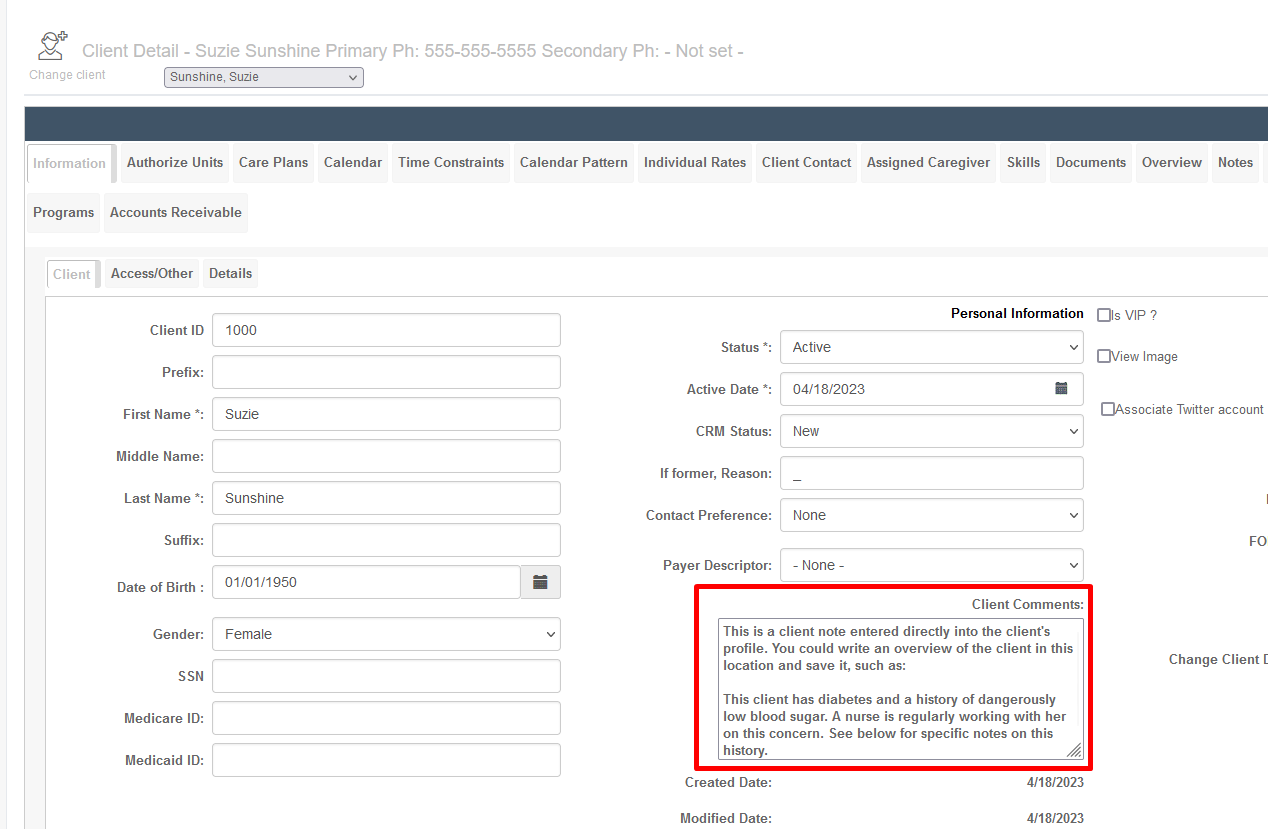
The Client Detail page for Suzie Sunshine displays personal information fields including Client ID (1000), name, date of birth (01/01/1950), gender (Female), and contact details, along with a Client Comments section containing clinical notes about the client's medical history and care needs.

Creating Notes from the Client Overview

Below the client overview is a notes section. Notes from the Action Center that are copied to client profiles are housed here, as are any notes which are created and saved on this screen. To add a note, click the Add Note button, then fill in the information in the pop-up window and save it. If the note is saved in the status of Open, it will be copied to the Action Center. If saved in the status of Closed, it will be saved as a historical record in this tab only.
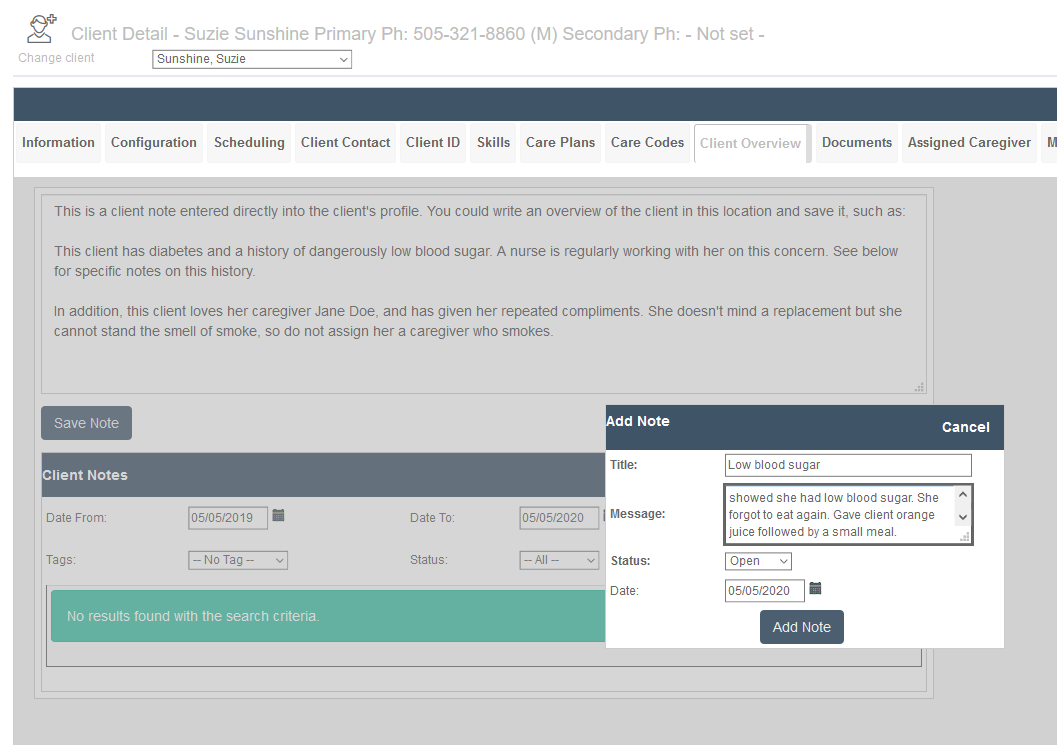
The Client Detail page for Suzie Sunshine displays the Client Overview tab with a text area for entering client notes and an "Add Note" dialog box open on the right side. The dialog shows fields for Title ("Low blood sugar"), Message (containing details about a low blood sugar incident), Status (set to "Open"), and Date (05/05/2020), with "Add Note" and "Cancel" buttons.

Saved notes will be listed in the Client Notes section and can be filtered using tags, status, and date range.
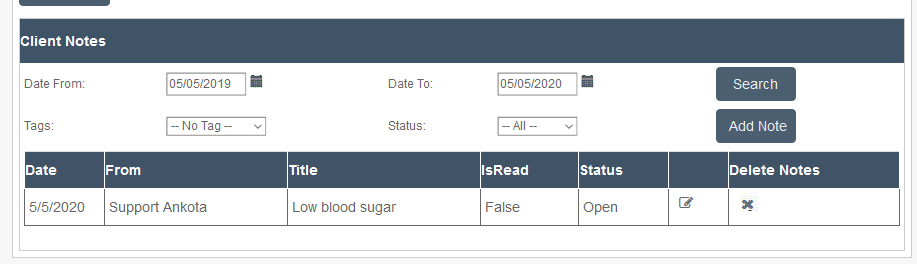
The Client Notes page displays a searchable table of client notes with filters for date range (05/05/2019 to 05/05/2020), tags, and status, along with columns for Date, From, Title, IsRead, Status, and Delete Notes actions; one note entry is visible showing a "Low blood sugar" note from Support Ankota dated 5/5/2020 with Open status.

The screenshot below shows an Open status note which copied to the Action Center.
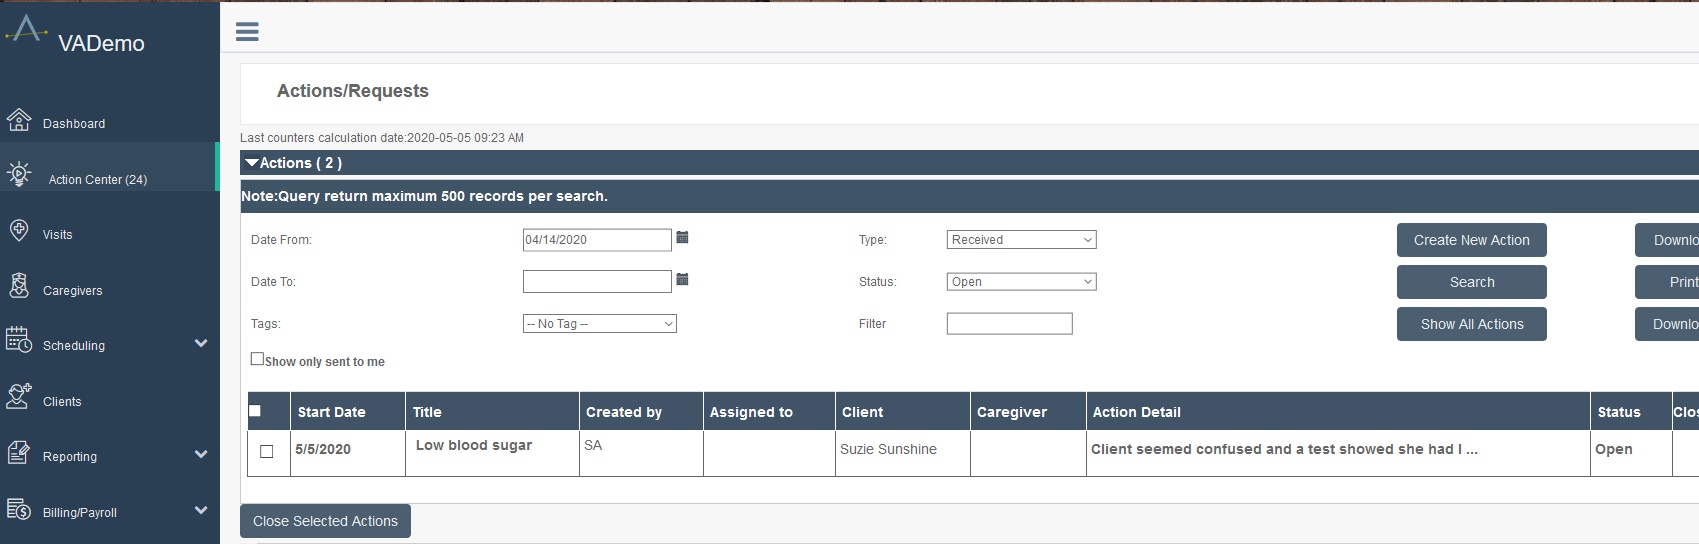
The Actions/Requests page displays a filtered list of 2 actions with columns for Start Date, Title, Created by, Assigned to, Client, Caregiver, Action Detail, and Status. A search interface at the top allows filtering by Date From/To, Type (Received), Status (Open), and Tags, with buttons to Create New Action, Search, and Show All Actions.

The Client Overview and Adult Day Care Check-in Notifications

On each client's Notes/Overview tab, there is a special checkbox for "Include note in check-in."
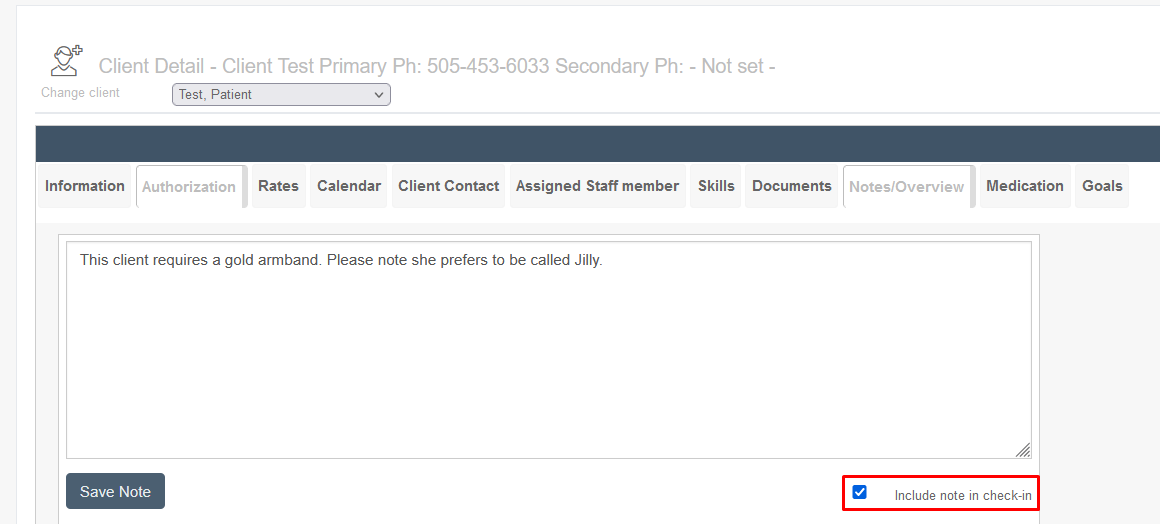
Client Detail page showing the Notes/Overview tab with a text field containing client information including a gold armband requirement and preferred name "Jilly"; includes a "Save Note" button and "Include note in check-in" checkbox.

When checked, it will ensure notifications are provided. When the client is checked in to the Adult Day module, a flashing yellow pop-up will appear including the first paragraph (up to 200 characters) of information from the client's profile.
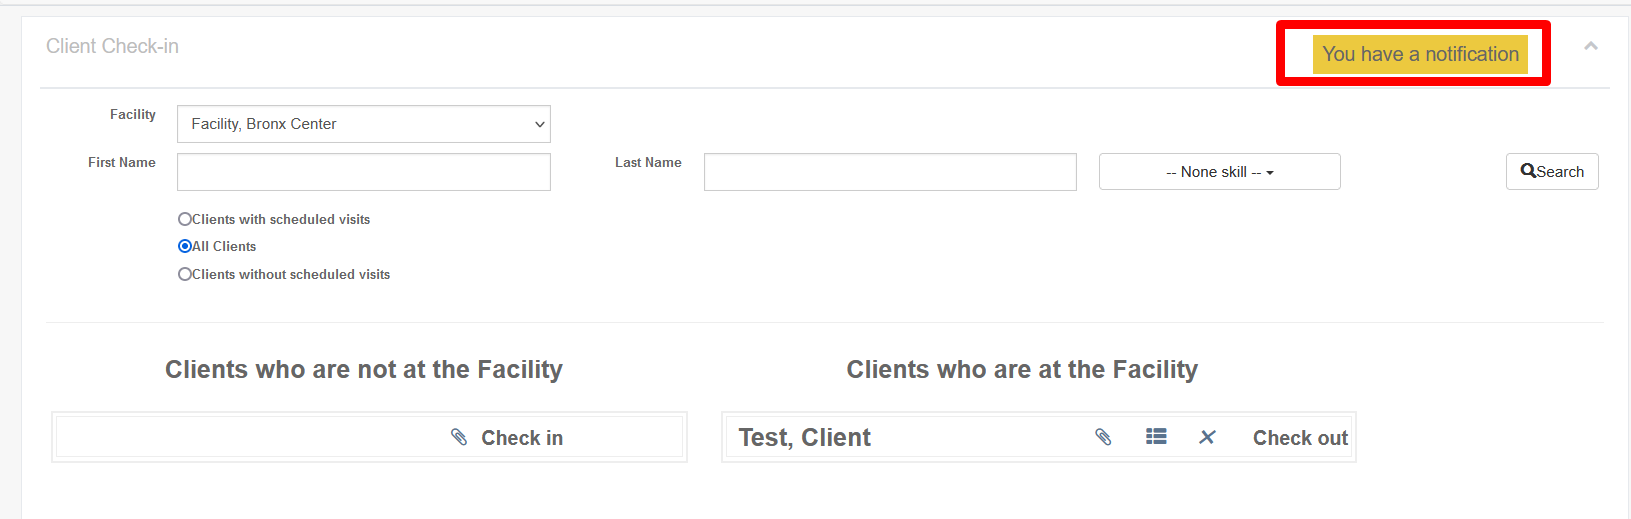
The Client Check-in page displays a form with fields for selecting a facility (set to "Facility, Bronx Center"), entering First Name and Last Name, and filtering by skill level, along with radio button options to view "All Clients," "Clients with scheduled visits," or "Clients without scheduled visits." The page is divided into two sections: "Clients who are not at the Facility" (left) with a "Check in" button, and "Clients who are at the Facility" (right) showing "Test, Client" with "Check out" and other action buttons.

When the flashing yellow notification is clicked, a new pop-up will appear with a list of all unread client check-in notifications. To close out this window, the user will need to confirm they have read and acknowledged this information.
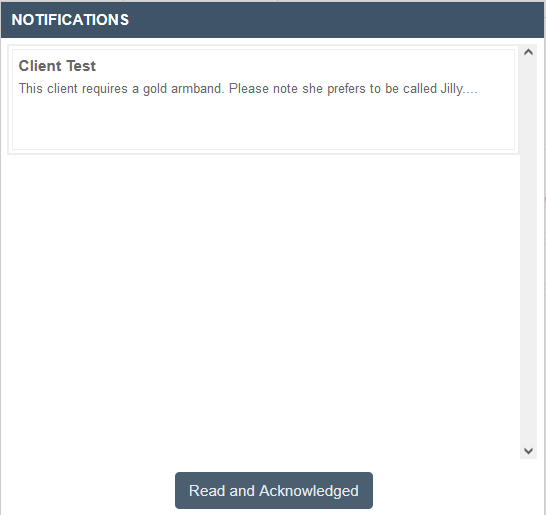
The Notifications panel displays a notification titled "Client Test" with details stating the client requires a gold armband and prefers to be called Jilly, with a "Read and Acknowledged" button at the bottom to mark the notification as completed.

The Notes Tab

The Notes tab is similar to the Overview tab, but it lacks the general "overview" note and it allows for more detailed notes entries. One of the advantages of the Notes tab, sometimes called Notes with Tags, is that note entries can be clearly tagged upon entry. This is useful for quickly sorting the history associated with a single concern. Notes here can also be copied to the Action Center for general information sharing.

For example, a note could be entered regarding a client's birthday preferences, tagged "Birthday Notes."
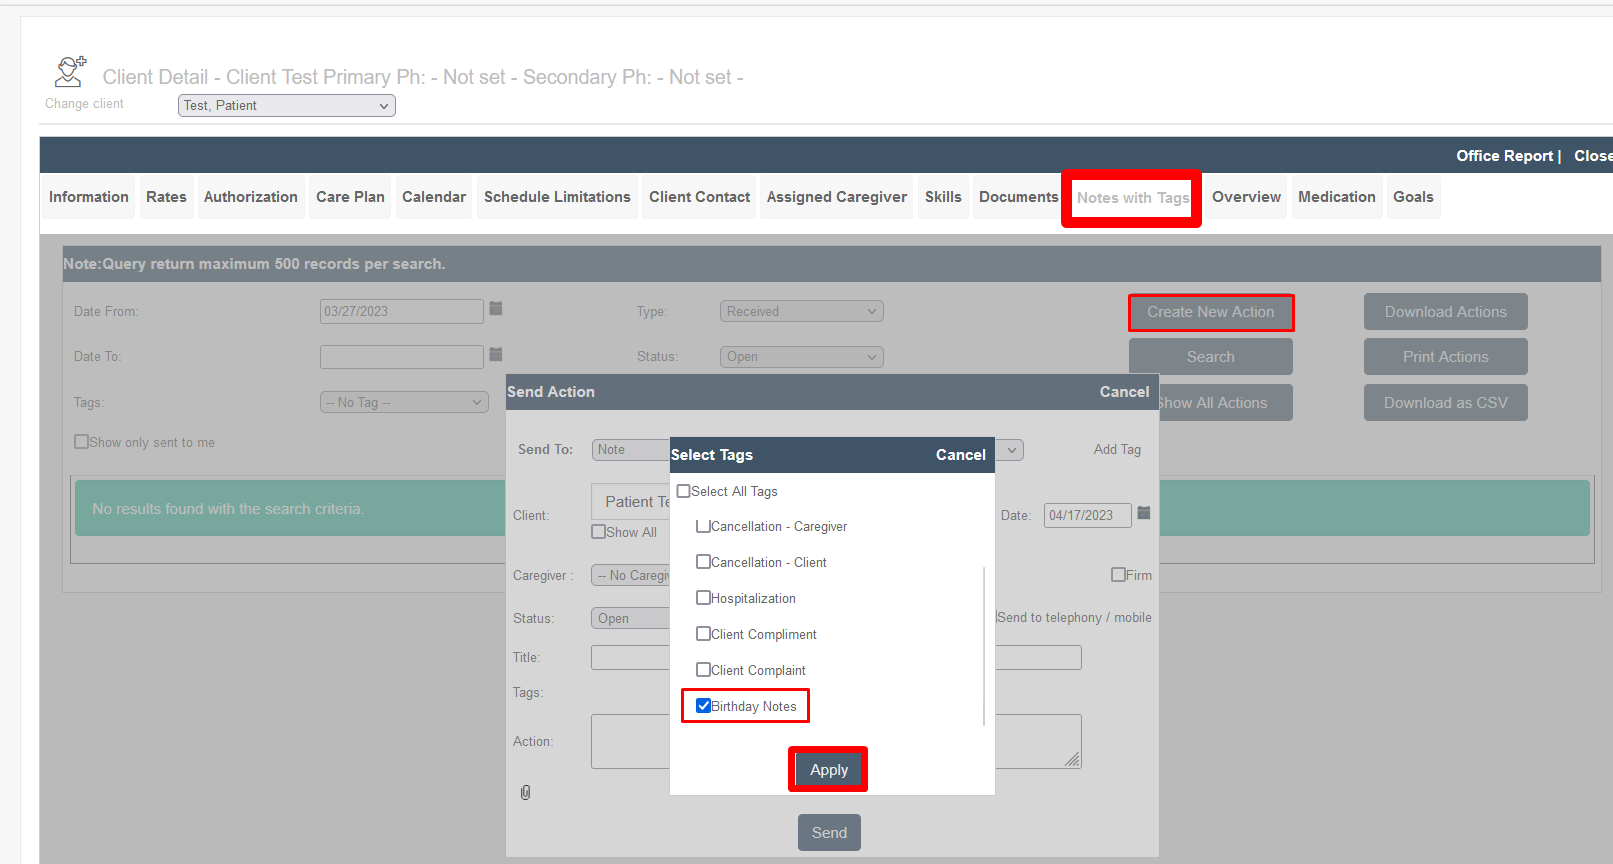
The Client Detail page for "Test, Patient" is displaying the Notes with Tags tab, which shows a "Select Tags" dialog box with multiple tag options including "Birthday Notes" (currently checked). The dialog allows users to filter notes by selecting from available tags such as Cancellation, Hospitalization, Client Compliment, and Client Complaint before applying the filter.

Once the tag is selected, a note can be created. Selecting the status of "Closed" means the note will not be flagged on the Action Center (client note only). To share the information on the Action Center, change the status to Open.
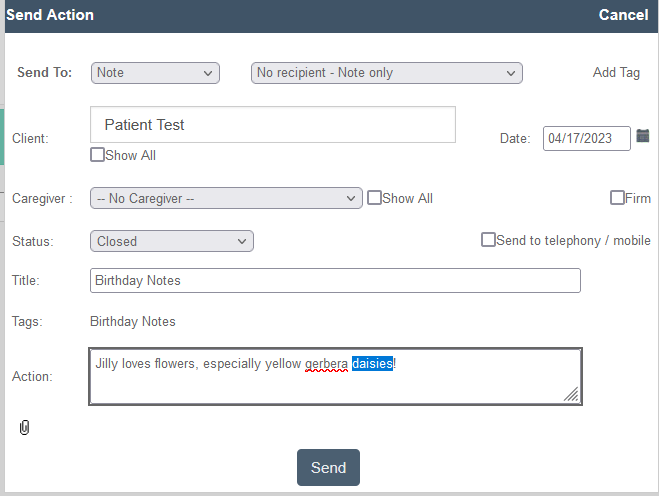
The Send Action dialog shows a form for sending a note to a patient record titled "Patient Test" dated 04/17/2023, with fields for Client, Caregiver, Status (set to "Closed"), Title ("Birthday Notes"), Tags, and Action text content, along with Send and Cancel buttons at the top.

In the future, when the birthday reminder comes up on the Action Center for the client, open the client's profile, go to the Notes tab, and filter for the appropriate tag to review the client's birthday notes preferences.
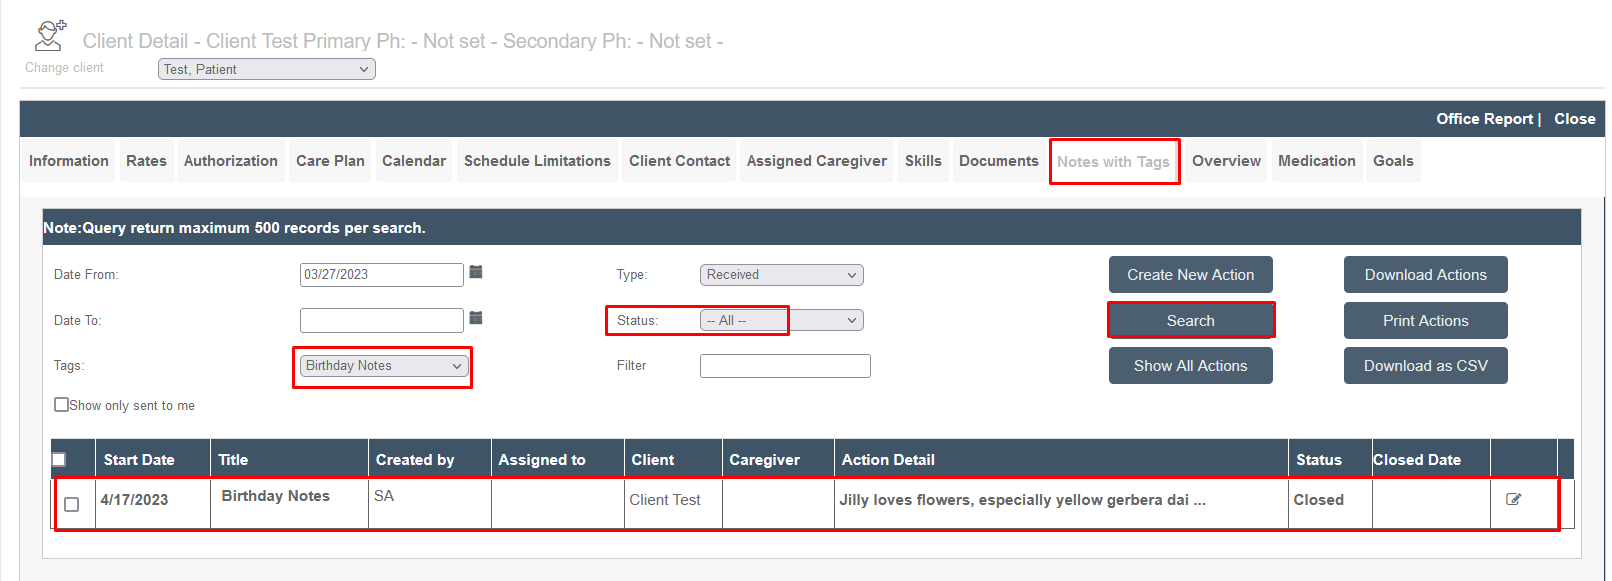
The Notes with Tags tab in the Client Detail screen for "Client Test" displays a searchable table of client notes filtered by date range and tags (currently set to "Birthday Notes"). The interface includes search filters, action buttons (Create New Action, Search, Show All Actions), and a results table showing columns for Start Date, Title, Created by, Assigned to, Client, Caregiver, Action Detail, Status, and Closed Date, with one note entry visible dated 4/17/2023.

If a note is long, click the "edit" icon to read the full note.
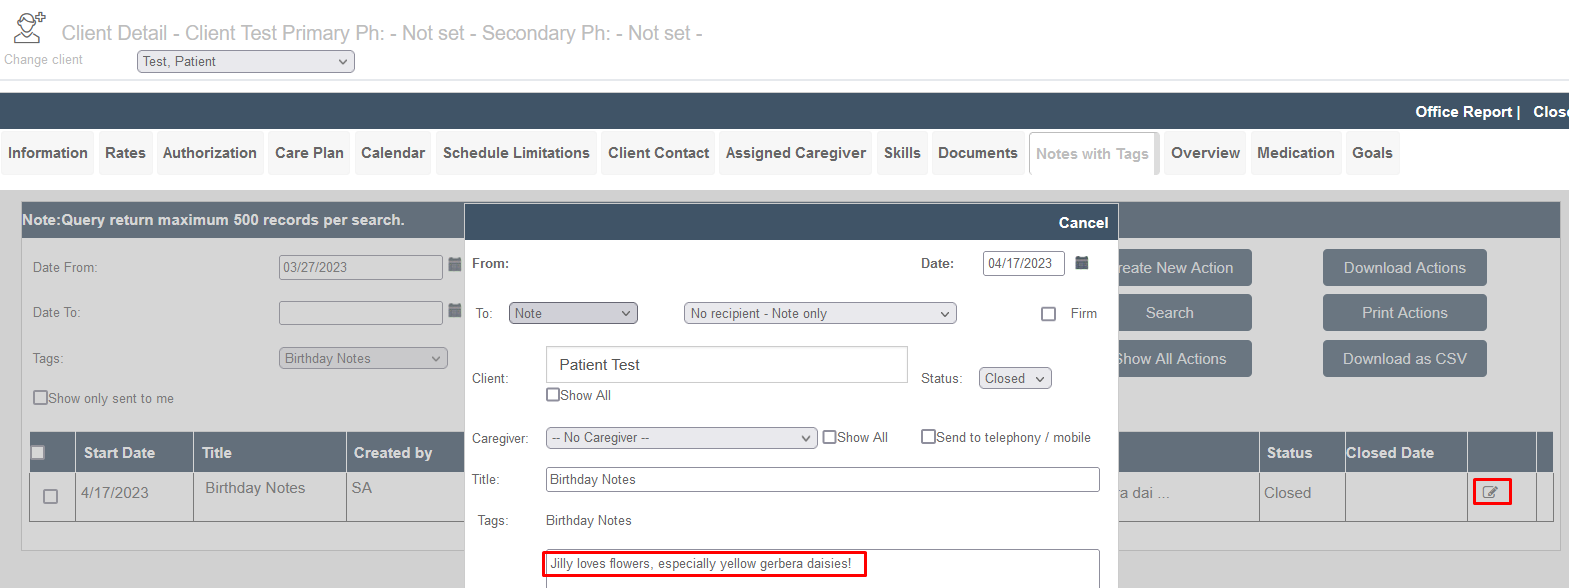
The Client Detail page for "Test, Patient" displays the "Notes with Tags" tab, showing a note creation/editing dialog with fields for date, recipient, client name, caregiver, title, and tags, along with a note content area containing personal information about the patient's preferences.

Was this article helpful?
On this page