Creating Visits from Patterns
Overview
With calendar-based scheduling, creating visits with patterns is less commonly used now. For those who wish to use this option, or who simply wish to check the stored pattern, the Create Visits or Calendar Pattern tab (name may vary depending on your organization) can be an extremely useful tool.
Creating Visits with Patterns
After establishing the client and entering their authorized units and care plan items, visits can be created with patterns. (Note: private pay clients do not require authorizations, but for scheduling management, it's still a recommended feature.)
To begin, select the Create Visits tab in the Client screen. (This may be called Calendar Pattern in some organizations.)

Select Create Visits with Patterns and click New.

Check the days for the visits, set the Visit Type, and assign a caregiver. Click Add Another Line for each change in program or caregiver. If the organization uses multiple care plans per caregiver, there may also be an option to select care plans on this screen.

Select Save Changes.

Go to the bottom of the screen and click the checkbox next to Create Ongoing Visits. Then either select an end date OR select the number of repetitions.

Click Create Visits. A success message will appear after visits have been created.

If visits already exist, the system will warn to either "Proceed deleting all visits" (and replace them) or "Proceed adding the visits." Typically select Proceed deleting all visits. Note that Proceed adding the visits means both the old AND new visits will be kept, which is usually not the desired outcome.

Reviewing Patterns
To review previously created patterns, return to the client's Create Visits/Calendar Pattern tab. Next to Select Pattern, click the drop-down arrow and select the pattern to review. Click the Edit button next to it.
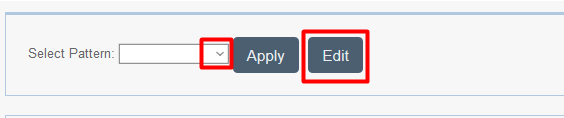
The pattern can then be reviewed.

To change the pattern and have the new pattern take effect, follow the same process as described above for creating a pattern of visits for the first time.