Caregiver/Staff Management›Adding an Administrator

Adding an Administrator

Overview

Organizations will need to add additional administrators after implementation. Ankota allows for easy administrative adds at any time.

Adding Administrators

for organizations with more than one department, setting up an admin at the parent level will give that administrator access to all subdepartments. To limit access, set up the admin at the individual department level. As with all workers, set the template from the available drop-down list after creation, then Save, to set permissions.

To begin, go the Main Menu, then click on Staff. (This may be called Admins in your environment.)
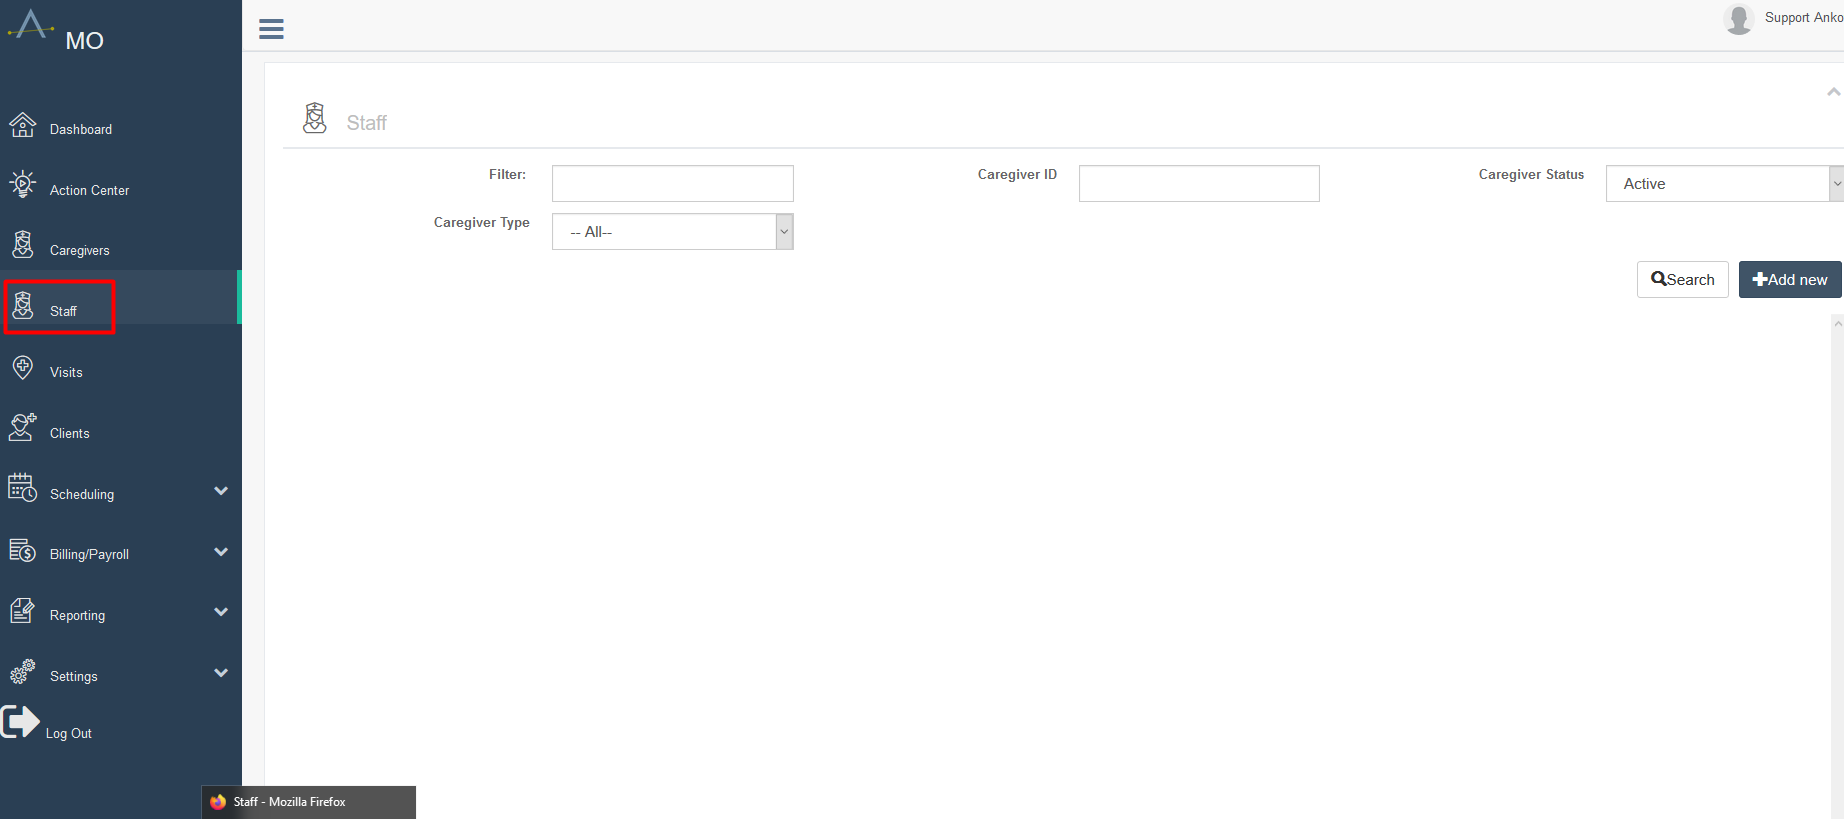
The Staff page displays a filter section with a "Caregiver Type" dropdown set to "-- All --", along with input fields for Caregiver ID and Caregiver Status (set to Active), and action buttons for Search and Add new in the top right corner.

Before adding any new administrator, search for the admin's name with the status of All to ensure this employee has not been added before.  This helps prevent unwanted duplicates.
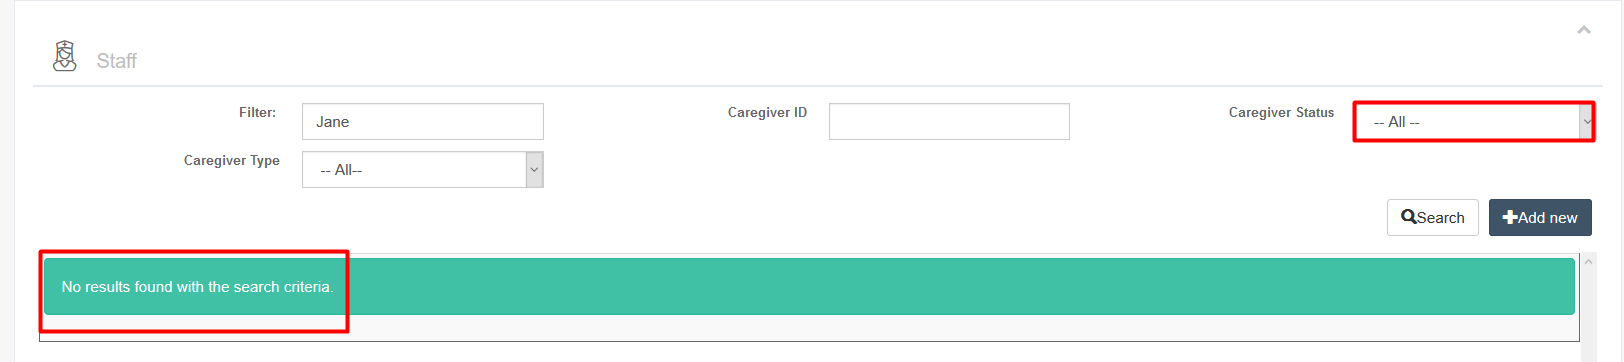
The Staff page displays filter options for searching caregivers, including a text filter field populated with "Jane", a Caregiver Type dropdown set to "-- All --", a Caregiver ID field, and a Caregiver Status dropdown highlighted in red set to "-- All --". A green message banner states "No results found with the search criteria" and buttons for Search and Add new are visible in the top right.

If you do not find the admin, click on + Add new. 

Staff management filter panel showing search and filter options including a name filter field with "Jane" entered, Caregiver Type dropdown set to "-- All --", Caregiver ID field, Caregiver Status dropdown, and "Search" and "Add new" buttons in the top right corner.

New Admin Registration Page

Next, fill out the admin's name and check the box next to Create Web User. For admins, add an email for the User ID and a temporary password (such as "password"), then click submit. This will create their new, usable profile. 
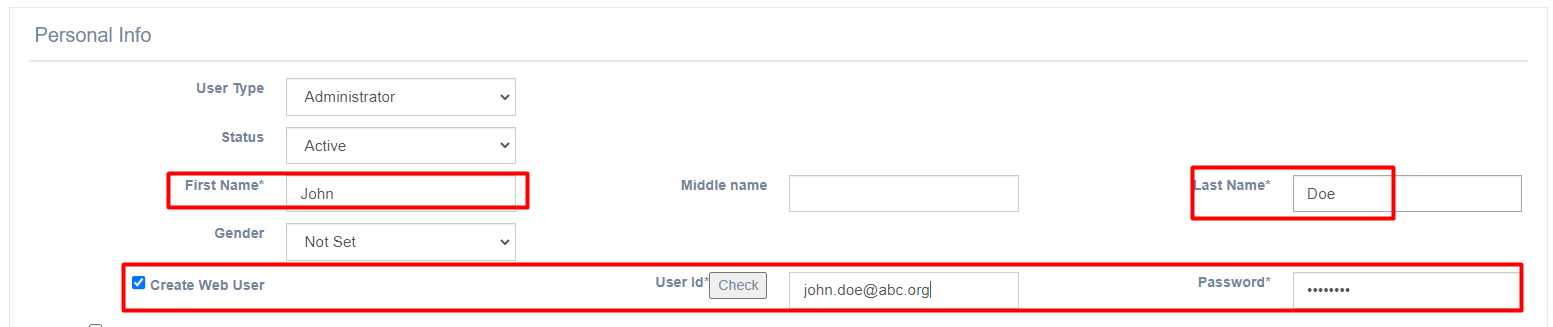
The Personal Info section of a user creation form displays fields for User Type (set to Administrator), Status (Active), First Name (John), Last Name (Doe), Gender (Not Set), and Middle name. The Create Web User checkbox is checked, with a User ID field showing "john.doe@abc.org" and a Password field.

To limit the new admin's permissions, after creation, click the Template drop-down and pick their appropriate level of permissions. If you do not see an appropriate template, reach out to Support to request a new template for permissions.
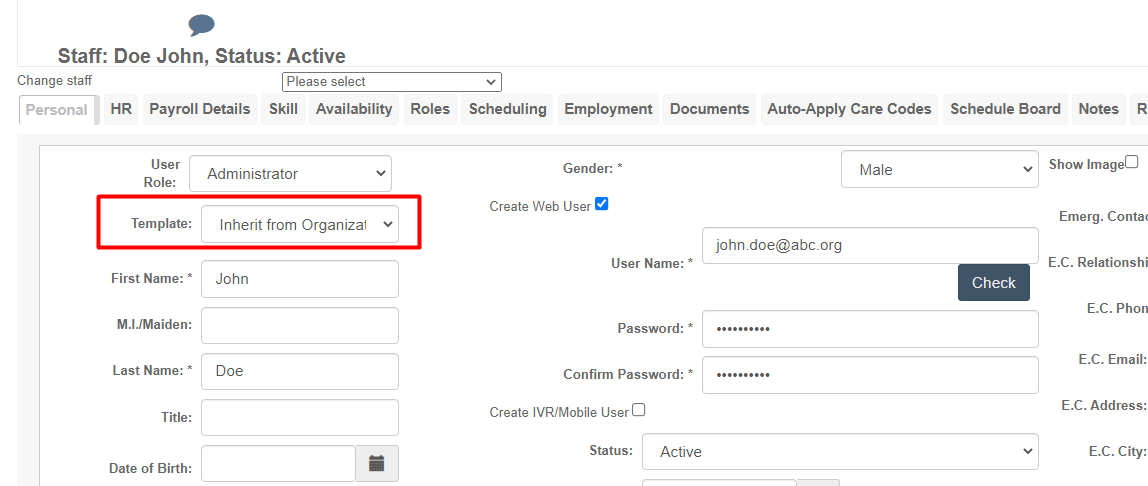
The Personal tab of the staff member editing screen shows Doe John's details with the User Role set to Administrator and Template field (highlighted with a red border) set to "Inherit from Organization." The form displays fields for First Name (John), Last Name (Doe), Gender (Male), and web user creation options including User Name, Password, and Status (Active).

Old Profile View

In personal information, make sure Administrator is selected for the User Role, then enter their demographic information as needed. For a basic administrator, only a name, User ID, and password are required. (The password is a temporary password, and will be re-set at first log-in.) Some organizations may require other information; fill out fields as needed.
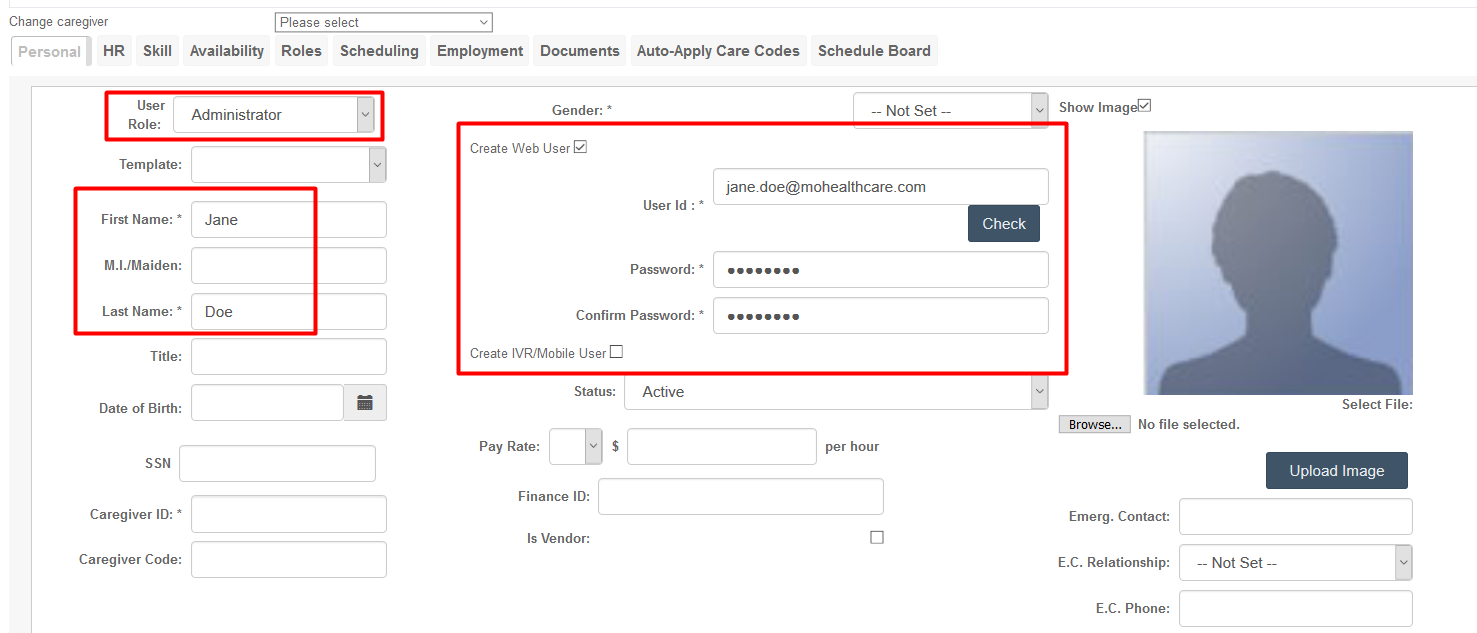
The Personal tab of the caregiver management form displays fields for creating a new user with Administrator role, including First Name (Jane), Last Name (Doe), and web user creation options with User ID (jane.doe@mohealthcare.com), password fields, and account status set to Active. The form also includes sections for demographic information, pay rate, finance ID, vendor status, and emergency contact details.

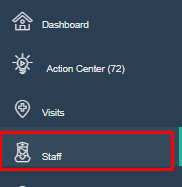
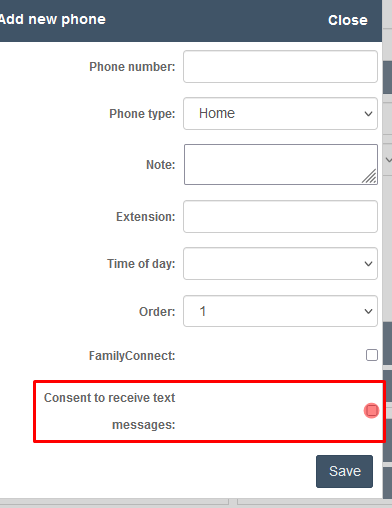
Should you wish to have the ability to text your staff, you will need to enable the "Consent to receive text messages" functionality.  The process is as follows:

  • go to staff from the main menu

Navigation menu showing four main sections: Dashboard, Action Center (72), Visits, and Staff (highlighted in red). The Staff option is currently selected, indicating the user is in the Staff management area.

  • Search for the staff member whose number you wish added to receive text messages
  • Click on their phone number
  • Check the box next to "Consent to receive text messages"
  • Click "Save"

The "Add new phone" dialog displays form fields for entering phone contact information including phone number, phone type (set to "Home"), note, extension, time of day, and order (set to "1"). A red-highlighted section at the bottom contains a checkbox for "Consent to receive text messages" with a Save button positioned at the bottom right.

When you are done entering this information, scroll down and click Save Personal.

that once you save, the default Administrator template in your environment will be applied and will then be visible in the Template: field.
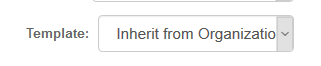
The Template dropdown menu is set to "Inherit from Organization," allowing administrators to select inheritance settings when adding a new administrator account.

If this template needs adjusting - for example, if the new administrator is the head of billing, and will therefore need a billing template - click the template drop-down list and select the appropriate template from the list. If you do not see the template you are looking for, reach out to your Ankota specialist.

Please note Ankota will require the administrator to change the password the first time they log in.
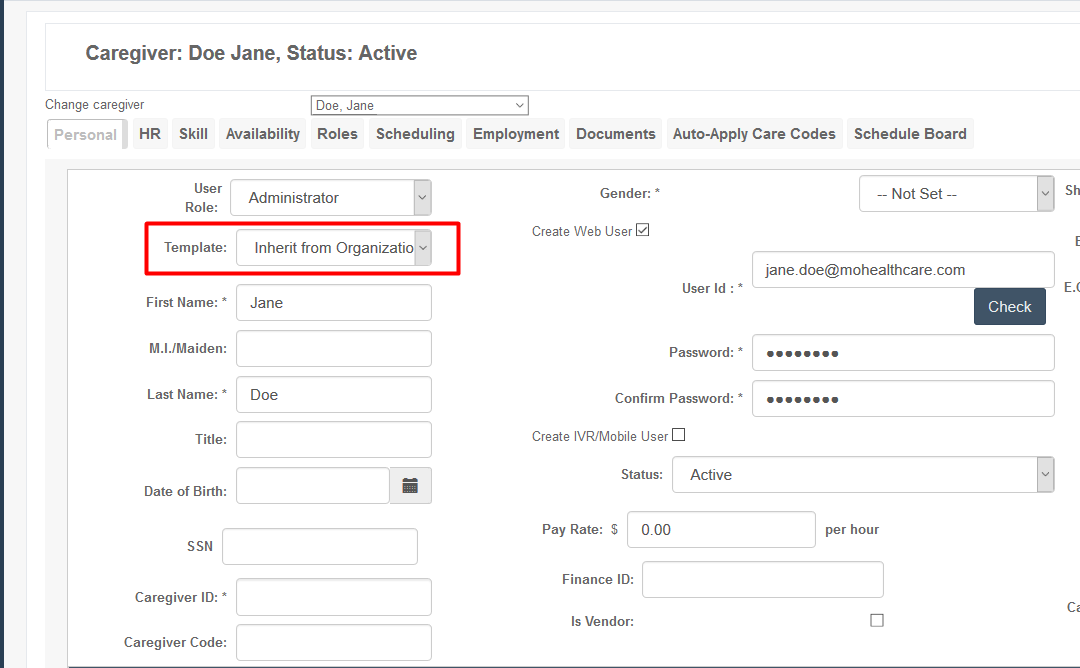
The Personal tab of a caregiver profile for Doe, Jane (Active status) shows user setup fields including User Role (Administrator), Template dropdown (highlighted in red, set to "Inherit from Organization"), First Name (Jane), Last Name (Doe), and other fields like Gender, User ID, Password, and Status (Active).

Was this article helpful?
On this page