Assigned Caregiver Functionality
Overview
The Assigned Caregiver functionality, available on the client's Assigned Caregiver tab, is a special functionality that can be used in many different ways to allow or limit caregiver functionality in Ankota.
This article includes:
- Limited Caseload View
- Pre-approved Visit Creation (with options)
- Patient Concerns Functionality
- Reports View: Clients with Assigned Providers and Visit Types
- Available Shifts
- Documents View
Limited Caseload View
For caregivers that will have web log-ins (ankota.net access) but only need to view a limited number of clients, Ankota can limit caregivers' access only to the clients they are assigned to. Once this is done, caregivers can be assigned to clients as needed, and they will only see these clients going forward in their ankota.net access.
To assign caregivers to a client:
- Open the client profile of the desired client
- Click the Assigned Caregiver tab
- Click Add New
- A pop-up window will appear
- To assign the caregiver, select the caregiver next to Caregivers
- Click Assign New Caregiver
Pre-approved Visit Creation (with options)
For caregivers that may need to create visits on the fly in the mobile app or in ankota.net, they can be given the ability to create approved visit types for clients they are assigned to, in addition to setting special pay codes if desired.
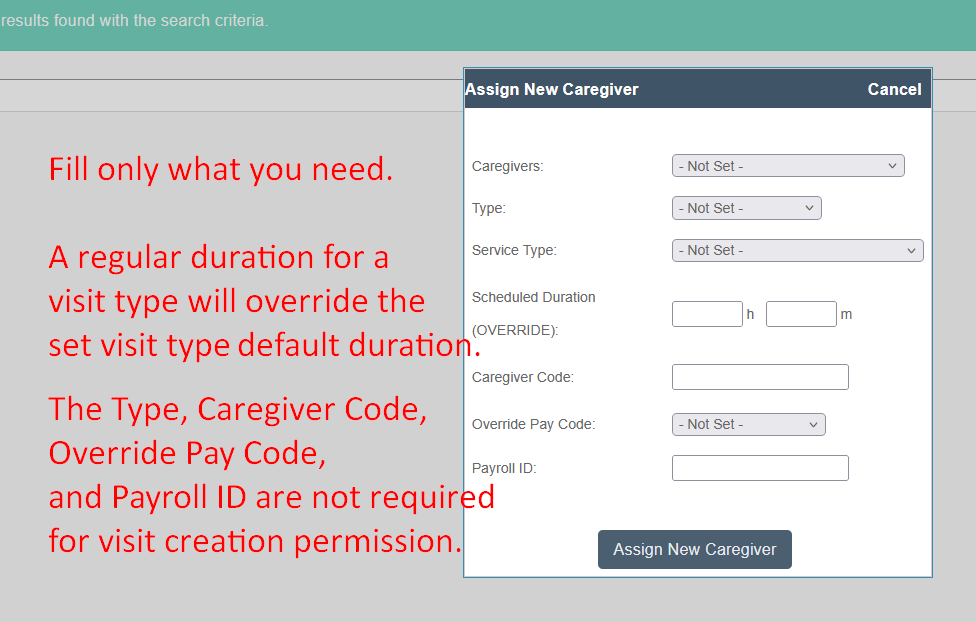
Note that there are many options when the assigned caregiver functionality is turned on, and not all of them must be used. For example, you can turn on the caregiver's ability to create a visit for a client with or without turning on the pay code function.
To assign caregivers to a client:
- Open the client profile of the desired client
- Click the Assigned Caregiver tab
- Click Add New
- A pop-up window will appear
- To assign the caregiver, select the caregiver next to Caregivers
- To limit the visit type that the caregiver can create, select the type (may not apply in your environment)
- To set a special pay rate for a visit type and/or client, set the pay rate next to Override Pay Code AND set a Worker Code (the Worker Code can be any number, but must be unique)
- To set a unique payroll ID, enter the ID next to Payroll ID
- To set a regular visit duration, enter a number of hours and minutes next to Scheduled Duration (OVERRIDE)
Patient Concerns Functionality
If your company uses the Patient Concerns reporting functionality, concerns reported will appear on the Visit Approval Dashboard.

A reporting feature can be added using the Assigned Caregiver functionality to determine which caregivers (usually RN roles) will be permitted to see and respond to patient concerns. First, contact Ankota support to turn on the patient concerns functionality and specify which roles should have access to patient concerns.
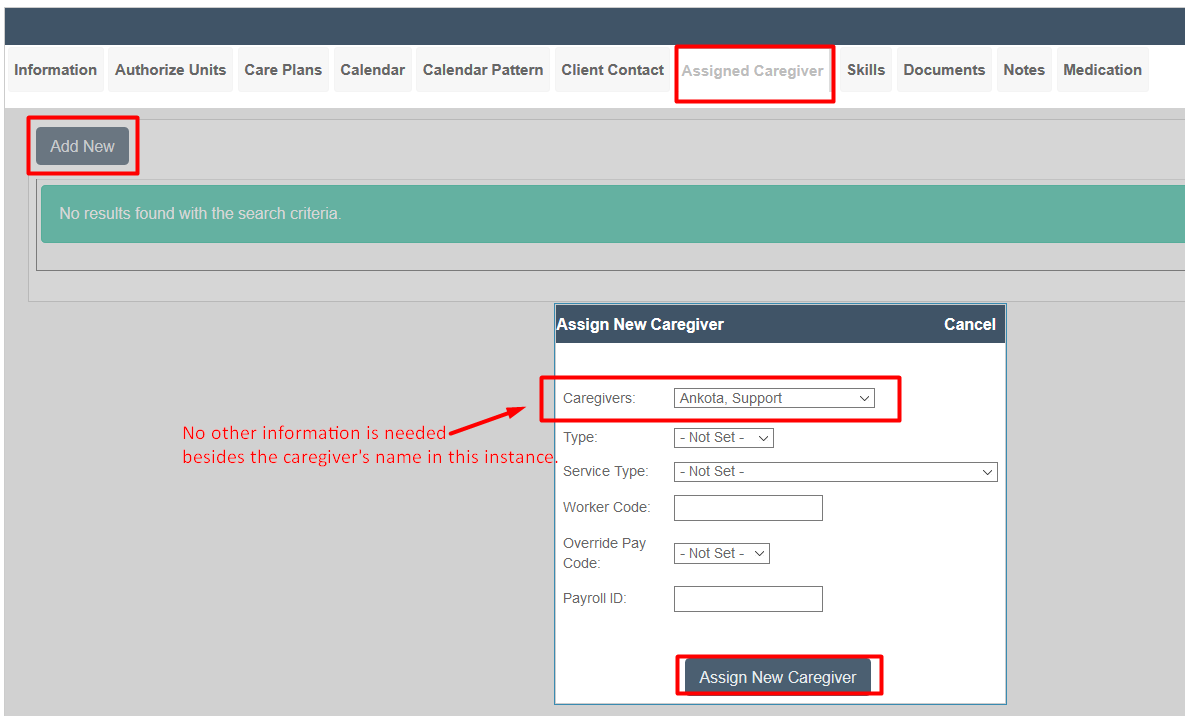
Once that is done, assign RNs (or other roles) to clients as Assigned Caregivers so they will be able to see their patient concerns. This is the same process as described above, but without setting a visit type, pay code, etc. Only the caregiver is assigned; do not select type, service type, worker code, override pay code, or payroll ID.
To assign a caregiver to a client for patient concerns functionality:
- Open the client profile of the desired client
- Click the Assigned Caregiver tab
- Click Add New
- A pop-up window will appear
- To assign the caregiver, select the caregiver next to Caregivers
- Click Assign New Caregiver to save
Reports View: Clients with Assigned Providers and Visit Types
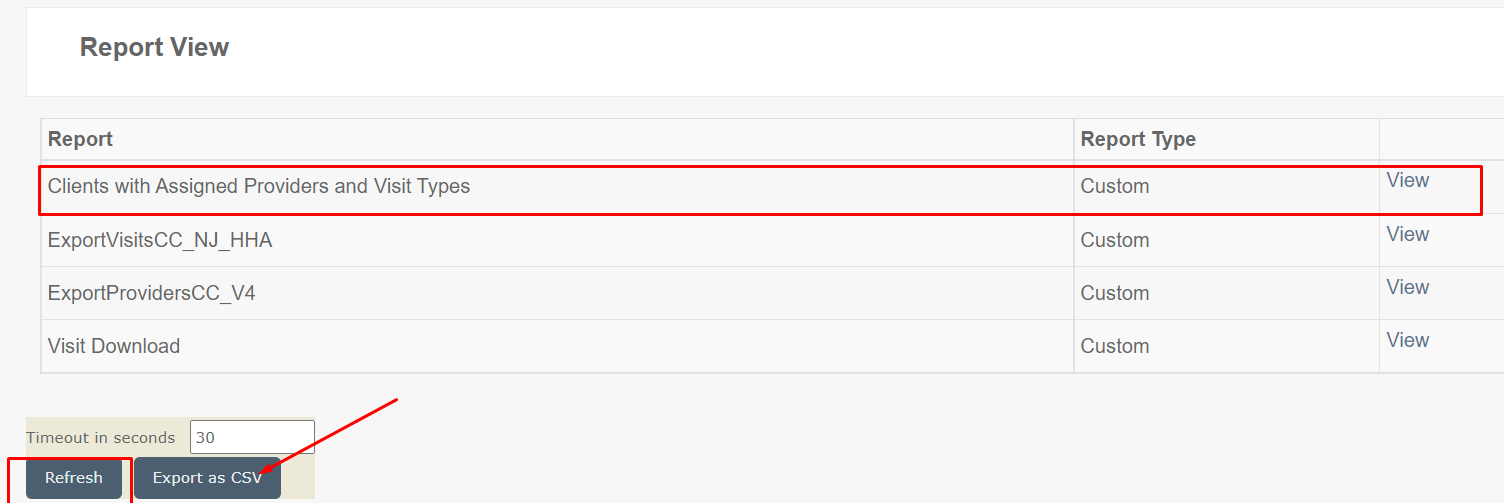
Some customers may wish to break down their clients by assigned providers (caregivers) and visit types, which is available in this report. This report is not automatically defaulted in all environments; contact Support to have it configured.
To find the report:
- Log in to the environment
- Click Reporting
- Click Reports View
- View Clients with Assigned Providers and Visit Types
- Timeout in Seconds: 30
- Click Refresh
- Export as CSV once the report has been generated
Available Shifts
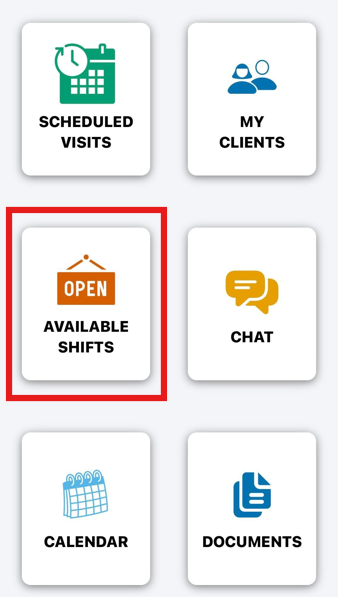
In the mobile app there is a section called Available Shifts, which can be used or hidden, depending on company preference. With Available Shifts, caregivers can request to pick up shifts that are available in the Available Shifts section in the mobile app. Some organizations may wish to allow caregivers to be pre-approved to pick up shifts for certain clients. The Assigned Caregivers function provides this pre-approval.
See the Available Shifts article for more information on this option.
Documents View
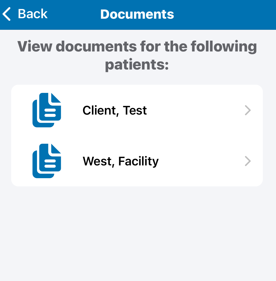
In the mobile app there is a section called Documents, which can be used or hidden, depending on company preference. If a caregiver is assigned to a client, they are given special permission to view all their clients' documents. (Note this Documents section is different from the blank forms available in visits.)
If desired, caregivers can be given automatic access to this folder so long as they have a visit assigned. This configuration to view client documents with OR without the Assigned Caregivers feature must be configured; contact Support to request this option.
See the Documents in the mobile app article for more information on this option.