Document Management in Ankota
Overview
Documents can be managed in many different ways in Ankota, and Ankota offers many template documents for use.
Documents for upload have a maximum size of 10MB, except 835 electronic remittance advice files, which are allowed at virtually any size.
This chart outlines each process's destination:
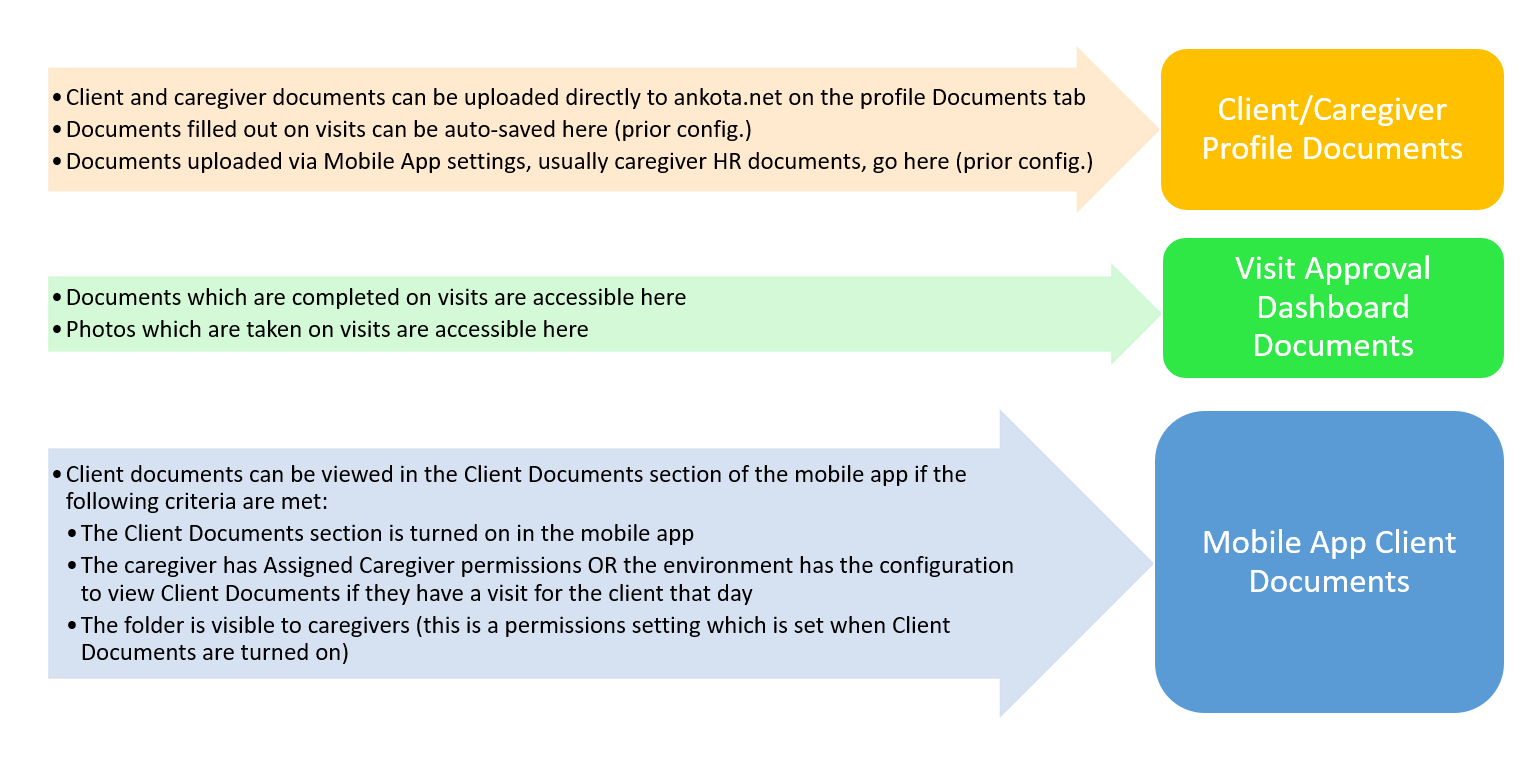
Index
- Documents on Visit Types (most common, includes video)
- Viewing Documents in Client/Caregiver Profiles
- Uploading
- Fill Form
- Other Features
- Managing Folders for Client/Caregiver Documents
- Creating Folders for Documents
- Caregiver Document Upload (via Mobile App Settings)
- Create Caregiver Document Upload Requirements & Define Where Documents Go
- Caregiver Document Upload Process (typically for HR Documents)
- Admin Notification of Caregiver Documents to Review
- Photos in the Mobile App
- Uploading Photos via the Mobile App
- Photos and Attachments via Visits
- Photos and Attachments via the Visit Approval Dashboard
- Downloads
Documents on Visit Types
The most common way to assign and receive documents is by assigning documents to visit types. Here is how it normally works:
- During implementation, each organization decides which documents they wish to use.
- The organization may also request forms to be built.
- The organization will then decide how to manage those forms.
- Documents are assigned to visit types as desired.
- In some cases, such as with Incident reports, the document can be made available on all visit types just in case.
- These documents can also be assigned "filing" folders where the completed documents will automatically be copied.
- Filing folders can be in the client OR caregiver profiles.
- The Documents warning can be turned on so that visits with completed documents can be automatically flagged.
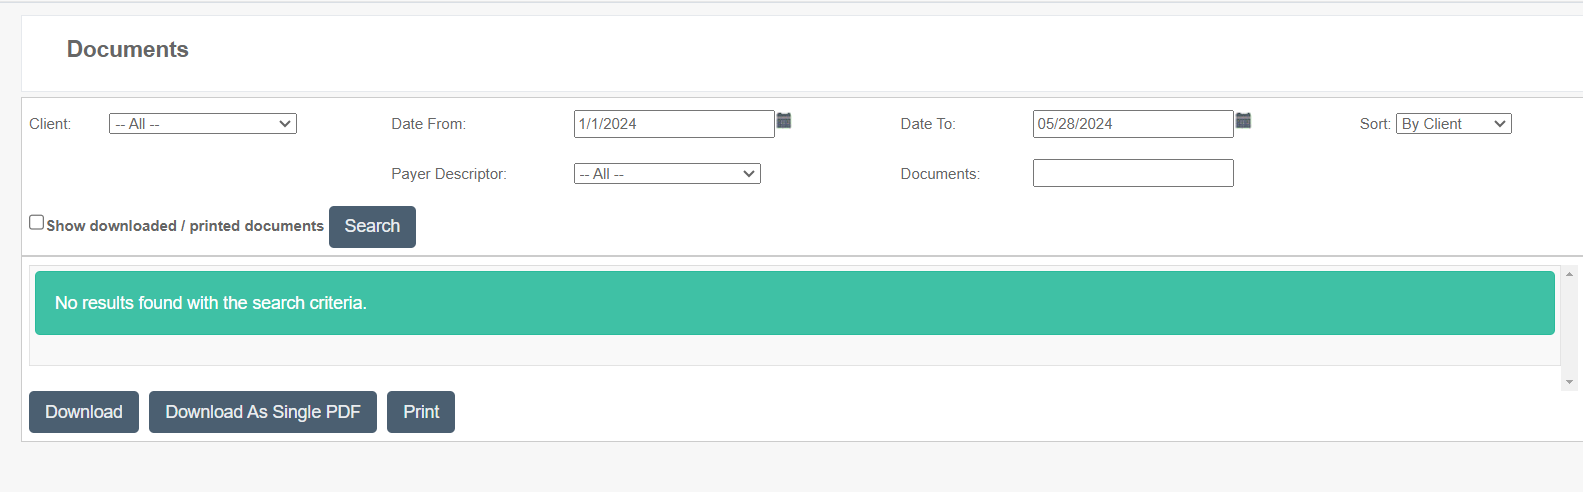
- Finally, the Documents page will be turned on so that it is easy to search for all recently completed documents.
When the caregiver clocks in to a visit type, the caregiver or nurse has the ability to fill out those documents. When the document is completed, it is saved to the visit. Depending on the organization's requested settings, the document may then be:
- Filed in the appropriate client and/or caregiver folder
- Flagged in the Visit Approval Dashboard for review
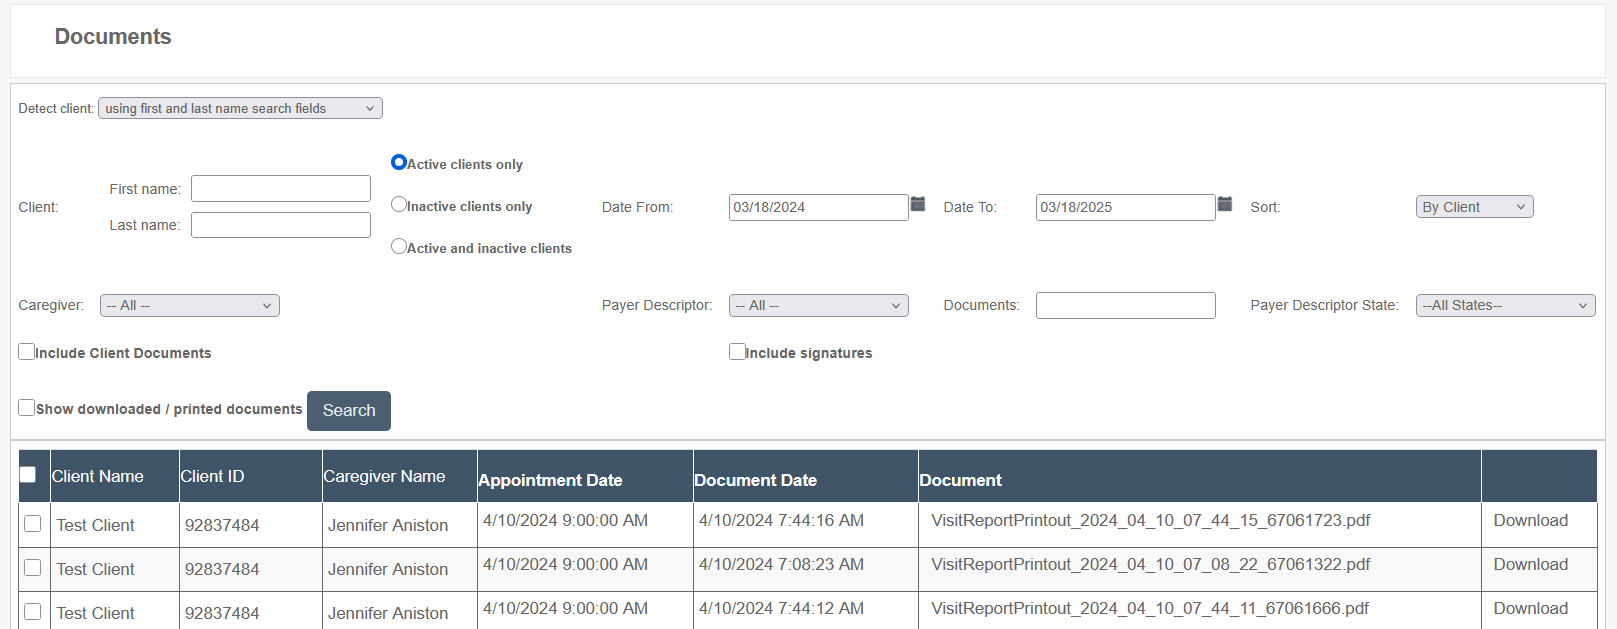
- Available via the Documents page when the date range is searched
Viewing Documents in Client/Caregiver Profiles
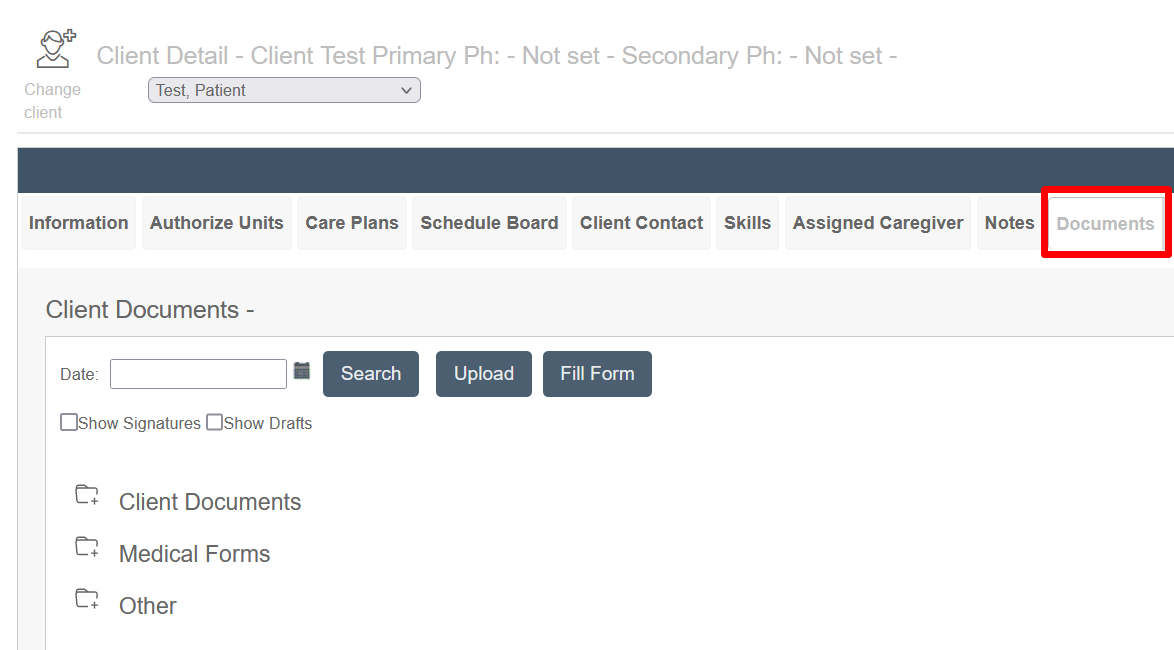
Both clients and caregivers have Documents tabs in their profiles where documents can be stored, searched, and viewed as needed.
IMPORTANT NOTE: Special characters in the file name such as apostrophes, colons, and slashes will cause the file to fail to upload, so these should be removed prior to upload. The document size limit is 5 MB.
Uploading
To upload a document:
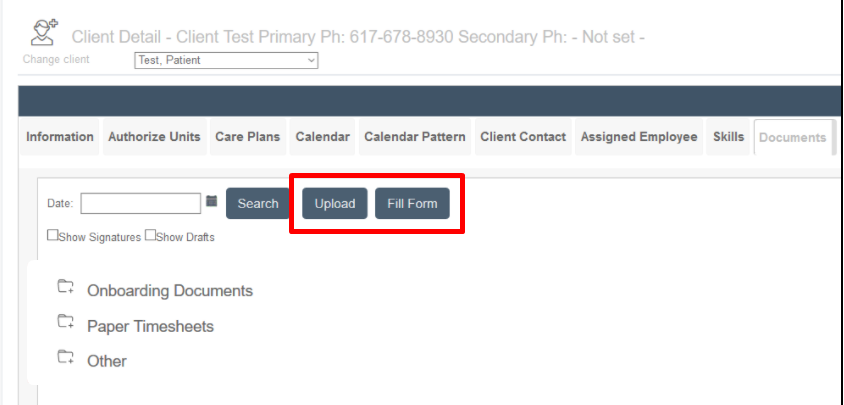
- Click Upload.
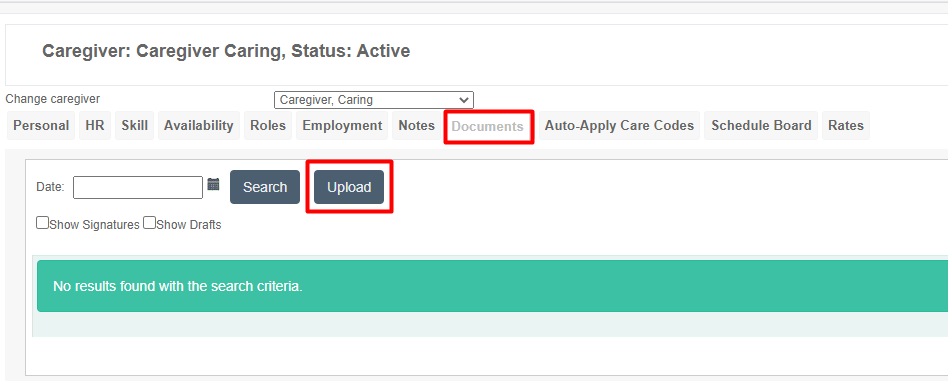
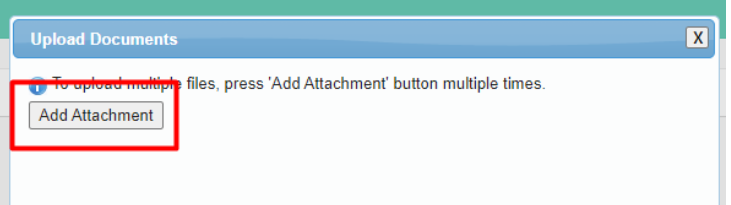
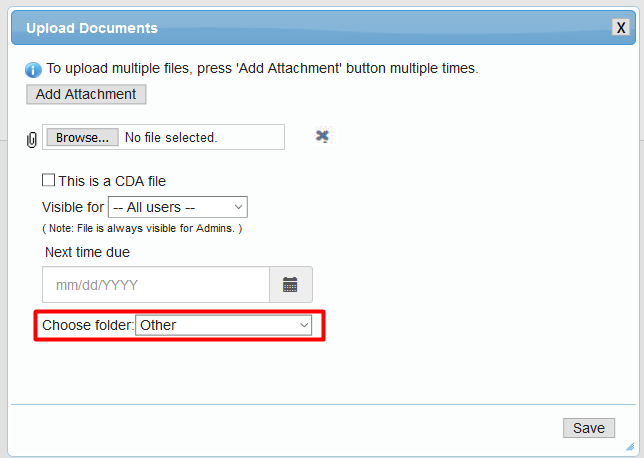
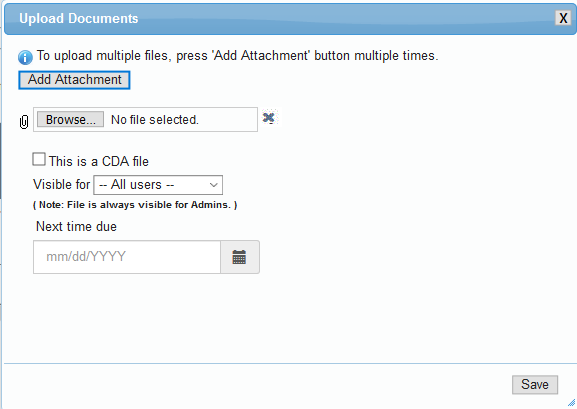
- A pop-up window will appear; click the Add Attachment button.
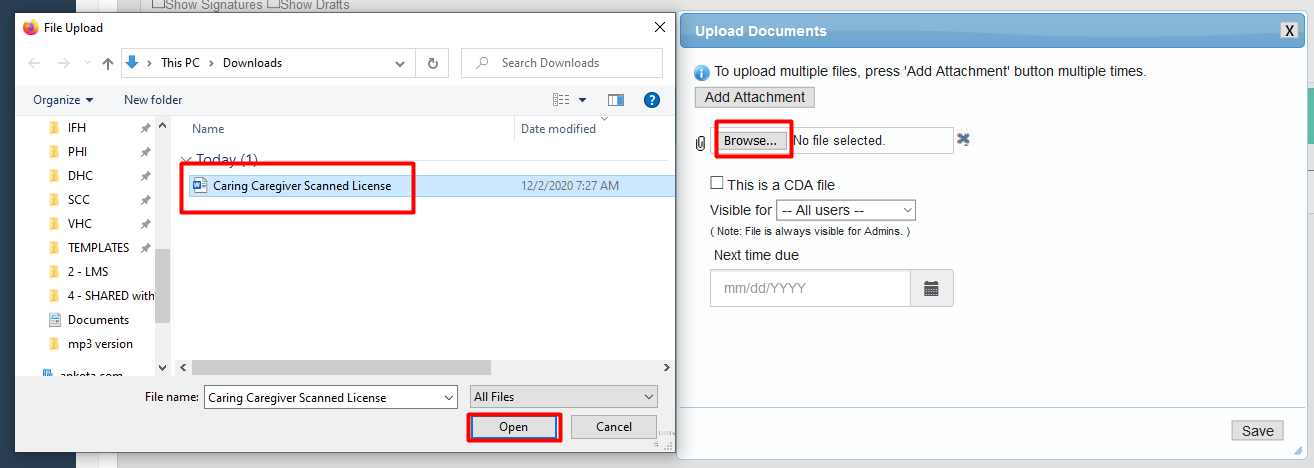
- Click the Choose File button, which will open a searchable folder; search for the file to upload, select the file, then click Open in the second window.
- Once uploaded, click Save.
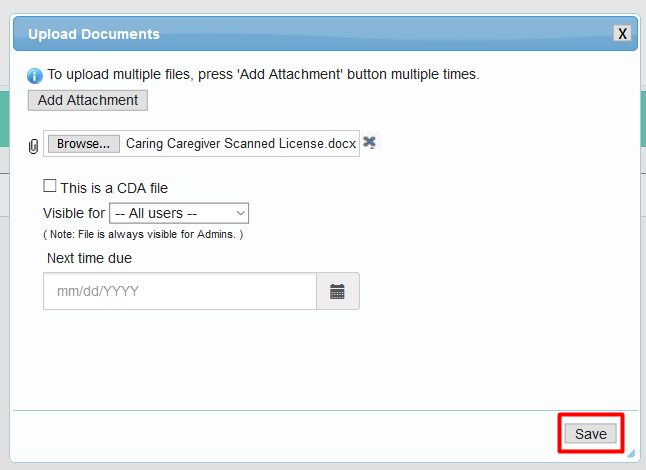
Special characters, including apostrophes, will cause upload to fail. The document size limit is 5 MB.
Fill Form
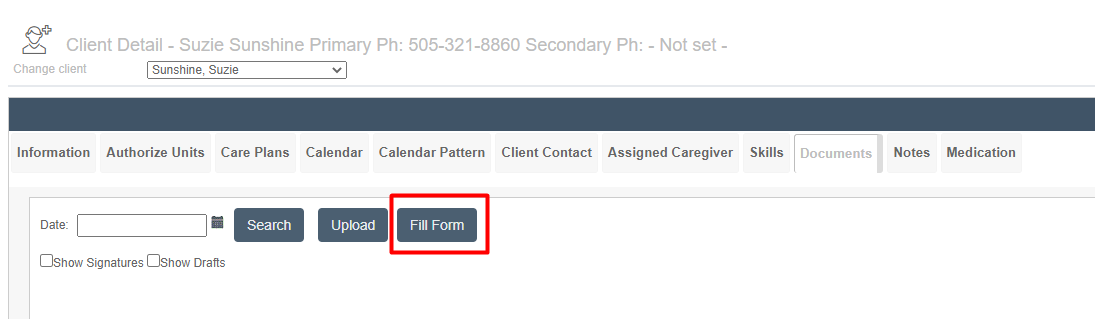
In addition to uploading a variety of document types, new forms can be created from this page and immediately saved to this tab. For more on this process, see Fill Forms - Online. If this option is not present in your environment and you would like to add it, reach out to Ankota Support or your Ankota specialist for assistance.
Other Features
Search: To search documents by date, enter the date in the Search field and click the Search button.
Show Signature: Allows viewing of signatures on past forms filled out specifically via mobile forms, as opposed to being filled out directly in the Documents tab.
Show Drafts: Allows viewing of drafts. Drafts are created when a fill has begun but was not manually saved. The auto-saved draft will appear when filtering for Drafts.
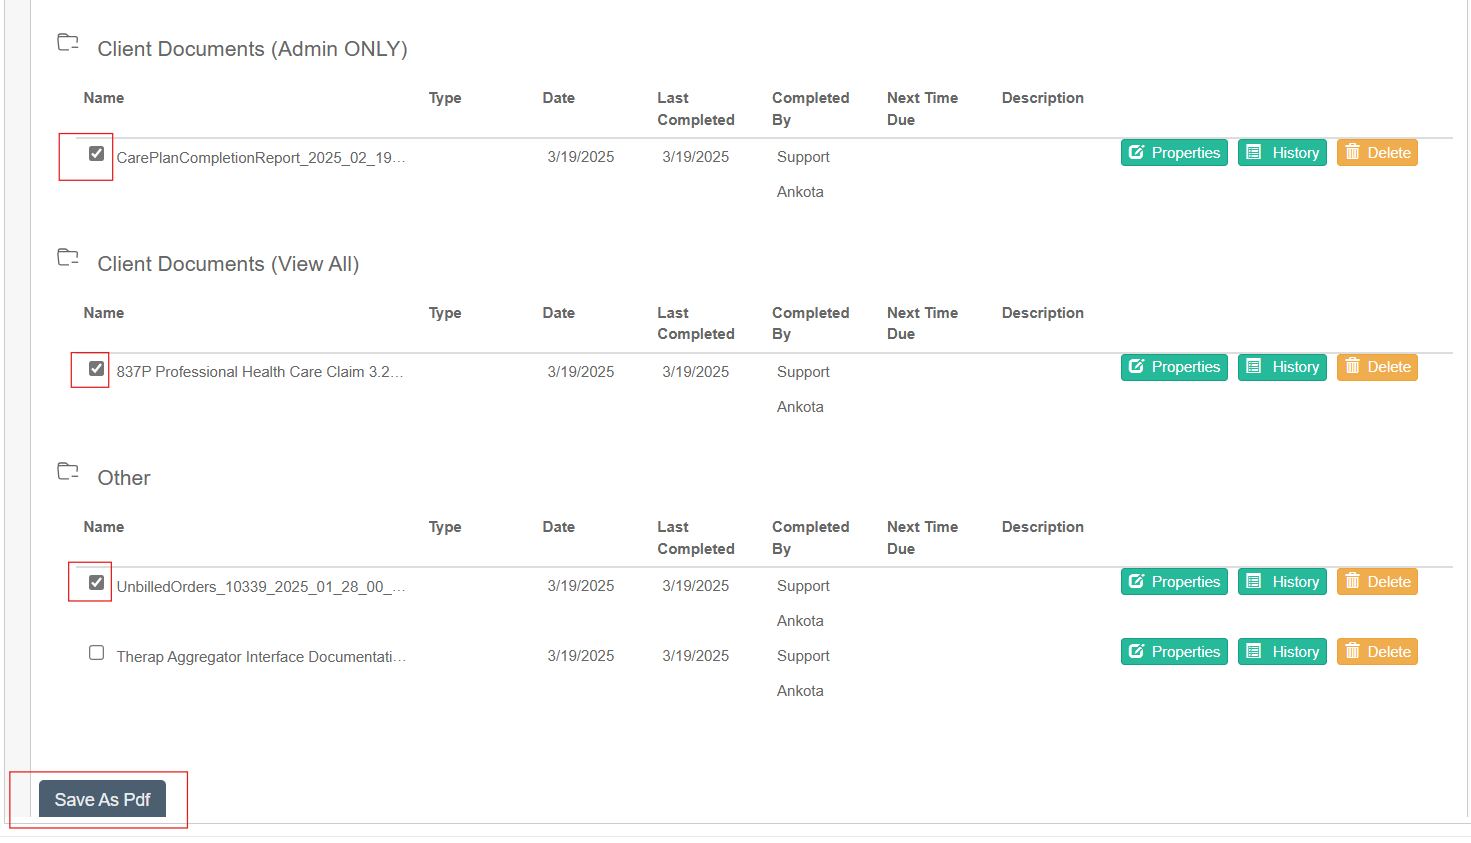
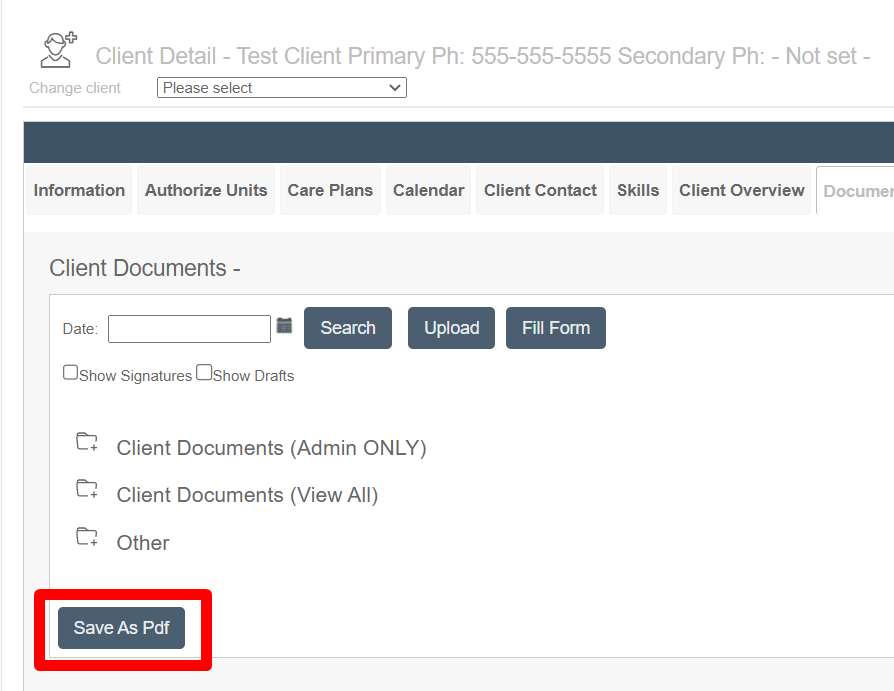
Save All as PDF: A configurable feature that allows all client documents to be selected and saved together in one PDF. Contact support to add this to your environment.
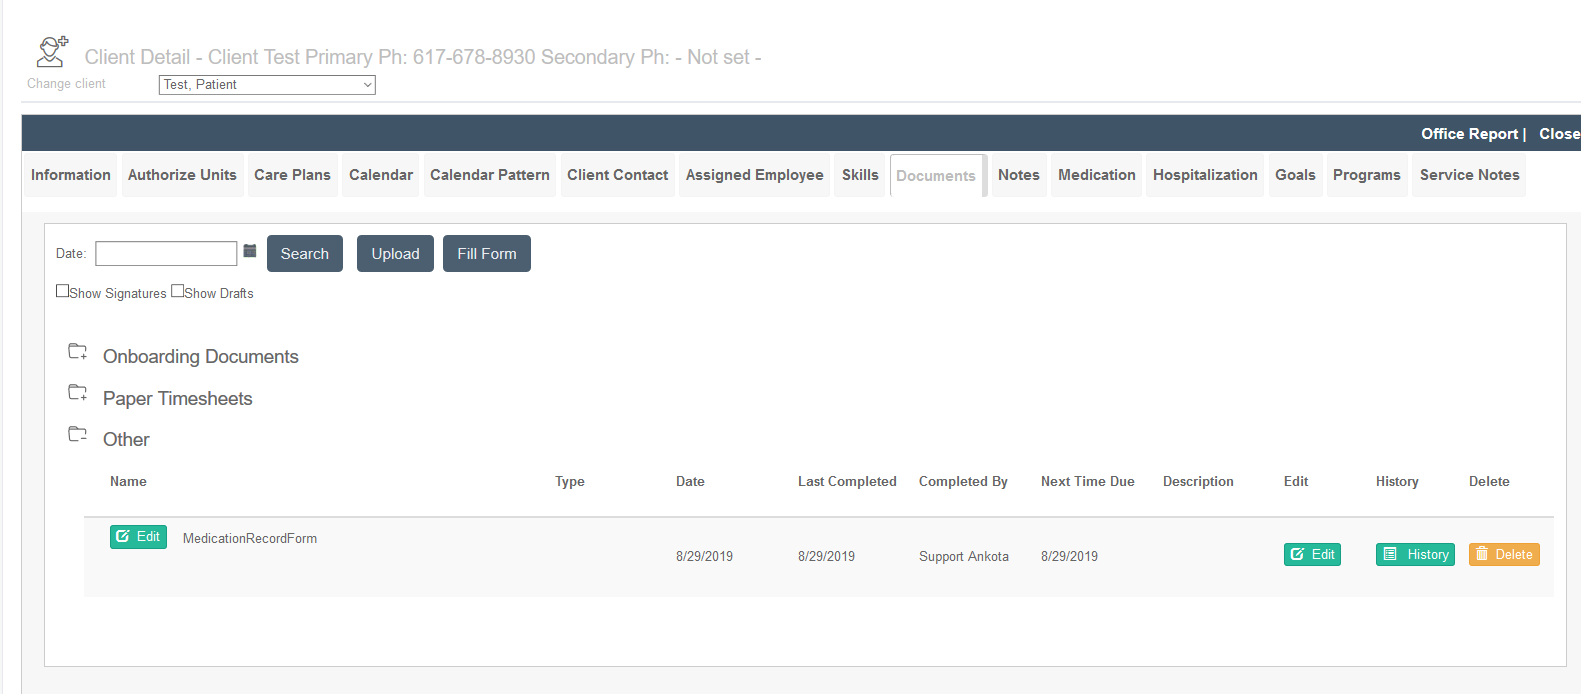
Folders: If your organization has requested folders, documents can be organized into folders. When uploading, documents can be placed into a chosen folder. To open folders, click the + sign next to the folder's name.
To build folders, follow the directions under Folder Management for Documents.
Choose a folder:
Managing Folders for Client/Caregiver Documents
The Documents tab for Clients and Caregivers is a useful management tool. Assessments and other key evaluations for clients can be uploaded and managed here. Similarly, caregivers can have their resumes, annual reviews, disciplinary actions, and more uploaded to their Documents tab.
Specific folders can be added for easier management.
Creating Folders for Documents
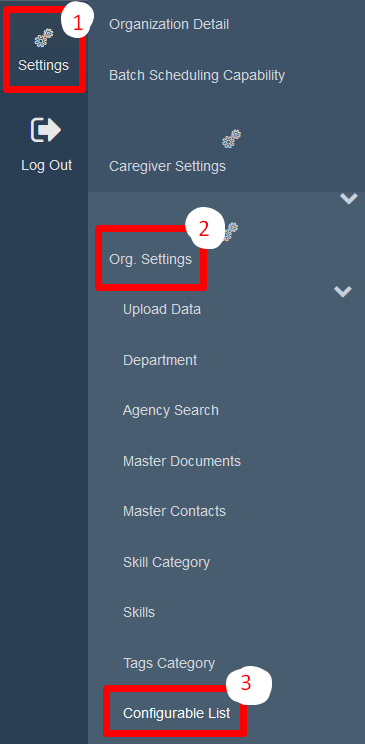
- Log in to ankota.net.
- Click Settings > Org. Settings.
- Click Configurable List.
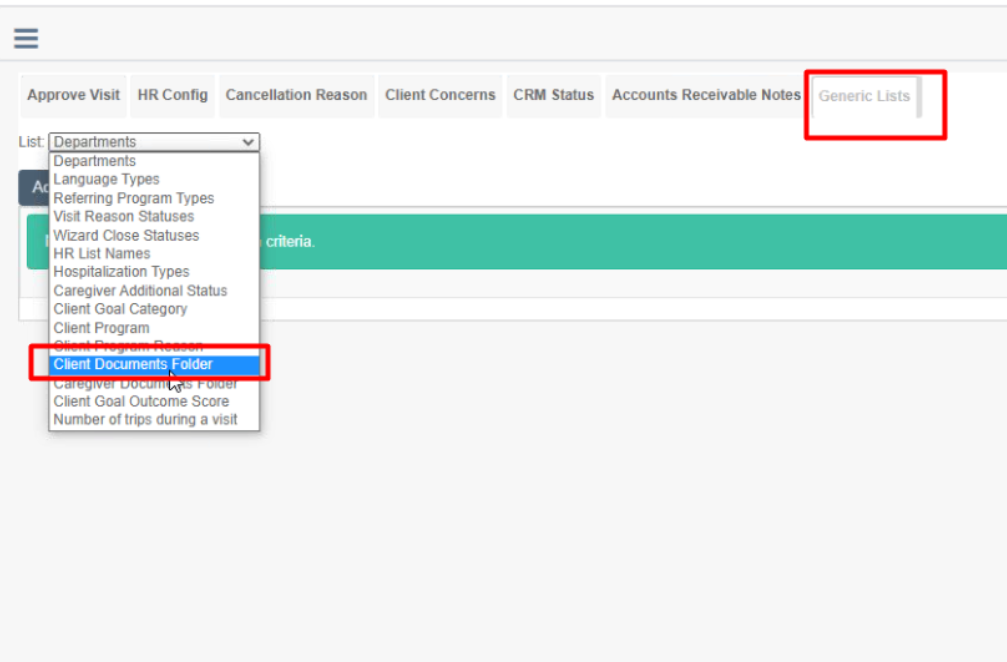
- Click the Generic Lists tab.
- Select Client Documents Folder OR Caregiver Documents Folder.
- Click Add New.
- Name the folder. The "Other" folder is automatically set in your environment and does not need to be added.
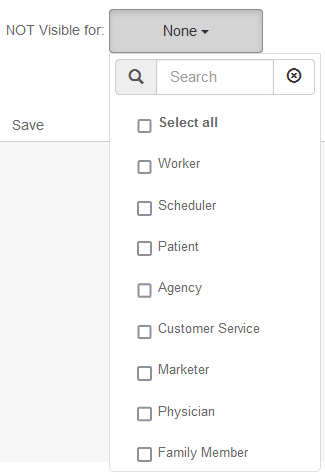
- Set folder Visibility. These are based on the user roles set in the profile.
- Save.
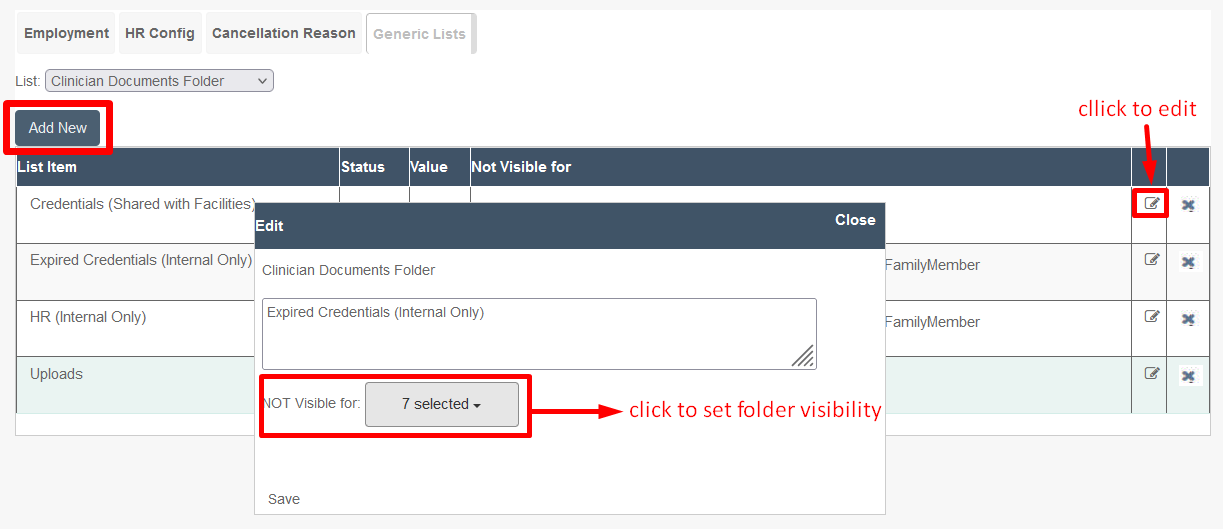
This is how the documents will appear in your environment:
Caregiver Document Upload (via Mobile App Settings)
Organizations often have HR requirements, credentials/certifications, or other documents that need to be uploaded to the employee's profile. This feature allows caregivers to upload required documents to their own profile via the Mobile App's Settings page.
Create Caregiver Document Upload Requirements & Define Where Documents Go
Before setting up a list of required documents, set up Folder Management.
- Log in to ankota.net.
- Click Settings > Org. Settings.
- Click Configurable List.
- Click the Employment tab.
- Select Configurable List: Caregiver Required Documents.
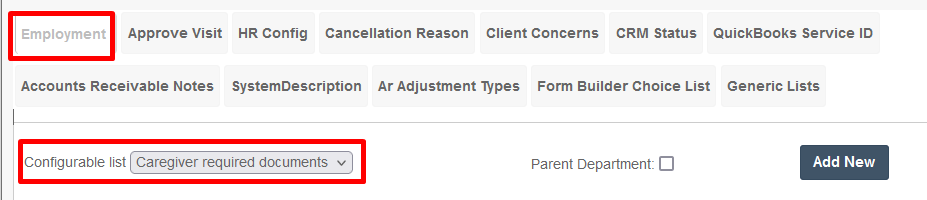
- Add New.
- Type in the document name.
- Select which folder the documents should be added to.
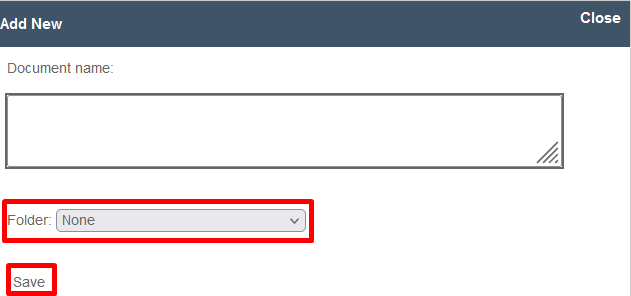
- Save.
Caregiver Document Upload Process (typically for HR Documents)
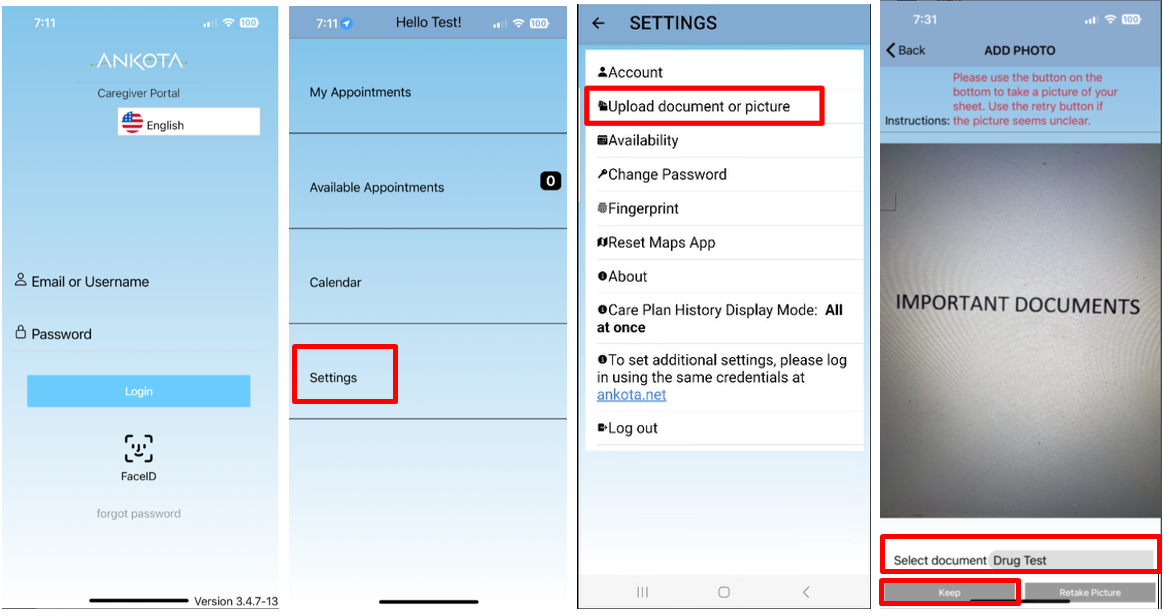
- Log in to Ankota's Caregiver Mobile App.
- Go to Settings.
- Click Upload document or picture.
- Add picture.
- Select Document (list is based on configured required documents).
- Keep.
- Repeat until all necessary documents are uploaded.
Admin Notification of Caregiver Documents to Review
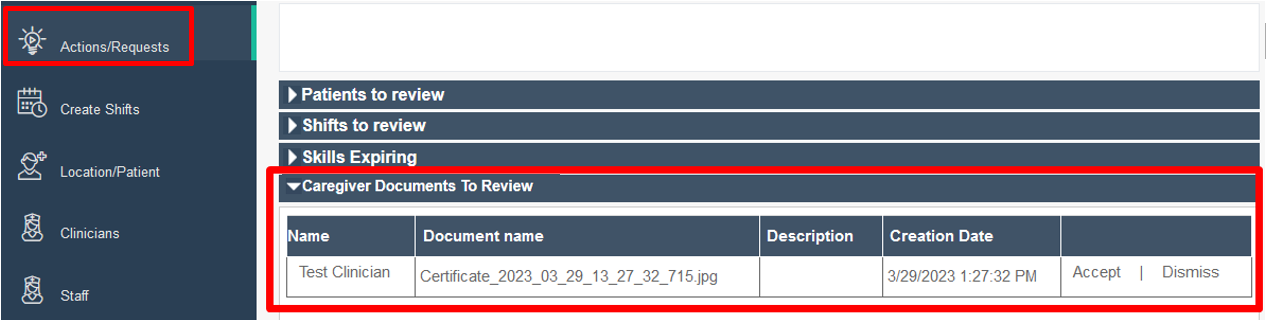
- Click Actions/Requests.
- Click Section - Caregiver Documents to Review.
- Click Accept to confirm.
- Click Dismiss to remove.
Photos in the Mobile App
Uploading Photos via the Mobile App
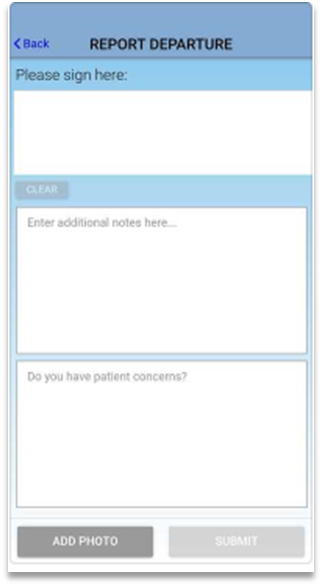
As part of the regular functionality of reporting departure in the Ankota Caregiver app, caregivers can attach a photo. Click Add Photo, allow the phone access to the camera, and take a picture. Wait for it to upload and confirm the upload, then proceed with submitting the departure as usual.
Photos and Attachments via Visits
On the Visits page, previously created files (such as photos taken by caregivers or forms processed as part of the visit) can be viewed, and attachments can be uploaded as needed.
To upload a file to a visit:
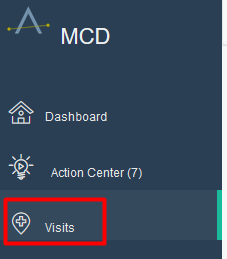
- Click Visits in the Main Menu.
- Search for the appropriate visit(s).
- Click the Attachment icon (the paper clip) on the row of the correct visit.

- A window will open.
- Click Upload.
- Browse for the file.
- Select the file.
- Upload the file.
- Save.
To view previously uploaded files:
- Click Visits in the Main Menu.
- Search for the appropriate visit(s).
- Click the Attachment icon (the paper clip) on the row of the correct visit.

- A window will open.
- View the files by clicking the name of the attachment.
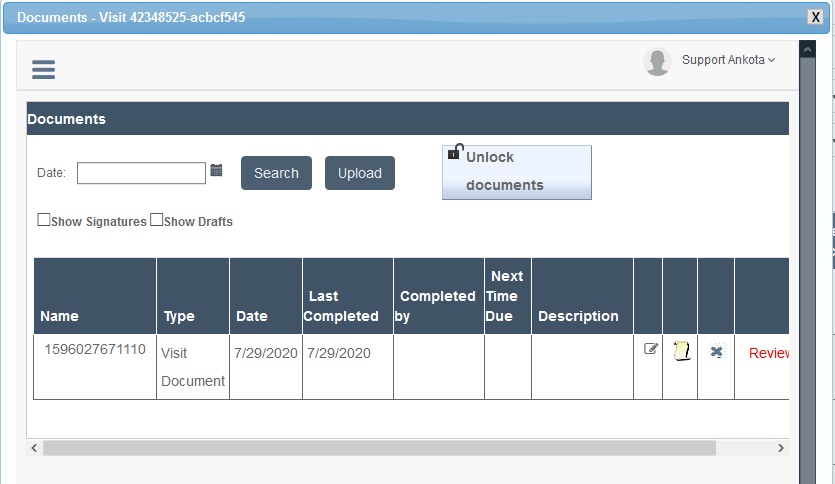
Photos and Attachments via the Visit Approval Dashboard
To view previously uploaded files:
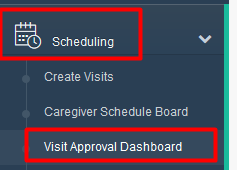
- Click Scheduling.
- Click Visit Approval Dashboard (also known as the Visit Closure Report in some environments).
- Filter for a visit.
- Open the visit details by clicking on the pencil and paper icon.
- Scroll down to the documents section.
- Click the document name to open the file.
Downloads
Completed documents can be downloaded by clicking the Save As PDF button on the Client Documents tab, or alternately via the Agent Documents page.
Client Documents Download Option
Agent Documents