Family Access / Authorized Representative Access
Overview
Some clients like to offer a family app to their clients' contacts. Despite its name, this can be used by any authorized representative (not just family). The basic idea is when a contact is added to a client, you can choose to grant that contact authorization to log into the system and view the schedule and care tasks for that client. This access is available through the new family app to client contacts who have been assigned a log-in, and also available online through https://family.ankota.net/
Log-ins are created under the client contact section by opening the contact and clicking the User Settings tab. NOTE: you must contact Ankota Support first to ensure that you have a Family Contact template set up for these contacts.
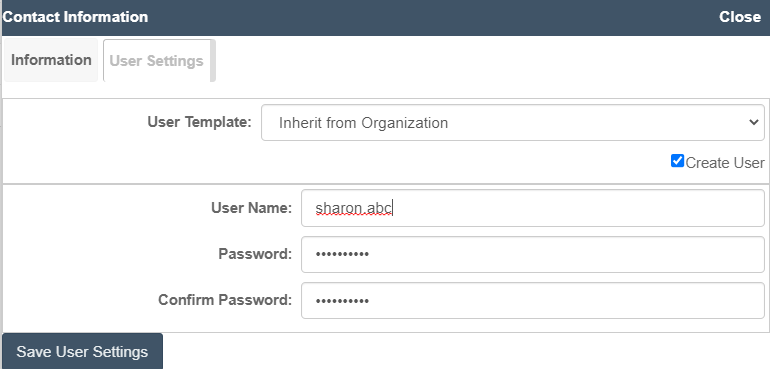
Creating Family Access
First, reach out to Ankota Support to request that a Family Access or Auth Rep template be created and assigned to your environment. Your family access portal will not work without configuration from the Ankota team.
Once that is configured, you may create the new client contact with the new Family Access template.
To do so,
-
Log in to your environment
-
Open the client's profile
-
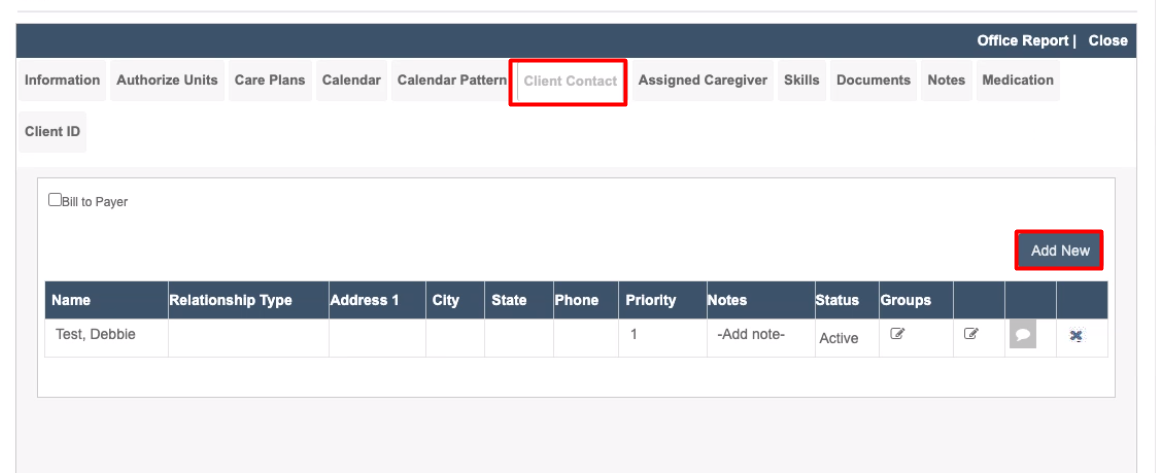
Click the Client Contact tab
-
Click the Add New button
-
Then add the client contact's role as Authorized Representative
-
Add the person's name
-
Save
-
REOPEN
-
Click the User Settings tab
-
Assign the User Name (mobile app log-in name: should either be the email OR a username + your Ankota name, like sharon.abc if ABC is your organization log-in), password, and also confirm the password
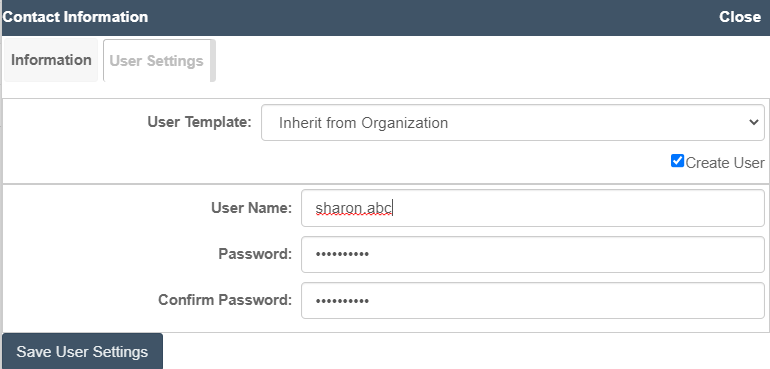
- Notify the family member or authorized representative of the log-in name, password, and the app name