Billing›Adding a Billing Adjustment

Adding a Billing Adjustment

Overview

From time to time billing adjustments may be needed. These adjustments can be easily made using the adjustments functionality from the Main Menu. To enter adjustments, click New and then fill out the adjustment as needed. To review past adjustments, filter as desired, then click Search.

Adding Billing Adjustments

To begin, go to the Main Menu, then click Billing, then Adjustments.

Screenshot.

Next, select Add New Adjustment.

Screenshot.

First, determine whether the adjustment is positive or negative. If it is negative, select Discount/Deduct from Pay. If it is positive, select Charge/Pay.
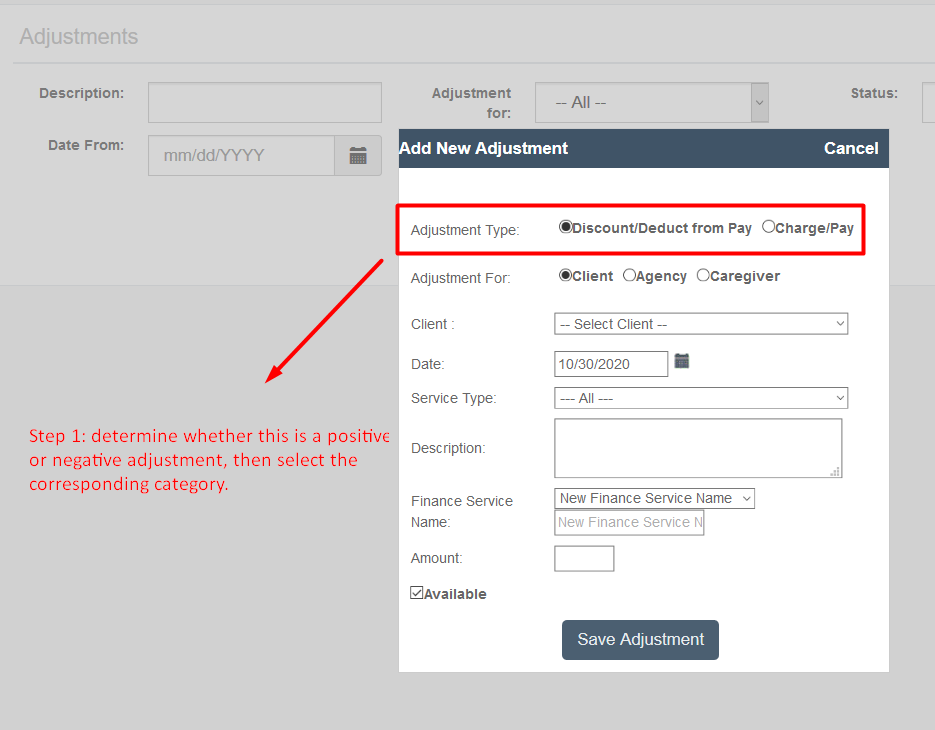
The "Add New Adjustment" dialog box displays form fields for creating an adjustment entry, with the "Adjustment Type" section highlighted in red showing radio button options for "Discount/Deduct from Pay" and "Charge/Pay". The form includes additional fields for Adjustment For (Client/Agency/Caregiver), Client selection, Date (10/30/2020), Service Type, Description, Finance Service Name, and Amount, along with an "Available" checkbox and "Save Adjustment" button at the bottom.

Next, select the appropriate category: Client, Agency, or Caregiver.

Radio button selection for "Adjustment For:" with three options: Client, Agency, and Caregiver, with Caregiver currently selected.

Complete the remaining fields as follows:

  • Set the date to the date the issue occurred on (can be some date in future)
  • Optional: enter a Service Type
  • Type a short description
  • Enter a Finance Service name if desired. This is how the adjustment will be shown on the invoice or payroll statement
  • Put in the dollar amount to be adjusted as a positive number. Even when the number is negative (a discount), the dollar amount is still entered as a positive number.
  • Leave "Available" checked. This indicates that the adjustment will be applied on the next invoice or payroll statement
  • Click Save Adjustment

See below for examples.
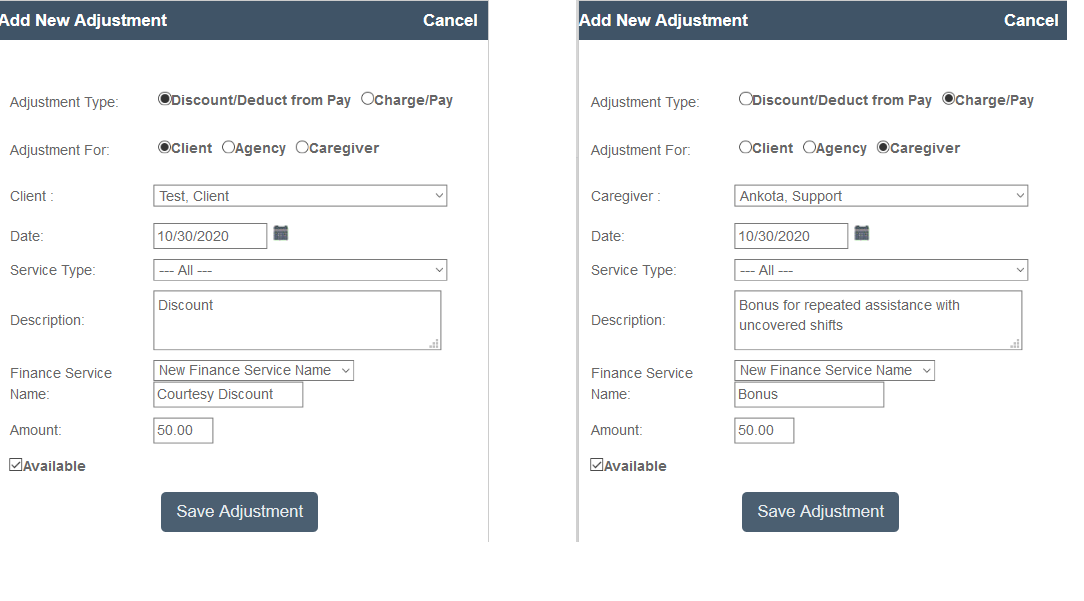
The Add New Adjustment dialog allows users to create pay adjustments by selecting adjustment type (Discount/Deduct from Pay or Charge/Pay), adjustment target (Client, Agency, or Caregiver), and entering details such as date, service type, description, finance service name, and amount. Both example forms shown include fields for Client or Caregiver selection, a date field set to 10/30/2020, a description field, a Finance Service Name dropdown, an amount field (50.00), an Available checkbox, and a Save Adjustment button.

Applying the Adjustment

After the adjustment is made, go to the Calculate Billing screen and search the client/date range. If the adjustment does not show the first time, click Recalculate to pull the new change.

The screen should look similar to the one below.
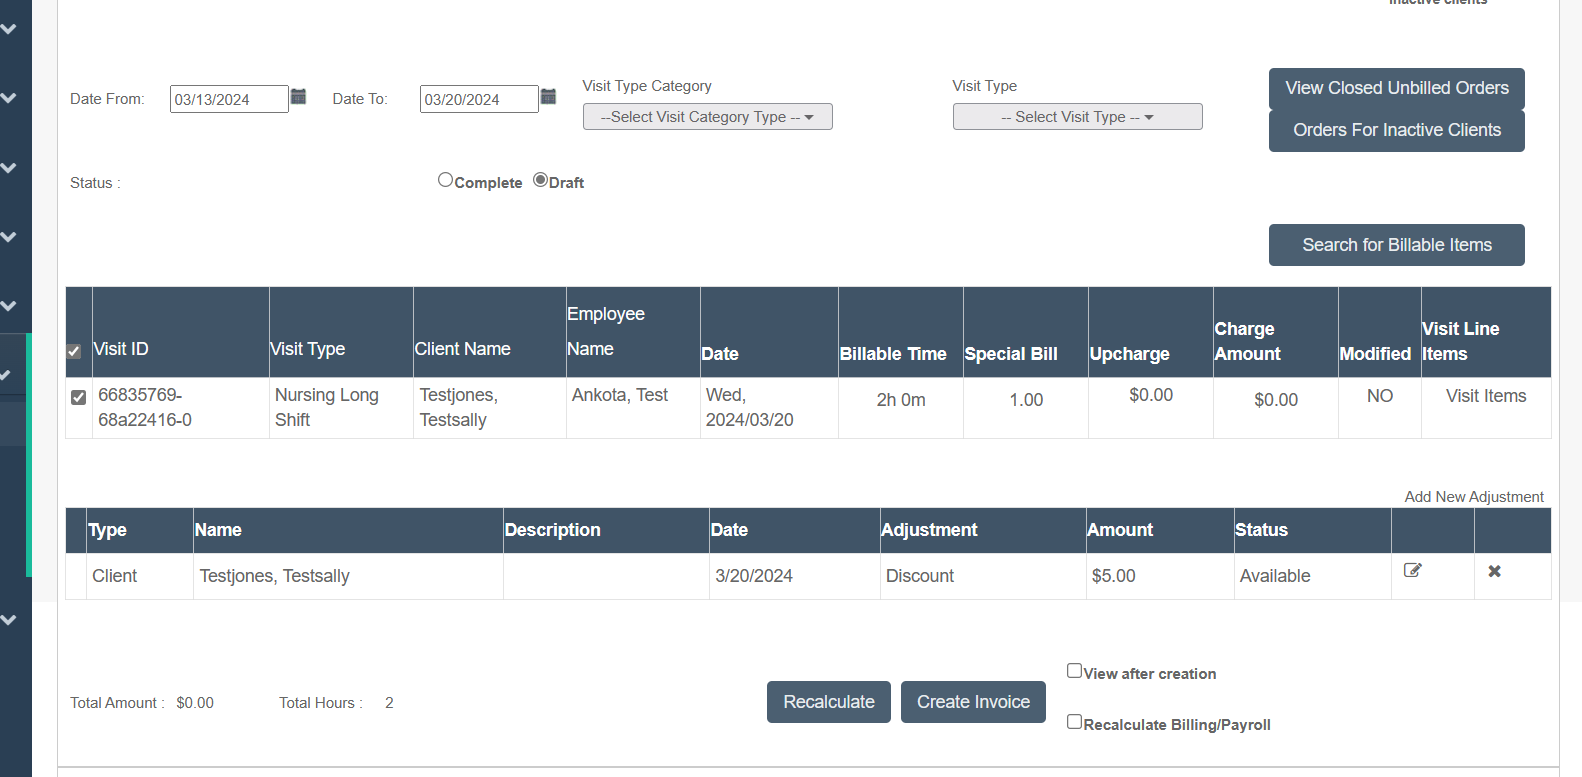
This is a visit billing search and management screen showing filtered results between 03/13/2024 and 03/20/2024 with options to filter by Visit Type Category and Status (Complete/Draft). The upper table displays visit details including Visit ID, Visit Type (Nursing Long Shift), Client Name (Testjones, Testsally), Employee Name (Ankota, Test), Date, Billable Time, charges, and a "Visit Items" link, while the lower table shows adjustments with columns for Type, Name, Description, Date, Adjustment type (Discount), Amount ($5.00), and Status (Available).

Then select Create Invoice and review in billing report drafts and complete as needed.

To review past adjustments, filter as desired, then click Search.

Was this article helpful?
On this page