AR Screen
Overview
The AR screen is a powerful tool that provides at-a-glance data on total (unpaid) balances, balance by payer, and by client, updated every 15 minutes. If you wish to make a manual payment, you can access each client's Accounts Receivable page via this overview. Users can also upload 835s to apply payments from the state to their account. For those times you may wish to review the data (such as paid/unpaid invoices) manually or do further analysis in Excel, a variety of exports are available via the AR Report button.
Process Remittance Advice
To upload a state 835 and apply the state's payments to your account—effectively a receipt, also known as the electronic remittance advice file (ERA)—use the Process Remittance Advice button on this page.
After payments are processed, it will take 15 minutes for that data to show up in the AR screen.
Access to Client Invoice History
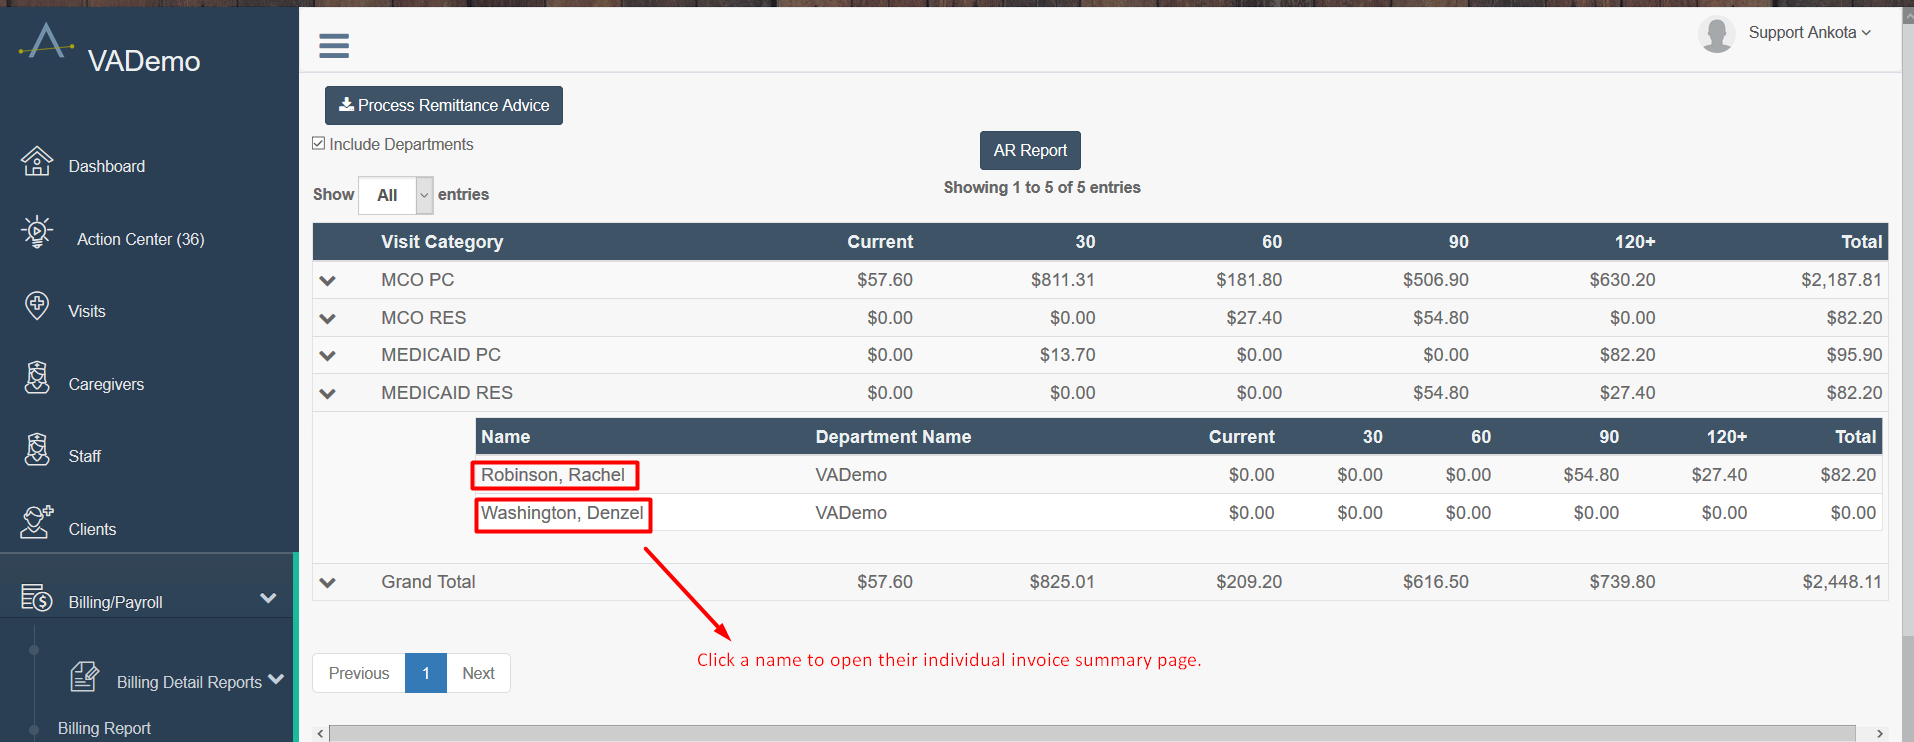
To access a client's specific invoice history, go to the AR screen, open the category desired, and then click on the name of the client.
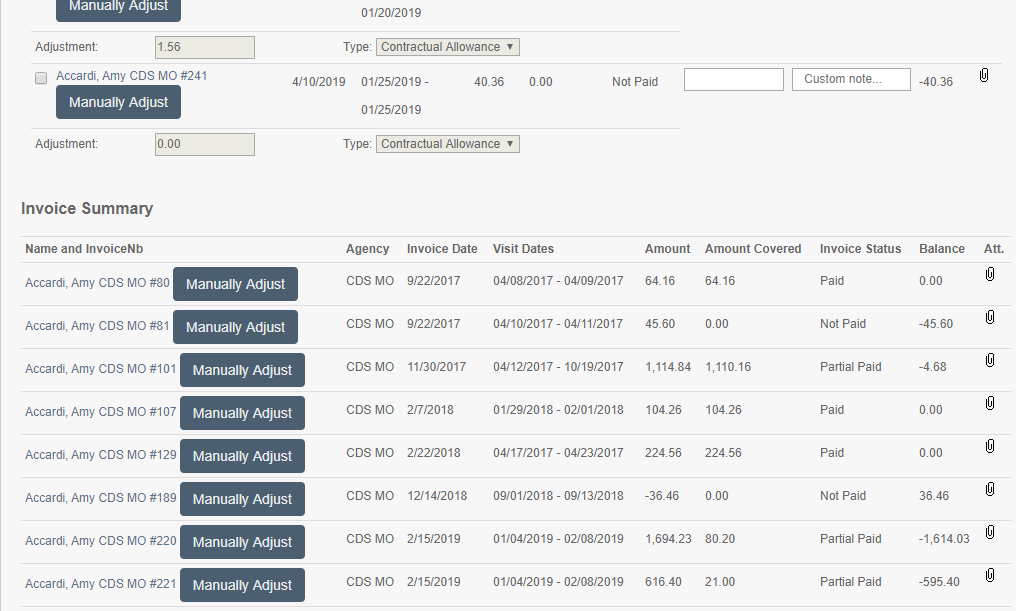
Once in a specific client's Accounts Receivable screen, the invoices will be summed together at the bottom in the summary. For example, if the bill had two payments (or one payment and an adjustment) it only shows once. To dive into detail, click on Manually Adjust to see the full breakdown, visit-by-visit. This will not affect the unpaid invoices. They will remain at the top, but they will also have a line item at the bottom.
Manual payments can also be posted from this screen.
As payments are processed, it will take 15 minutes for that data to show up in the AR screen.
Exporting the AR Report
To access Excel options for the AR report, click the AR Report button while on the AR screen.

Available Reports
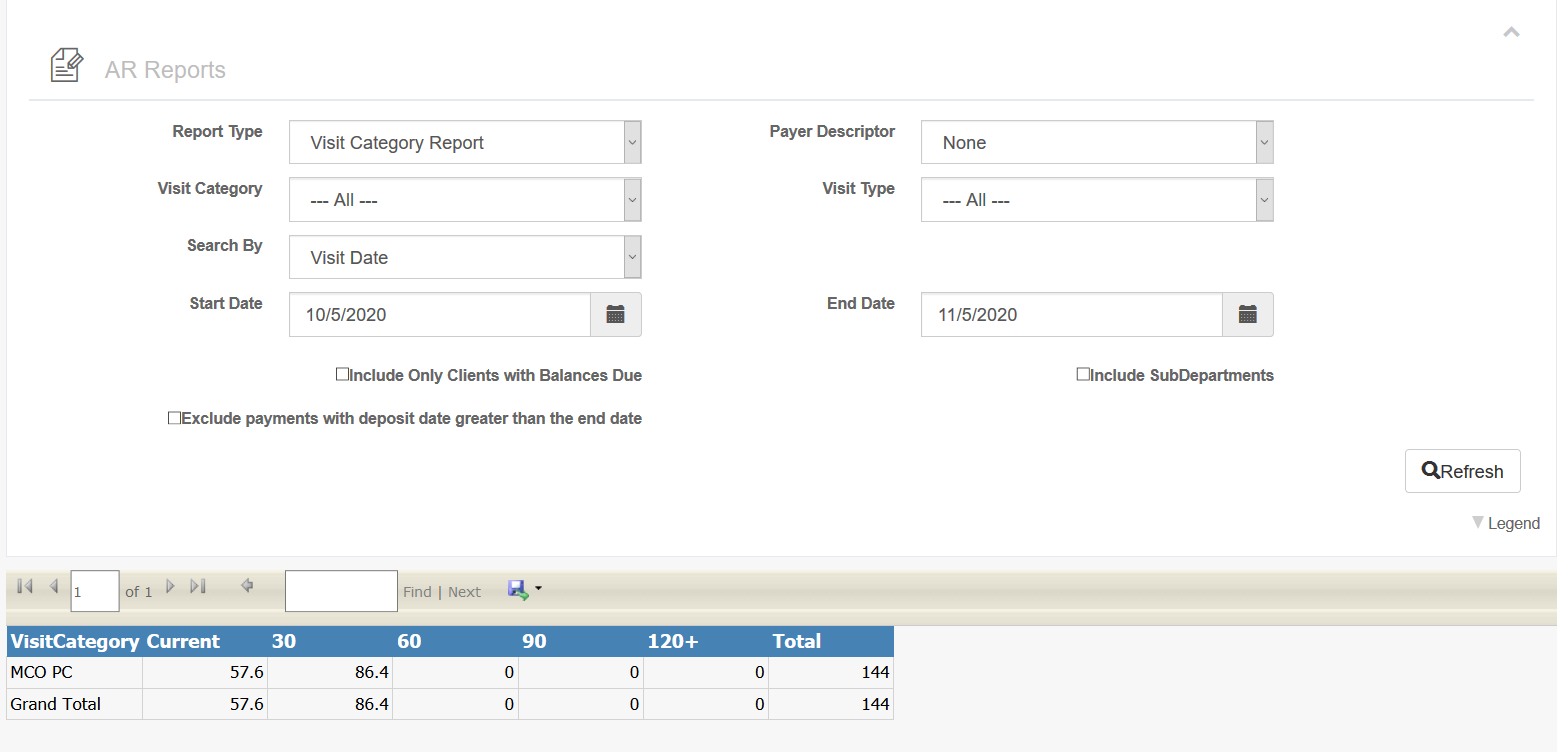
On the AR Reports page, several filters are available:
-
Report Type — pick which level of the AR screen to see:
-
Visit Category Report — the top-level data
-
Client Report — the basic client balance data
-
Client Details Report — includes both clients and specific invoice data (most commonly used)
-
-
Visit Category — build a report for one single category, if desired
-
Start Date and End Date — defaulted to the past month; alter as desired
-
Search By — view visits in a date range, invoices in a date range, or deposit date
-
Checkboxes allow the following options:
-
View subdepartments
-
Include only clients with balances due
-
Create a historic report, where payments after the entered date are not included (so you can see what was owed in a certain time period)
-
Once filters are selected, click Refresh, then save as an Excel file.
Edit/Adjust Deposit Date
Please follow the steps below to manually adjust a deposit payment date in Accounts Receivable:
-
Navigate to Billing/Payroll.
-
Select Accounts Receivable.

-
Search for the invoice using the client's name and the appropriate date range.
-
Click Show All Invoices.
-
Locate the correct invoice and select Manually Adjust.

-
Enter the deposit date.
-
Click Apply Payment to save the adjustment.
