New Hampshire Workflow
Overview
Private pay is generally self-regulating within the confines of state law and regulatory processes. This article focuses on Medicaid billing in the state of New Hampshire.
Critical Pathway
For a simple overview of key admin system maintenance, see the Electronic Visit Verification overview from the New Hampshire Department of Health and Human Services (nh.gov), which includes linked steps.
For a quick review of the bill & review process, see the Process Review walkthrough (Process Review.pdf).
Set-up: Authenticare / Fiserv
Company Registration
- Fill out the EVV Declaration Form (NH-EVVSystemDeclarationForm.docx).
- Email the completed form to evv@dhhs.nh.gov.
Caregiver Registration
- Enter caregivers in Authenticare.
- NOTE: Caregivers with more than one visit of a single visit type per day must also be entered with all the time-of-day modifiers.
Pre-Billing
Successful billing starts at the beginning of the client's creation. The processes below lead to successful billing.
Client Management
- Set Authorized Services for Clients (enter authorizations).
- Schedule Visits using Calendar-Based Scheduling (or, for the classic approach, Creating Visits from Patterns).
Visit Management
- Caregivers complete visits.
- Visits are approved automatically or by the office.
- Ensure visits are closed, then review and clear the Visit Approval Dashboard.
- NOTE: Visits must be split at midnight effective May 2026.
Error Prevention
- Watch warnings on the Action Center (for missing auths, primary diagnosis codes, IDs, etc.) and address as needed.
- Watch warnings on the Visit Approval Dashboard and address as needed.
- Ensure that First Name and Last Name spellings, Medicaid IDs, SSN, and DOBs are entered correctly.
Billing
To bill and export data to Authenticare, perform the usual visit review and billing processes in Ankota. After ensuring visits are closed, reviewing the Visit Approval Dashboard, calculating billing, and completing draft invoices, invoices are built and the data is sent to Authenticare.
CRITICAL NOTE: Completing invoices also AUTOMATICALLY pushes visit data to Authenticare. Authenticare visits must be billed in order to be auto-exported. The Export button on the VAD can be used to export a second time, but nothing will deliver until the visit is billed.
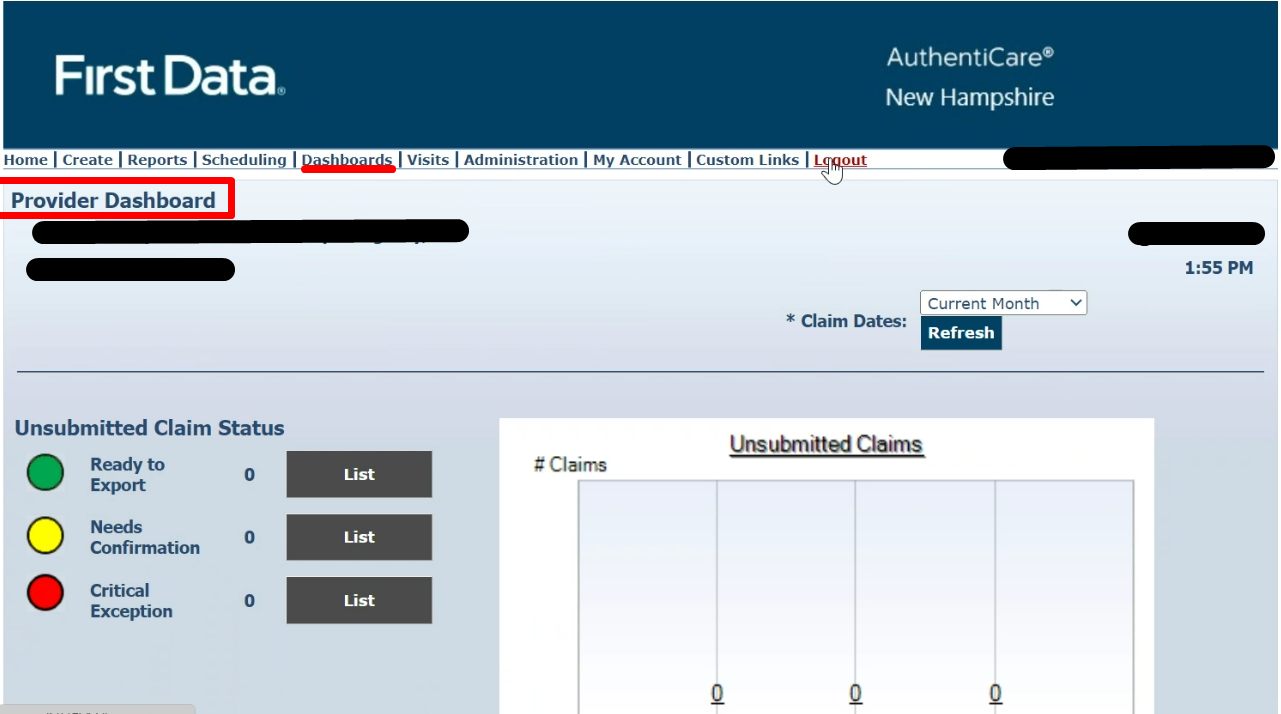
After exporting data, manage the release of claims via the Provider Dashboard in Authenticare.
Rejection Management
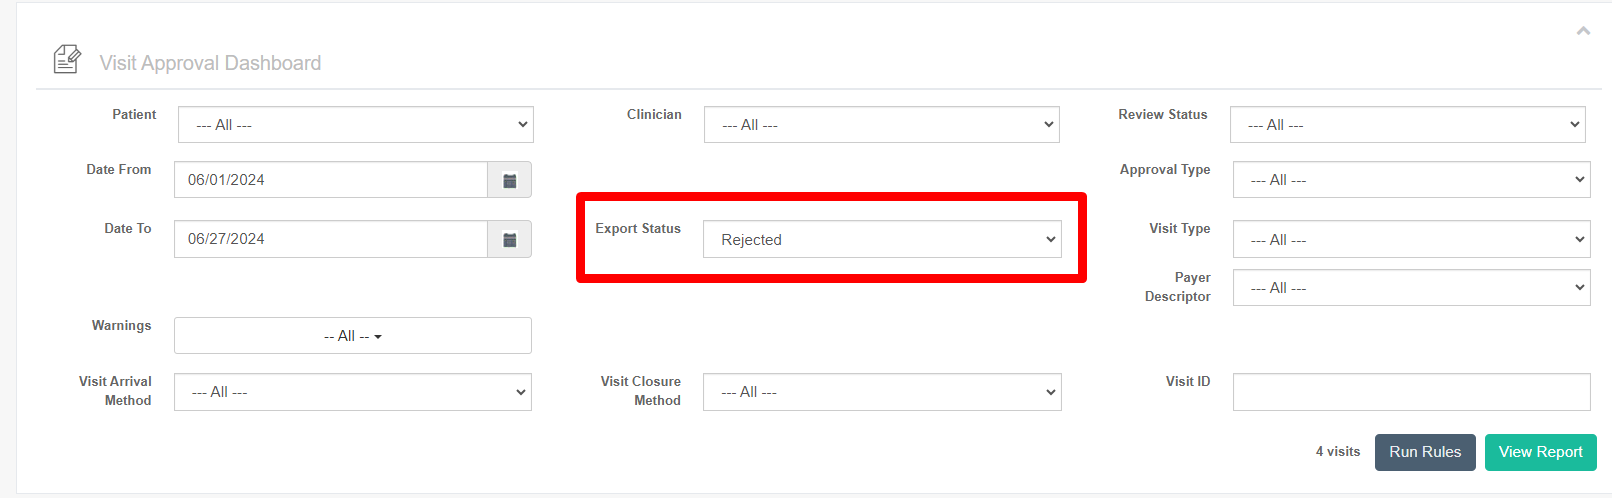
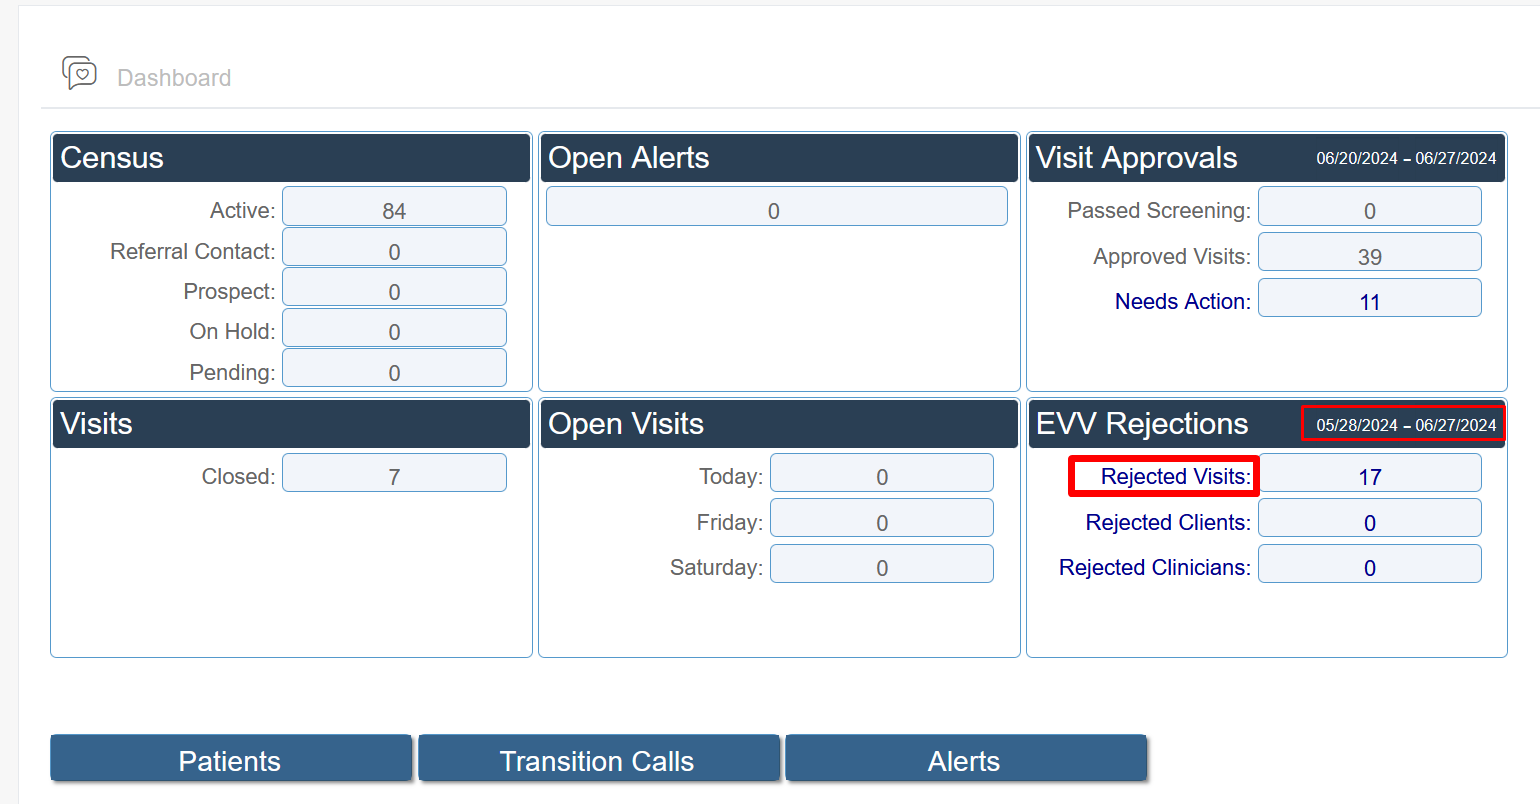
Rejected visits must be regularly managed. Click rejected visits on the landing Dashboard to open a new tab with all rejected visits for the selected time period (the time period is adjustable), or filter for all Rejected visits on the Visit Approval Dashboard. Open each visit, read the rejection, and take action as needed.
All clinicians must be registered with Authenticare or they will be rejected with the error "Clinician does not exist."
Remittance Advice Management (835s)
If billing via 837, a remittance advice file should be returned. If the RA is received as an 835, the file can be uploaded to Ankota for automatic application of payments in the A/R records.
- Process Remittance Advice (upload 835 "receipts" received from MMIS into Ankota).
- Post Manual Payments.
- Review Billing Reports.
See also: Collections Report, Exceptions Report.
Corrected Visits
When correcting visits, errors generally fall into a few categories, each managed differently. In general, fundamental errors require backing out billing to correct the visit, then re-invoicing, whereas reason code or demographic information can typically be updated and the visit re-exported immediately.
Currently there are effectively no rejections due to the lack of requirements; current issues usually stem from formatting, or clients and caregivers not found due to registration issues or inaccurate data.
Further Details
Additional resources:
- Ankota Training Overview (including videos)
- Daily Adjustments
- Manual Visit Entry