Nurse Access in Ankota
Overview
As a nurse, there are a number of options in Ankota. Visits can be clocked into and out of for nurse visits the same as with other caregivers. If desired, admins can also give permission to create your own visits that allows you to manage your own schedules in the mobile app. If forms are built in Ankota, then those forms can be made available to nurses. The forms can either be accessed via the mobile app on appropriate visits, or via ankota.net on the client's Documents tab.
See below for an outline of the available nurse options and requirements.
Scheduled or Unscheduled Visits
Depending on the company's needs, nurses can either have regularly scheduled visits (like most caregivers), or be given permission to schedule themselves for assigned clients.
For scheduled visits, admins will schedule the visits as needed, the same way they would schedule other caregivers. These visits will be available under Scheduled visits. See the standard caregiver access walkthrough for details.
For unscheduled visits, admins will assign the nurse to the client under the client's Assigned Caregivers tab, including the visit type. This allows the nurse to clock in at any time via the My Clients section in the mobile app. See the walkthrough on creating your own visits for details.
Documents
Documents can be accessed via ankota.net or via the mobile app. Mobile app access is the best, and standard, way to access documents. These documents can be made available on both scheduled and unscheduled visits.
Online (& Offline!) Documents in the Mobile App
To ensure visit data and documents are available, saved, and then delivered back to the office, even when nurses are offline most of the day, there are a few key steps to consider.
Documents for nurses via the mobile app access require the following:
- The documents must be in Ankota
- The documents must be assigned to the visit type
- The visit type must be accessible by the nurse
To successfully use documents in the mobile app:
- Start online
- Confirm all visits and documents have been loaded
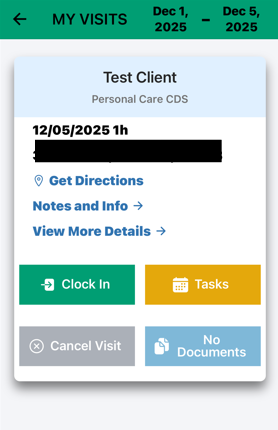
- Perform the visit (including going offline if needed)
- Clock in and out as needed
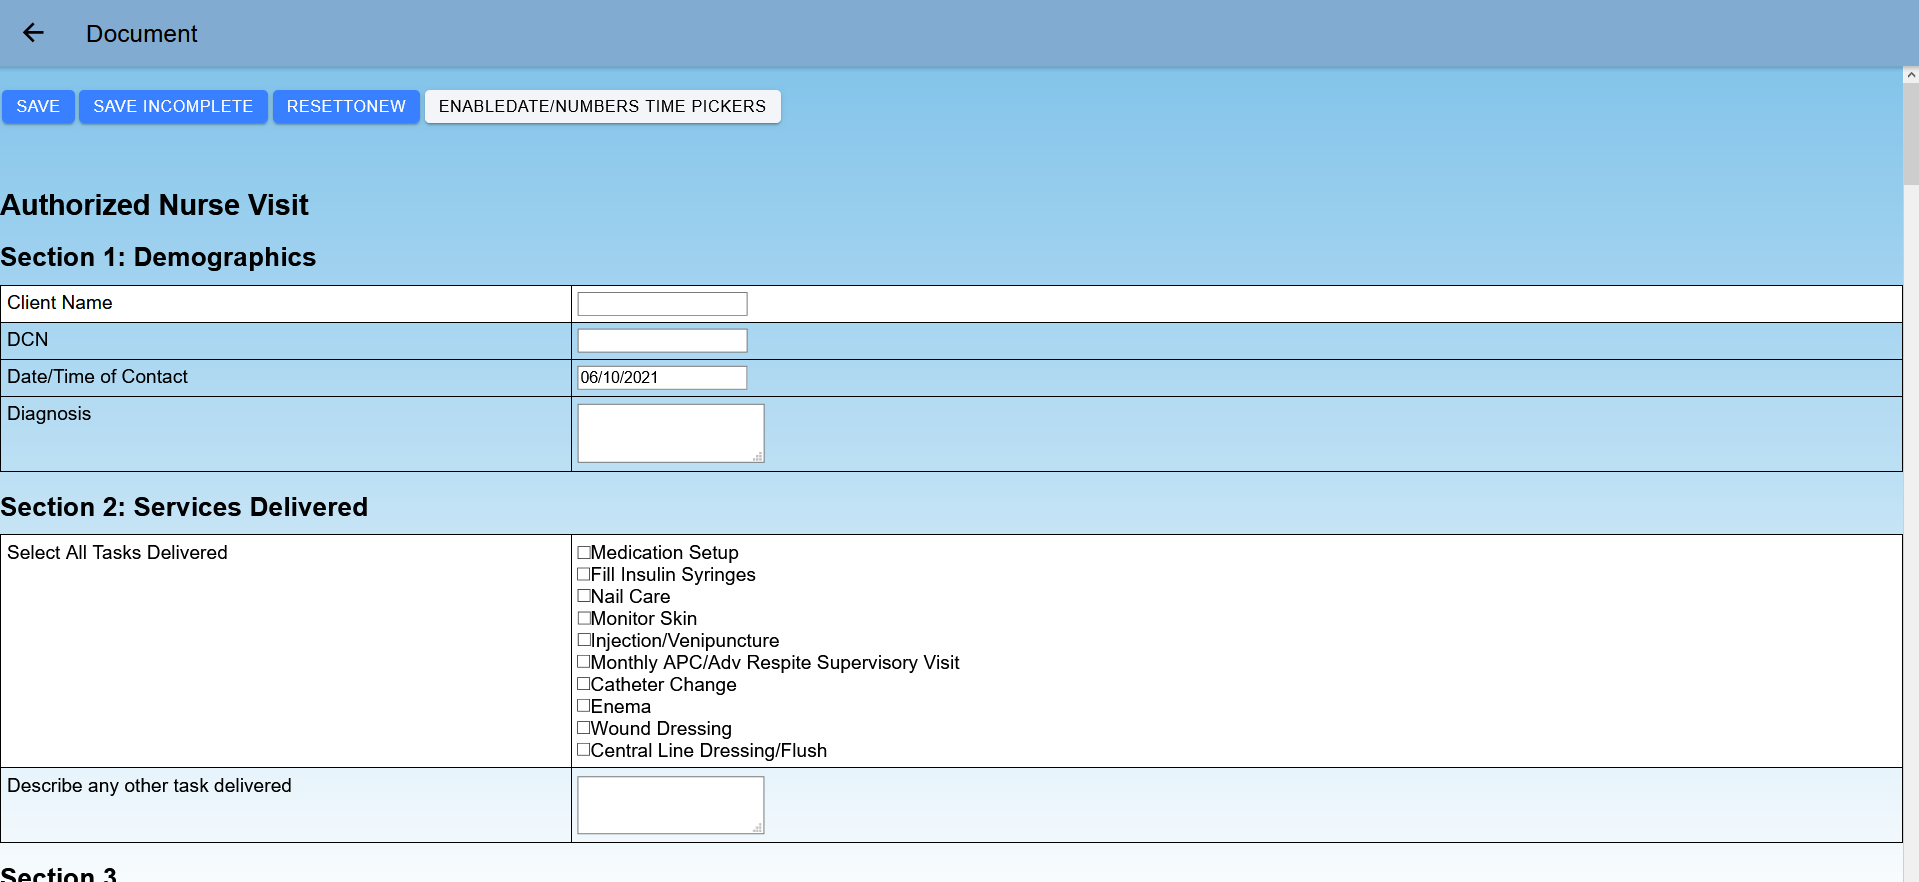
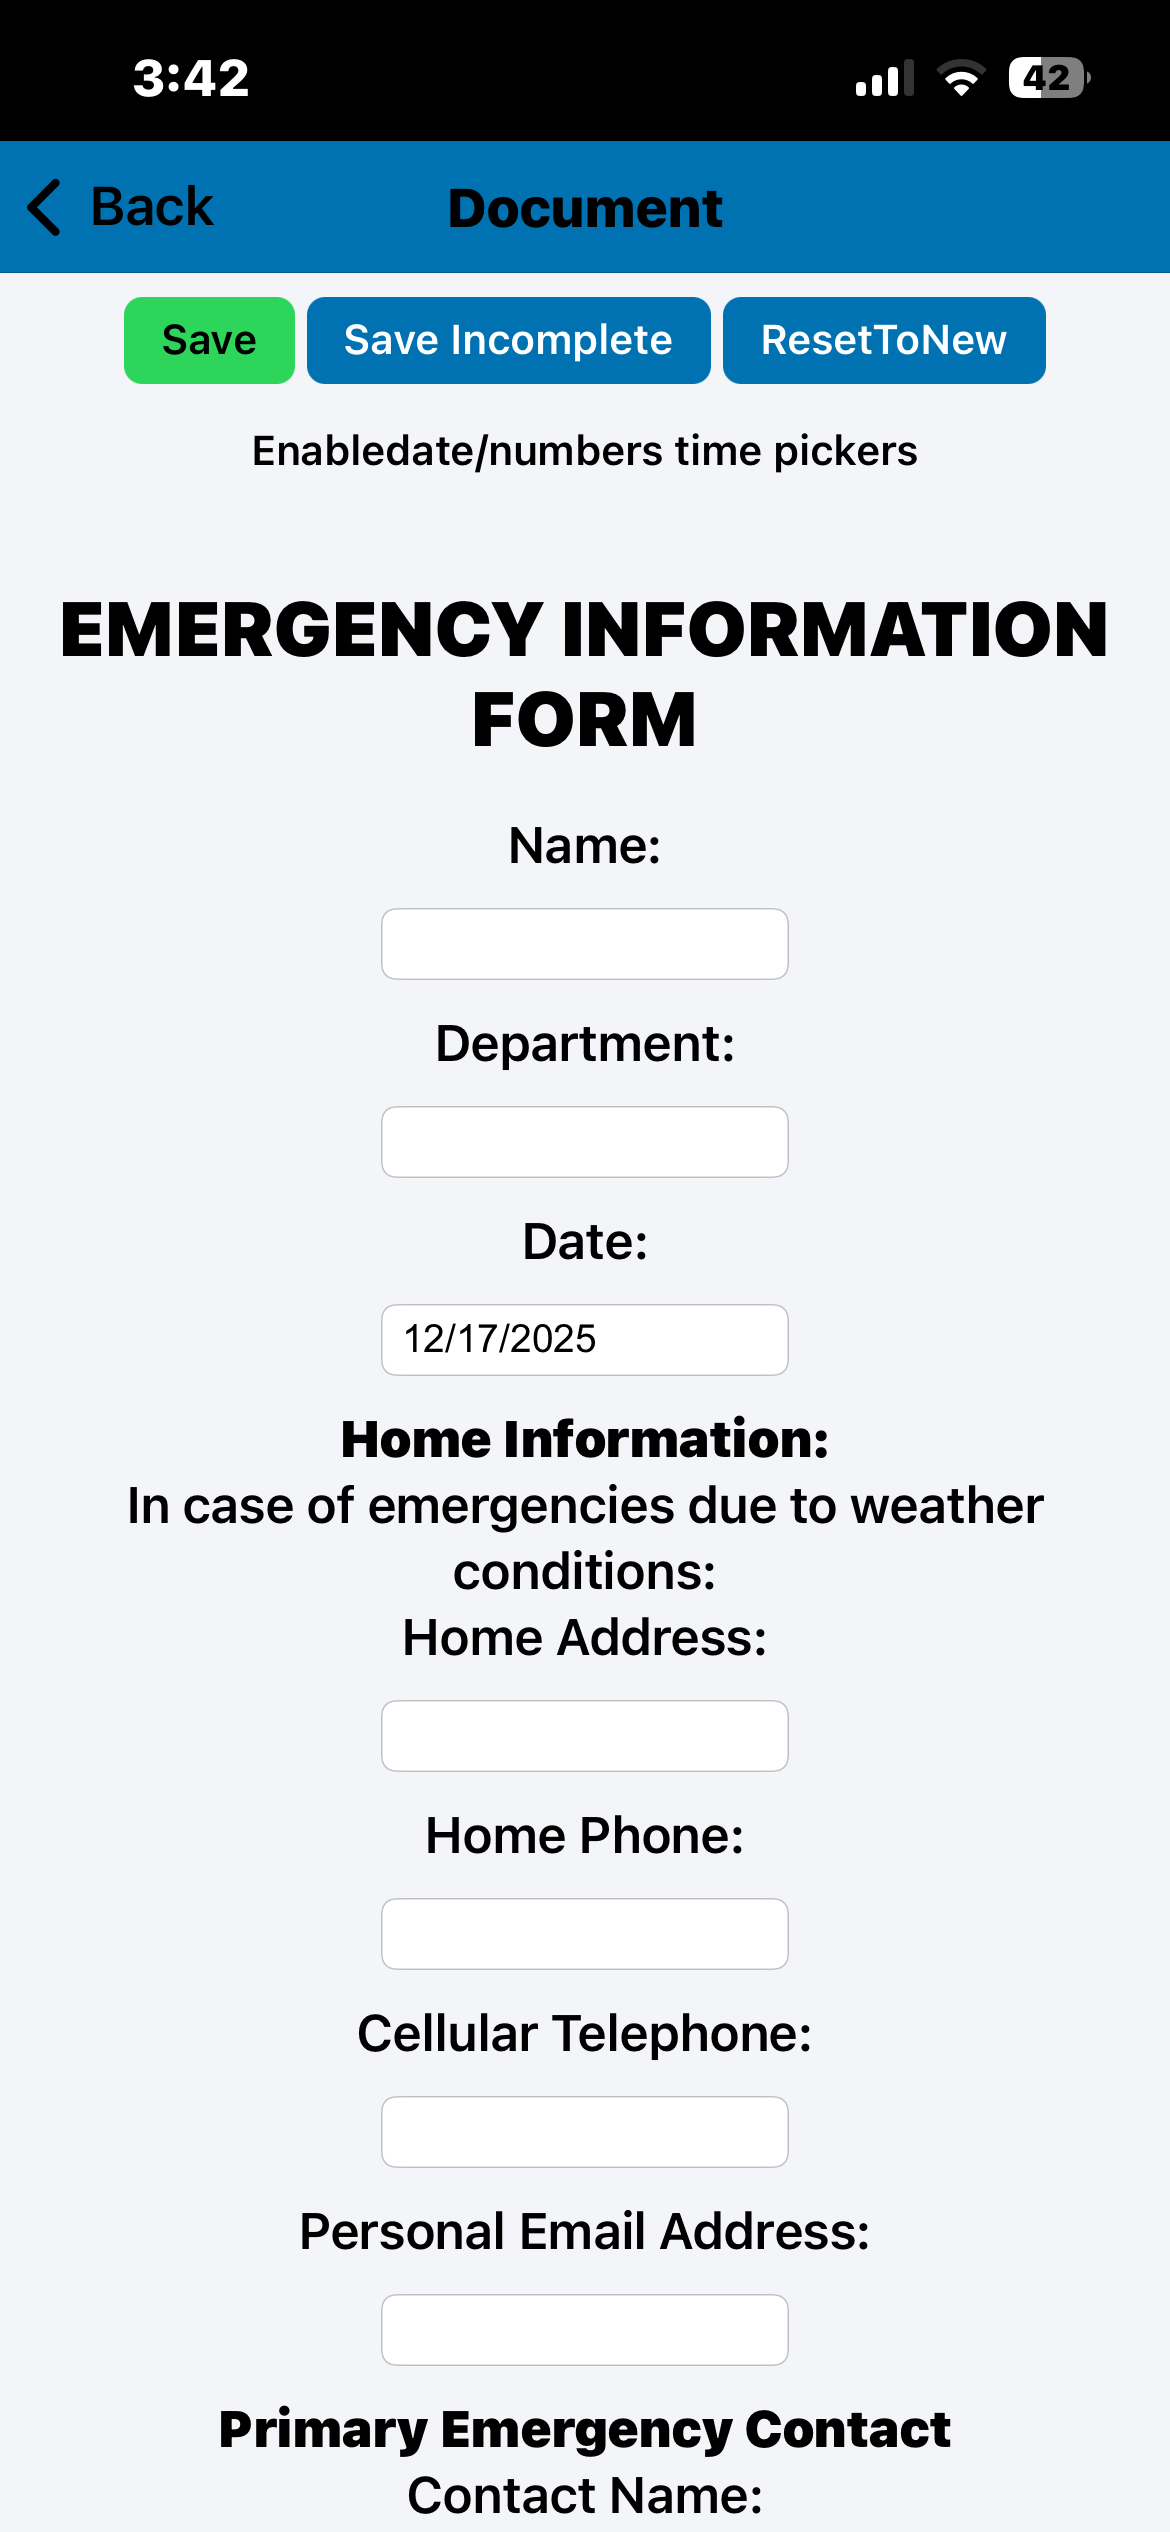
- Fill out documents as needed (tablet recommended but not required)
Tablet view
Phone view
- Go online by the end of the day to sync
- The online sync will automatically pick up the EVV information
- To deliver documents to the office, click Documents, then click Process Documents to deliver documents
NOTE: Visits must be completed in the location they were begun. Forms started in the mobile app must be finished in the mobile app.
Documents via ankota.net Admin Access
Some organizations have nurses access documents via the administrative ankota.net portal.
Documents for nurses via the administrative ankota.net access require the following:
- The documents must be in Ankota
- The documents must have permissions allowed for the nurse to view (accessed via ankota.net)
- Nurses must have a unique admin template assigned to ensure limited access to ankota.net
If documents cannot be accessed on ankota.net when they were intended to be, reach out to an admin to have permissions corrected.
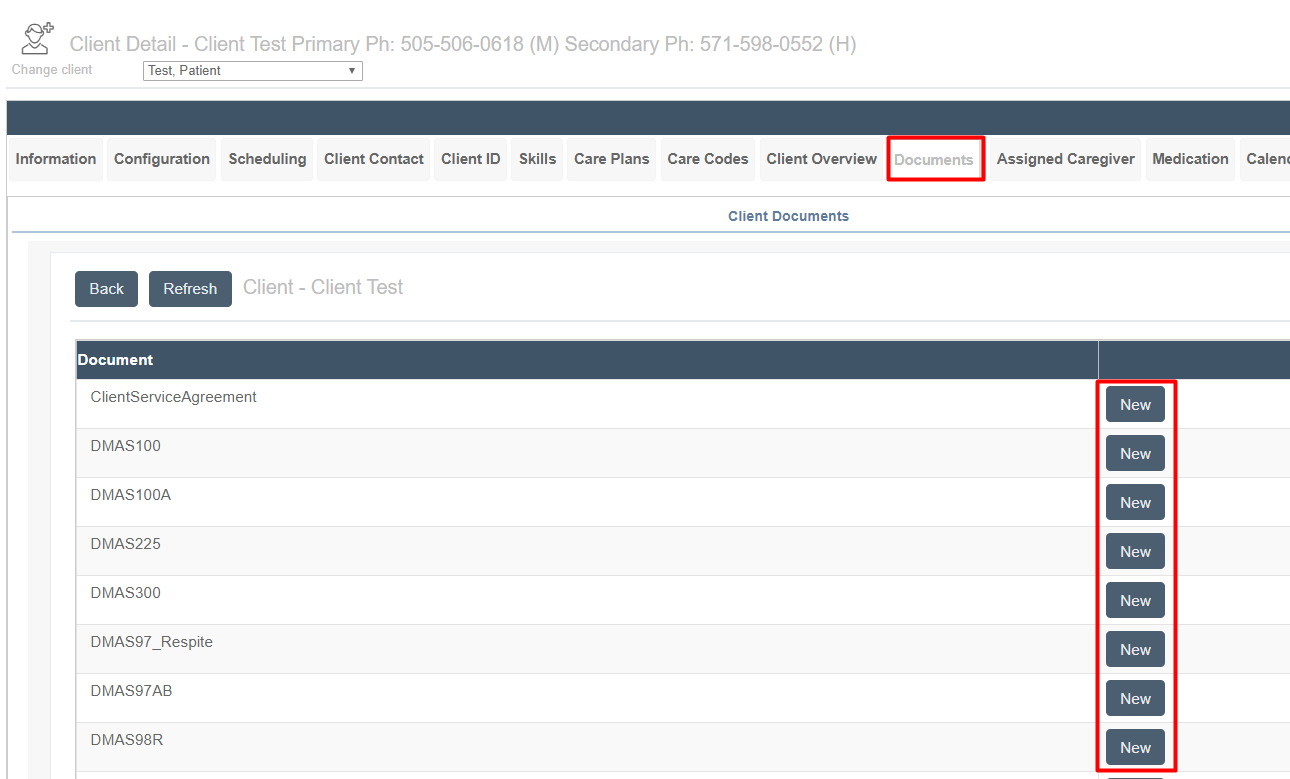
To fill out forms in ankota.net:
- Open the client's profile
- Click the Documents tab
- Click Fill Form
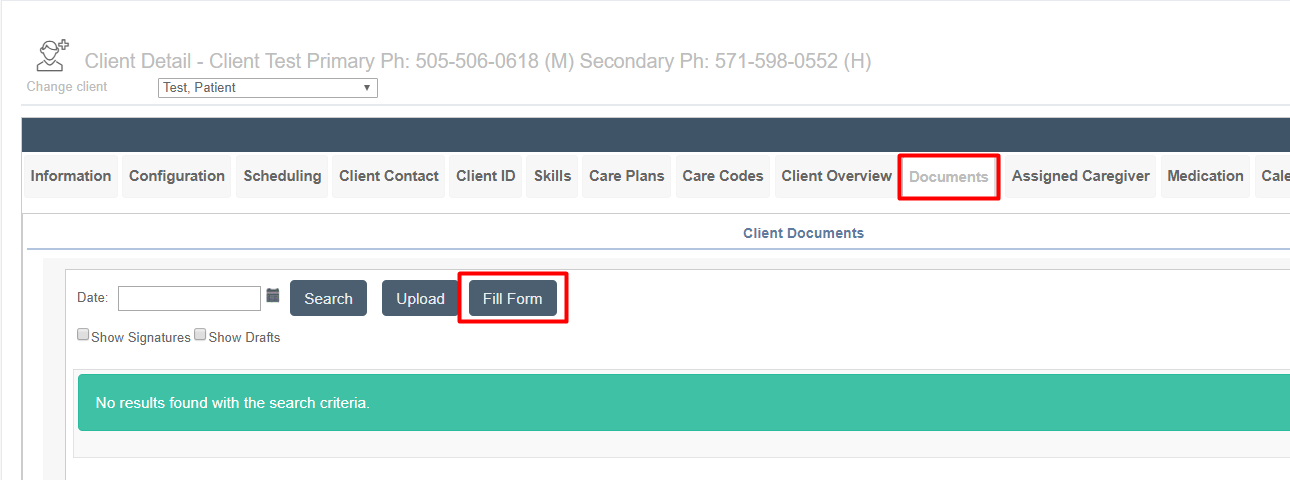
- This will open a list of documents
- Click the New button on the row of the form you wish to fill out
- Fill out the form as desired and save before exiting
NOTE: Visits must be completed in the location they were begun. Forms started in ankota.net must be finished in ankota.net.