The Ankota Caregiver Mobile App - Admin Perspective
Overview
This article provides the admin perspective of the Ankota Caregiver Next Gen mobile app. For the caregiver's perspective, see the Ankota Caregiver NextGen Mobile App article. For troubleshooting information, see Troubleshooting Ankota Caregiver App.
The Ankota Caregiver Next Gen mobile app includes many functions for caregivers. Sections can be kept, removed, or renamed as needed for each organization. The Settings option "Availability" can be turned on/off for the organization's caregivers. For more information on common Ankota configurations/system tailoring, including more control of clock-ins and clock-outs, see Configuration Options for Organizations.
For information on how to have caregivers retroactively report on missed information, missed clock-ins/clock-outs, or missed visits, see Rework, Missed Visit, and On Hold Functionality.
Critical things to understand about the mobile app:
-
There are many sections, and these can be turned on or off (for example, Payroll or Visit History can be removed)
-
Scheduled Visits (My Visits) — includes tasks and requested documents
-
My Clients (Assigned Clients) — "unscheduled" visits, allowing caregivers to create visits for approved clients
-
Available Shifts — ability for caregivers to pick up shifts
-
Visit History
-
Chat (video chat is in beta testing)
-
Calendar
-
Payroll (preview/review of approved payrolls)
-
Documents (allow caregivers access to client view-only documents — ideal for nursing companies)
-
Settings
-
Special features include Available Shifts, Unscheduled Visits, Rework, and On Hold completion features
-
Caregivers can usually intuitively follow the prompts, even without watching the mobile app training video
Sections in this article include:
-
Log-in Features
-
Scheduled Visits
-
Clock-in/out Management
-
Special Features in Scheduled Visits
-
Unscheduled Visits/My Clients
-
Notifications
-
Visit History
-
Payroll
-
Chat
-
Patient Documents
-
Calendar
-
Settings (including Availability)
-
Caregiver Upload Required Documents
Log-in Features
The log-in page allows caregivers to choose their language, log in, and re-set their password if needed.
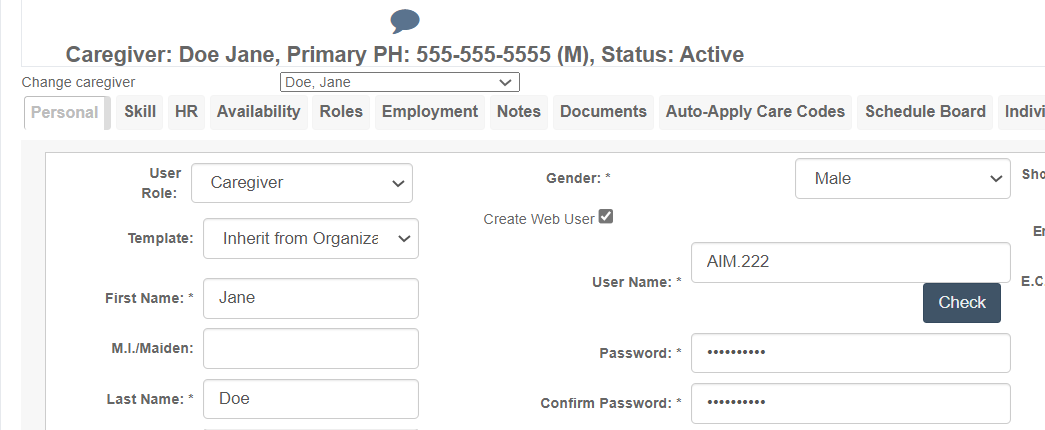
To find the log-in username and password, an admin goes to the caregiver page. Under Create Web User, the username and password will be provided. The admin can change the caregiver's password here. If a username and password are not provided, select Create Web User.
Password Re-Set
To re-set a password, caregivers can click "forgot password." A follow-up question will be posed to ensure the request wasn't made by accident. The password can then be re-set via email or phone number, depending on what is available in the caregiver's profile. Caregivers without either piece of information will be directed to reach out to their organization.
Languages
Caregivers who prefer to work in a different language can select their preferred language at the top of the log-in page.
Administrators can also have translated tasks and task choices set up for a fee.
Offline Functionality
Loading: The ability to work offline is useful for caregivers in areas with low bandwidth. Caregivers log in to the app in an area with good signal/bandwidth, which can be at home, office, or anywhere before the visit begins.
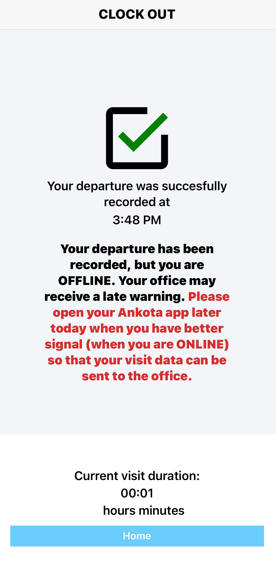
Completing Visits: Once logged in, all visits for the day will load. The caregiver can complete visits as expected once at the service location. All visit details are recorded as the caregiver enters them. The clock in and clock out page will show a notification for the caregiver.
Delivering Visit Data: Once the caregiver is in an area with signal/bandwidth, all recorded information is sent to Ankota.net. The main idea is to still capture clock-in/out time and care plan items. If a caregiver continues to do offline visits often for a specific client, consider a different clock-in method such as IVR.
Note: If all visits are being flagged as offline, the caregiver may be in a low-signal area. Contact Ankota Support to request that the threshold for "offline" be raised to several minutes so the mobile app can continue attempting to connect for an extra minute or two before going into offline mode.
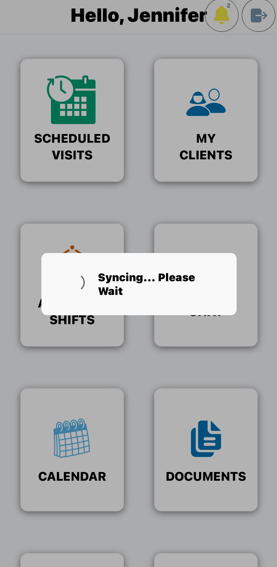
Scheduled Visits
Scheduled visits are visits scheduled in advance by administrators, usually in association with a care plan of defined tasks and an authorization for a certain number of units. Tasks can be hidden if unneeded.
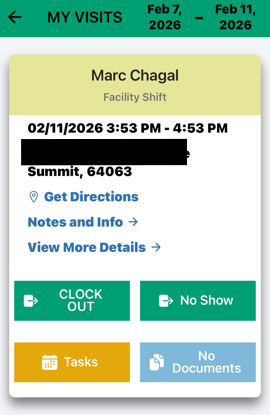
Visit details, including client information and directions to the client's service location, can be viewed by clicking "View More Details."
Documents
If documents have been chosen and assigned to visits, they will show up during clock-in and can be clicked on and filled out. The button for documents appears below the Tasks button.
Once opened, visit documents can be selected from the list of available documents. Documents can be filled out and saved, saved as incomplete, or reset to new.
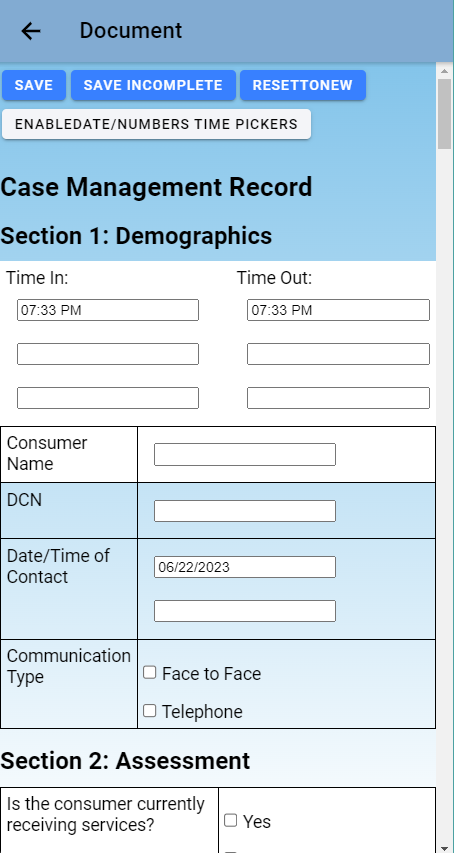
Once desired documents are completed, the user clicks Process Documents to deliver them. No documents will be filed unless Process Documents is clicked.
Completed, processed forms can be automatically placed in client or caregiver folders. Destinations for forms can be requested during implementation.
Info Only Items & Notes
Administrators can request a configurable Info Only section. A drop-down shows Info Only information about the client (for example: client is allergic to peanuts). Client information is added by an admin under Info Only in the care plan section.
Notes (from the individual visit added in advance, typically by a scheduler) and Info Only care plan items can be seen on preview external to the visit. This function can be turned on by request.
History
Some features here are not defaulted but can be turned on. The first is a history of notes on each care plan item, so caregivers can see notes from other caregivers by clicking the "History" link to open a field of past notes. The number of past days viewed can be set by the organization.
Clocking Out with Signatures
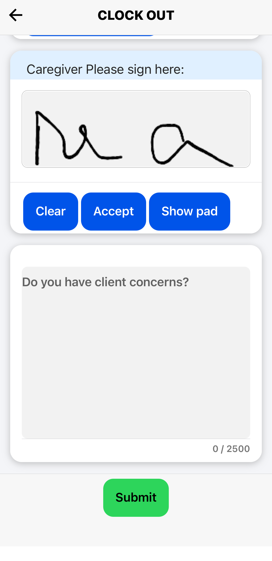
Caregivers can collect signatures after reporting departure. Signatures can be signed with a finger. To make the signature screen bigger, click SHOW PAD.
Visits can be EXCLUDED from requiring signatures. Exclusions are normally added in implementation, but can be added later by contacting Support.
Clock-in/out Management
The following options are available in Ankota:
Text options
-
Trigger texts to designated admins if caregivers are late clocking in/out
-
Trigger texts to all caregivers if caregivers are late clocking in/out
Clock-in/out options
-
Suspend clock-in options if caregivers are X number of minutes late (configurable)
-
Suspend clock-in/out if the caregiver is more than X distance from the scheduled location (configurable to 0.01 hundredths of a mile)
-
Suspend clock-out and place visit on hold if the caregiver is more than X minutes late clocking out
Self-scheduling
- Grant caregivers self-scheduling/"anytime" clock-in/out options for designated clients (see Unscheduled Visits/My Clients)
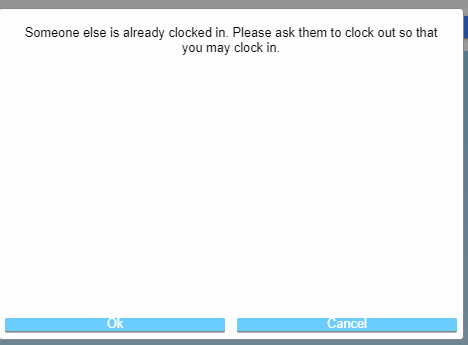
Preventing Caregiver from Clocking In If Previous Caregiver Hasn't Clocked Out
Triggers an error preventing the caregiver from clocking in until the previous caregiver has clocked out.
Special Features in Scheduled Visits
Other features include:
-
Allow caregivers to pick up shifts
-
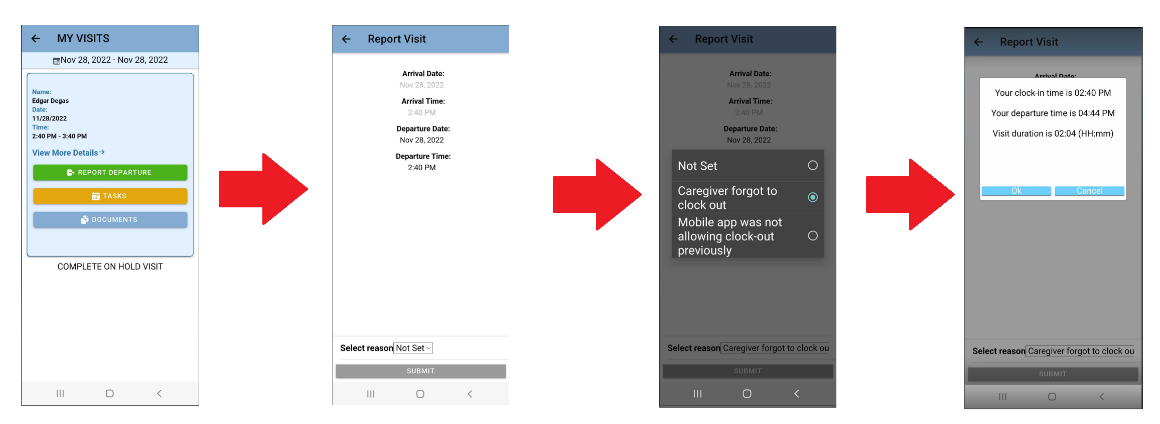
Give caregivers automatic access to complete clock-out, INCLUDING entering manual departure time, for visits in the status of On Hold (configurable). Typically used when caregivers forget to clock out and the system places the visit on hold overnight; the next day the caregiver can complete a manual clock-out. Contiguous visits show as a single On Hold visit, and Ankota splits the duration on the caregiver's behalf.
-
Prevent early and late clock-ins
-
Skip the care plan items page entirely (for companies without care plan items)
-
Report a client No Show (after clock-in) with a unique No Show button (configurable)
-
Report errand miles on the signature page (configurable)
-
Show "remaining authorized hours for the week" (configurable). It will not show if there is no authorization on the client's profile.
-
See visit history of past caregiver notes
-
Show contiguous (back-to-back) visits as 1 visit (defaulted, but can be changed to show both — configurable)
-
Report any care plan item as an "add-on" to the care plan, or by code (primarily for Private Pay and Virginia — configurable)
-
See nurse documents on visits (configurable)
-
See non-editable PDF versions of patient files (any caregiver)
-
Send visits to be filled out again to caregivers via the Rework function (configurable)
-
Tailor a list of drop-down answers for each care plan item, OR have a notes field (configurable)
-
Two-factor authentication (configurable)
-
Report client concerns (as opposed to caregiver notes)
-
See agency/payer descriptor and the associated phone number on each visit
-
Hide Availability in Settings (so caregivers cannot schedule their own availability and time off)
-
Reduce the idle time of the mobile app (automatic clock-out default is set to 5 minutes)
-
Default care plan items as Complete (only works for questions with the options Complete, Not Needed Today, Refused by Client — configurable)
Note: Not applicable in all states.
Unscheduled Visits/My Clients
For organizations that want caregivers to clock in as needed without pre-scheduled visits, the My Clients feature is a good option. This is commonly used for CDS and nurse visits.
Set-up is required. Caregivers are not allowed access without:
-
The My Clients section being turned on in the app
-
Granting permissions through the Assigned Caregivers tab on the client's profile in ankota.net
Notifications
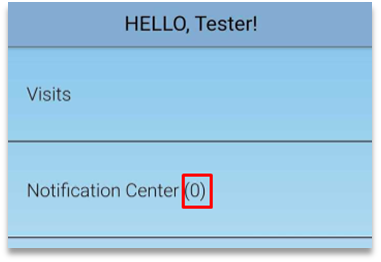
The Notification Center is where caregivers see notifications sent by admins or via expiring HR requirement system reminders. The number of messages is visible from the main menu.
Visit History
Visit History allows caregivers to review their visits based on a date range. They can also add notes to a past visit from this page (same-day only).
The summary of time (minutes) next to the actual time shows payable minutes. For example, if a visit was 11 minutes long and pay is rounded down to the nearest 15 minutes, it was 0 minutes payable. If system settings are different — pay to the minute, or round up, for example — those minutes would be displayed differently.
Payroll
Caregivers can review their gross payroll (past and present, after payrolls are completed/approved) in this section. They can review their access by selecting a date range, then clicking the arrow to view a payroll summary. Caregivers can only see hours from completed payrolls that are approved by admins. They will not see hours populate as soon as they finish working.
Chat
Caregivers can access mobile chat from the mobile app. Training for this feature is also provided in the Caregiver Resources HelpSite.
To open chat, click the Chat section. Messages will be indicated with a number after that chat.
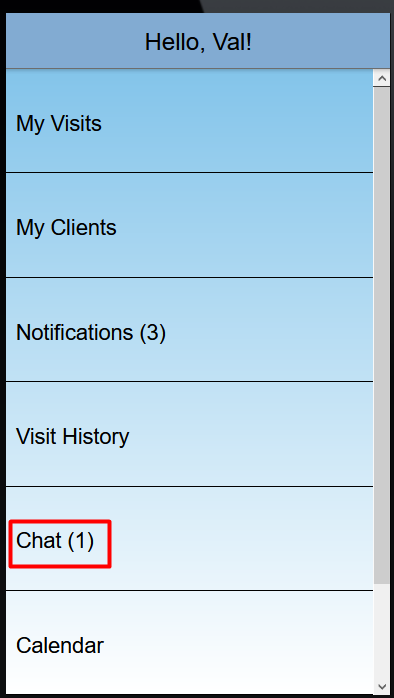
By clicking on this section, caregivers can chat with an overarching admin chat. Once they click the admin profile, a chat window opens. Any admin can respond on the scheduler board via the chat icon.
When caregivers click an admin, they will see their chat history. In this window, they can:
-
Instant message the admin
-
Send a document to the admin
-
Call the admin
-
Video call the admin
Instant messages and documents can be reviewed later by the admin; they do not have to be online for the instant message to be logged and saved.
Caregivers and admins need a working microphone and/or camera to use the call or video call options (in Beta testing). The admin must also be online in the app or on the Schedule Board with their chat window open to receive the chat call.
Patient Documents
With the Assigned Caregivers feature, caregivers can be allowed to see view-only (non-editable) versions of documents from their client's Documents tab. This is different from the blank forms available to caregivers on visits. At this time, all documents are shared with the caregiver, so this is not an option for organizations with sensitive material that should not be seen by assigned caregivers.
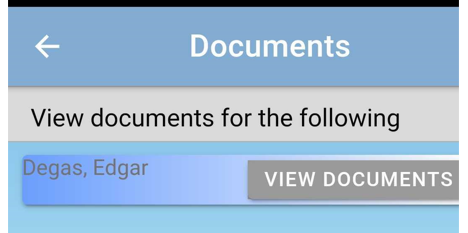
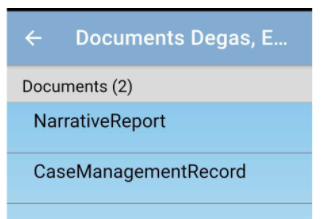
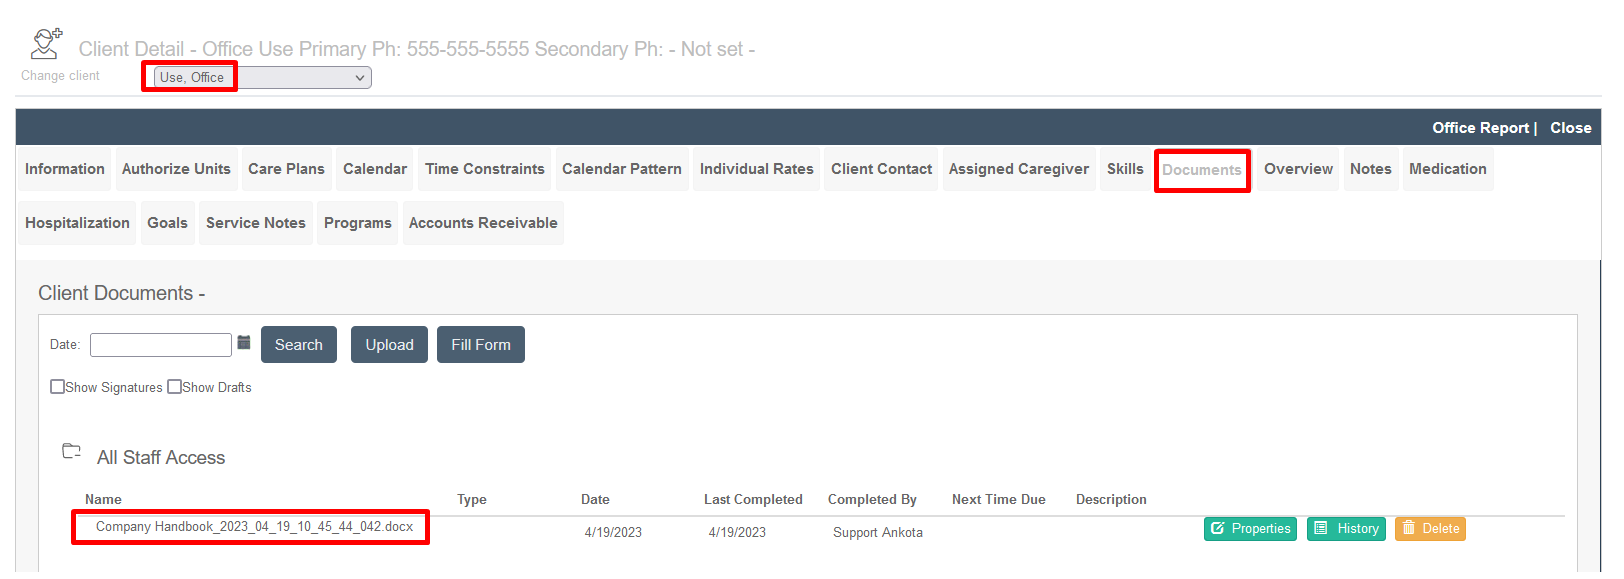
For organizations with company handbooks, HR files, or other general materials that they want to make available to all caregivers, these documents can be assigned to a generic Office client, and the caregivers can be assigned to the Office client. This special permission allows those caregivers to view read-only company documents from the Mobile App's Documents section.
Calendar
The caregiver calendar provides a quick, visual overview of the caregiver's upcoming schedule. To view the calendar, click Calendar from the main menu. It defaults to month view of the current month, with dots representing each scheduled visit. Below the calendar, there is a list of every visit including the date, time, client, visit status, and visit type.
Click on a specific day with a scheduled visit or visits to see a preview of the day.
To view the calendar in week view, click Week View at the bottom.
Settings
The Settings section provides caregivers management of their availability, as well as access choices.
Account
Allows caregivers to confirm their account name.
Availability
The "Availability" option allows caregivers to define their regular schedule and to mark themselves out as needed. They cannot unassign visits (they can't "force" a visit off their schedule by marking themselves out that day). This subsection can be turned on/off independent of other Settings.
Change Password
Caregivers can change their password in this location. They will change their password here at their first log-in.
Fingerprint
Caregivers can set up fingerprint access here.
About
Caregivers can check their app version here.
To Set Additional Settings
Additional settings are set by admins at ankota.net.
Upload Documents or Photos
This lets caregivers take a photo of documentation and send it to their worker profile for the admin to see, such as Medical Certification. After hitting Take Photo, the caregiver will have the option to Retake or Use Photo. After hitting Use Photo, the caregiver selects Keep. This sends the image to the worker's profile in Ankota.
Log out
For HIPAA security, caregivers are logged out after a few minutes of nonuse. To log out sooner, they can click here.
Upload Caregiver Required Documents
This feature allows caregivers to upload their own required documents instead of the admin manually adding them into the system.
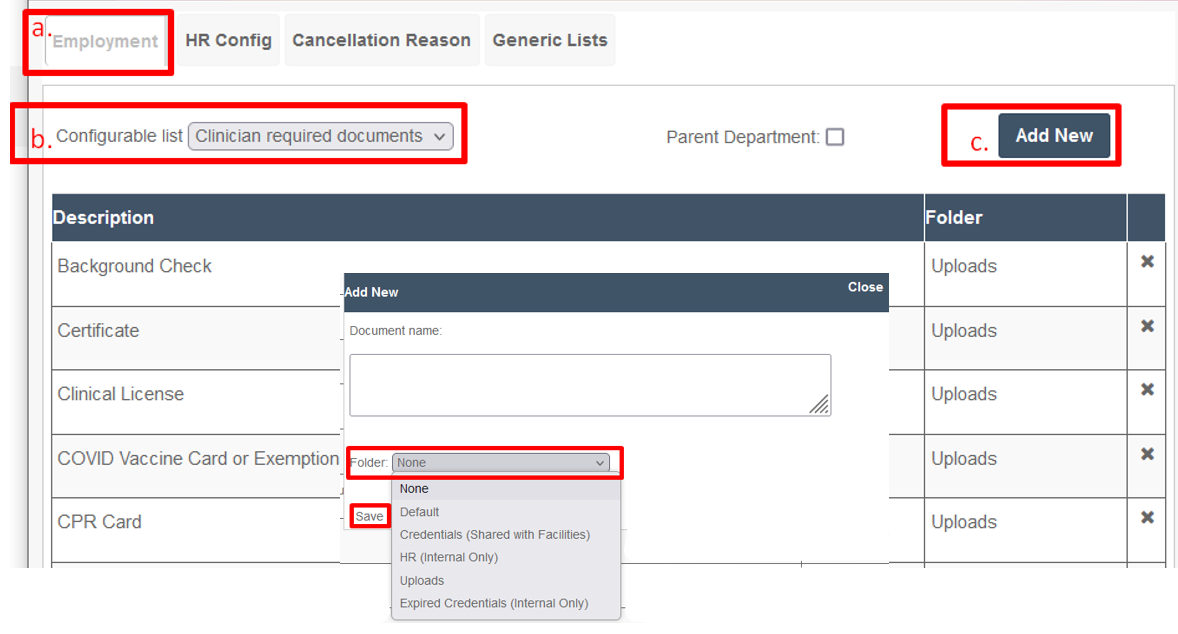
Step 1: Add Document to Mobile App Upload
-
Go to Settings
-
Click Configurable List
-
Click Employment Tab
-
Select Configurable List: Caregiver Required Documents
-
Add New
-
Label
-
Document Name
-
Folder: Uploads
-
Save
For a step-by-step tutorial on how clinicians can upload documents on the mobile app, see the related clinician upload article.
Note: This step needs to be configured by an Ankota specialist.
Once clinicians upload required documents on the mobile app, administrators verify by the following steps.
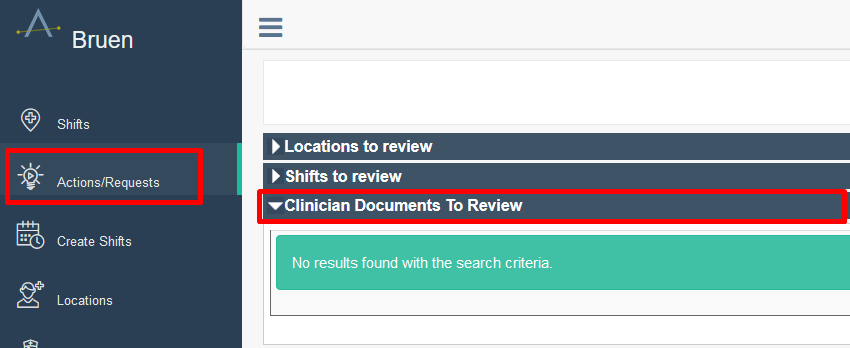
Step 2: Checking for new uploads in Actions Requests
-
Go to Actions Request
-
Select dropdown "Caregiver Documents to Review"
Step 3: Confirming in Caregiver's Document Tab
-
Go to Caregiver profile
-
Click the Documents Tab
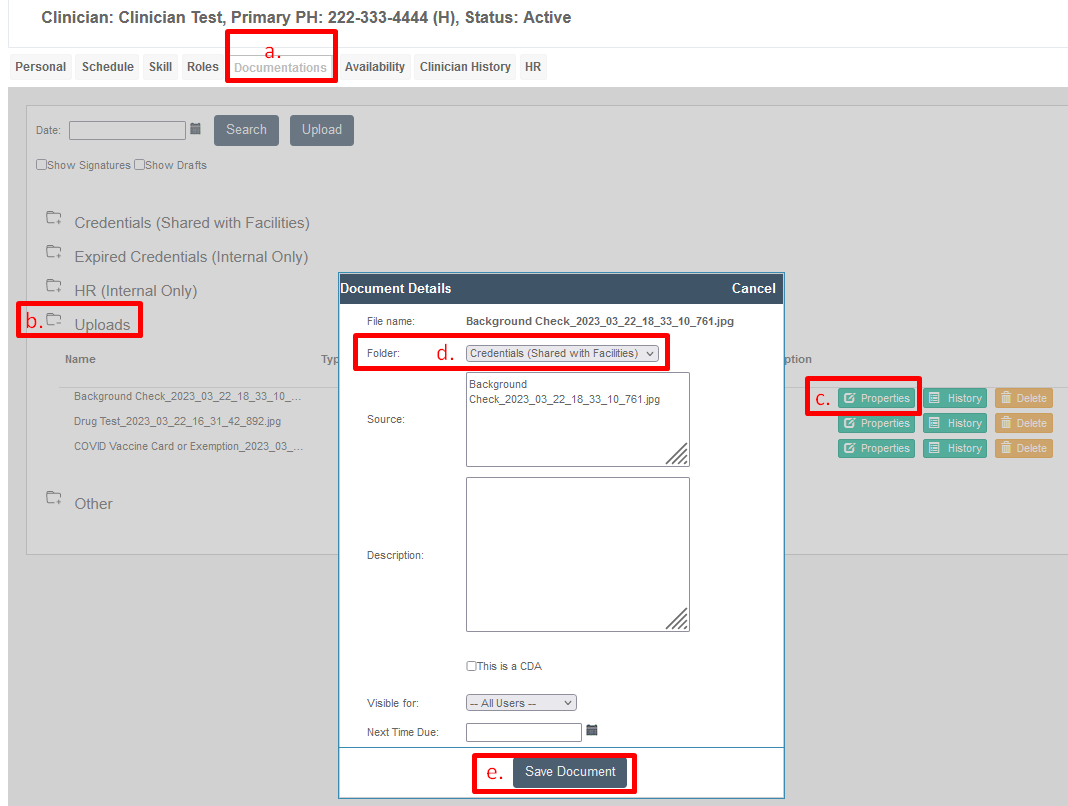
-
Select Folder: whatever you set the folder to in the settings above
To change folders:
-
Click Properties to Edit
-
Save