Canceling Visits (Visit Screen)
Overview
At times you will need to cancel visits. It is important to keep in mind that Canceled is a status. A deleted visit will be removed from the system, whereas a canceled visit remains in the status of Canceled (as opposed to Scheduled, Closed, etc.).
In order to cancel visits, follow the steps as described below.
Canceling Visits
When canceling visits, there are several options. An individual visit can be canceled on the Visits page or on any calendar. Most often, individual cancellations are handled on the calendar.
Canceling Individual Visits
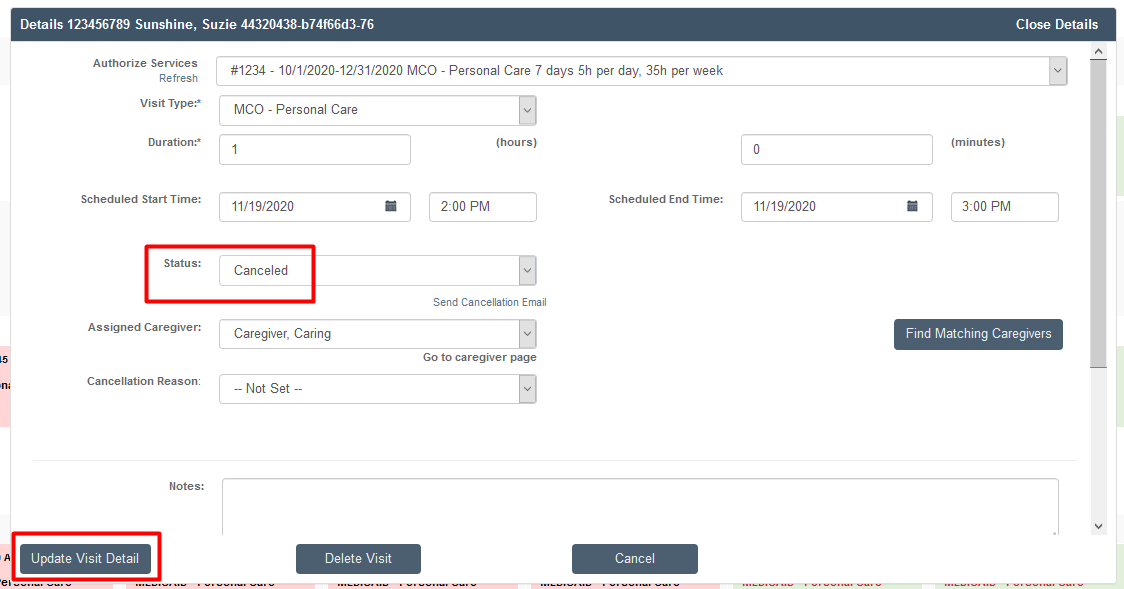
Open the visit, change the status to Canceled, then click Update Visit Detail to save and close the visit.
Canceling More than One Visit
To cancel a group of visits, the fastest way is to make a change to the selected visits on the Visits page.
To begin, go to the Main Menu, then click on Visits.

Search for Visits. This can be queried by Visit Date, Client ID, Visit Start and End Date, Visit Status, or Visit Type to filter. The query return maximum is 100 records per search.

To cancel the visits, check the box next to the visits to be canceled, then scroll to the bottom to the Cancel Visit button.
NOTE: To cancel a visit, do not use Cancel Assignment. The Cancel Assignment function will cancel the caregiver's assignment to the visits, and does not cancel the visit itself.

When Cancel Visit is clicked, a list of reasons (established by the organization) will appear. Select one of the items or create a unique canceled item explanation.

Finally, click the Save Notes and Cancel Visits button and the process is complete.