The Ankota Approval Assistant
Overview
In most states, Medicaid requires coding for visits which missed critical information such as EVV clock-ins or clock-outs. These requirements vary by state and the appropriate codes are available in any Medicaid system based on these state requirements. Particularly in larger organizations, keeping up with imperfect clock-ins and clock-outs and their associated reason and action coding can be time-consuming.
The Ankota Approval Assistant simplifies this process four ways:
- Data Entry Correction: First, by highlighting & fixing missing data.
- Code Correction: Second, by highlighting & fixing missing reason codes.
- Duration Correction: Third, by highlighting & fixing visits that went long as well as coding them.
- Filter for the correct visit type(s) first: this option should be applied only to visit types where there is a clearly defined, non-negotiable work period
- You may wish to open the list and review for notes first, approving visits which should be allowed to bill and pay longer than originally planned
- The default is to ignore pre-approved visits (which may have been approved for going long)
- Changing duration will result in a manual visit
- Alternately, approve the durations as they are
- Visit Approval: Finally, by allowing you to approve visits for Billing and Payroll, excluding visits with unresolved Ankota warnings. This way, you can still filter for your remaining Needs Action visits to manage any unusual warnings or issues.
NOTE: Unbillable visits can not be managed/changed in the Approval Assistant. Invoiced visits can not have their duration changed.
The Approval Assistant is available on the Visit Approval Dashboard. When visits are selected and the Approval Assistant button is clicked, a pop-up will appear.
This article includes the following sections:
- The Approval Assistant Configurations
- Data Entry Issues
- Reason Coding
- Adjust Duration
- Approve Visits
The Ankota Approval Assistant Configurations
The Approval Assistant must be configured and is rolling out on a state-by-state basis to high-level admins in their environments. Note that the Ankota Approval Assistant can be limited to specific template viewpoints. If some user templates should access the Visit Approval Dashboard without having access to the Approval Assistant, Support can assist with this request.
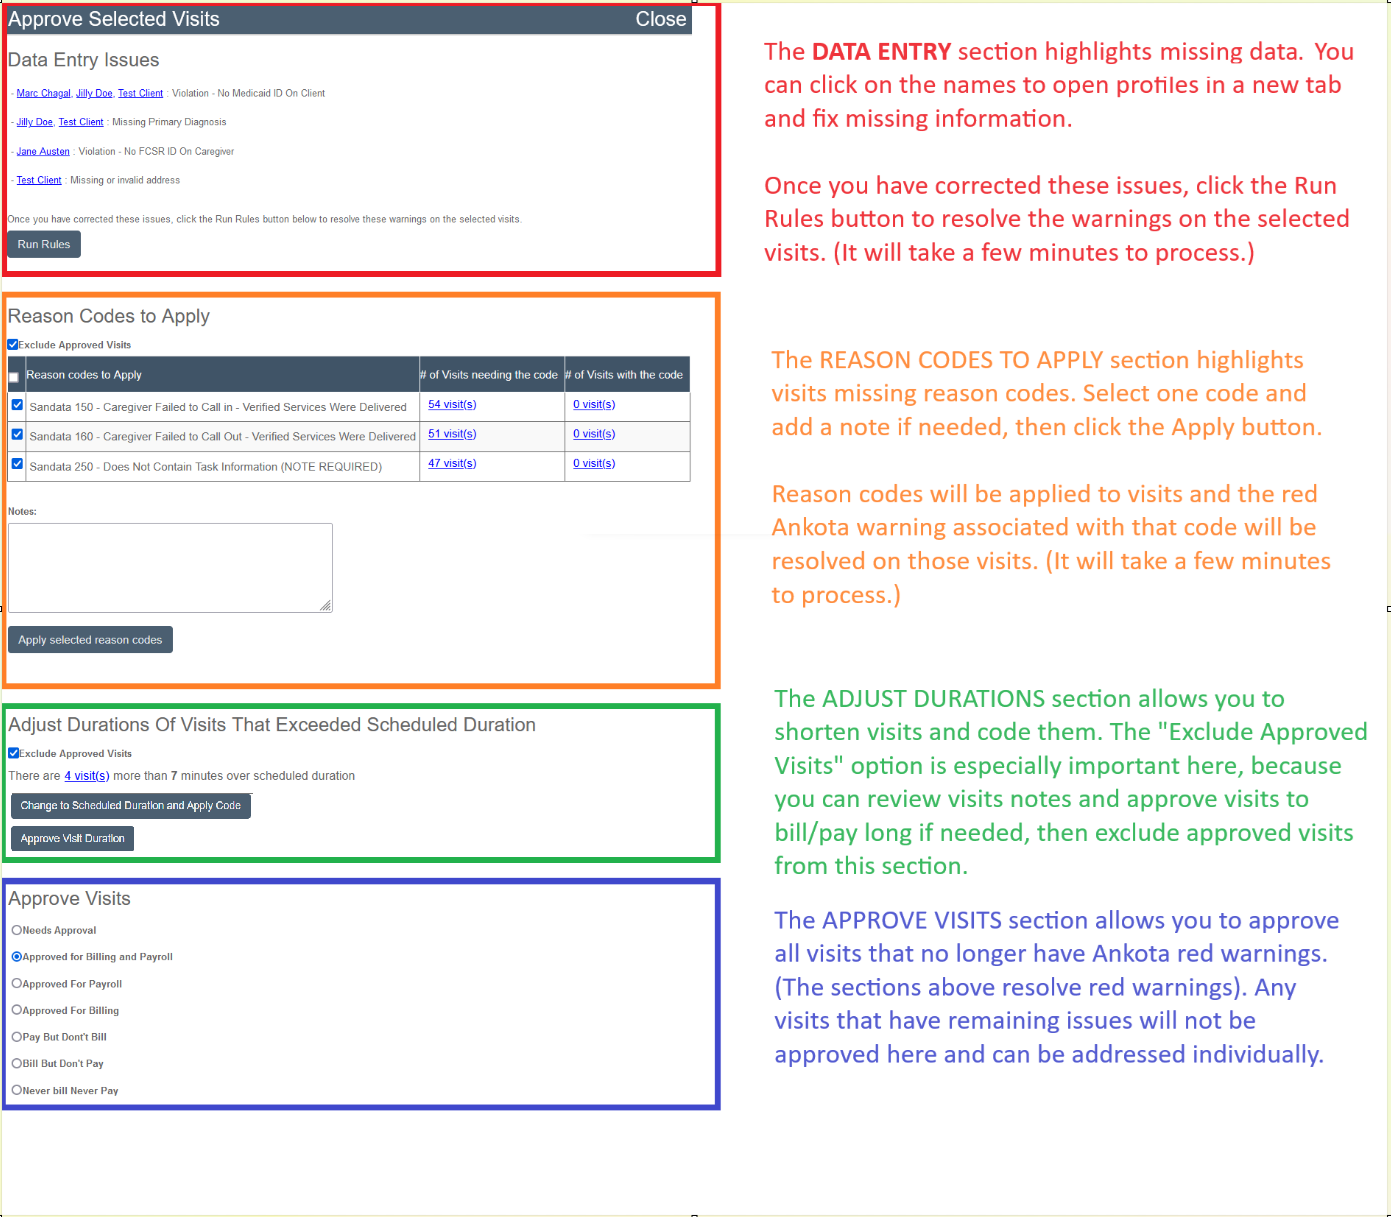
Data Entry Issues
The VAD Approval Assistant's first section provides a summary of all data entry issues, plus the ability to Run Rules after making those corrections.
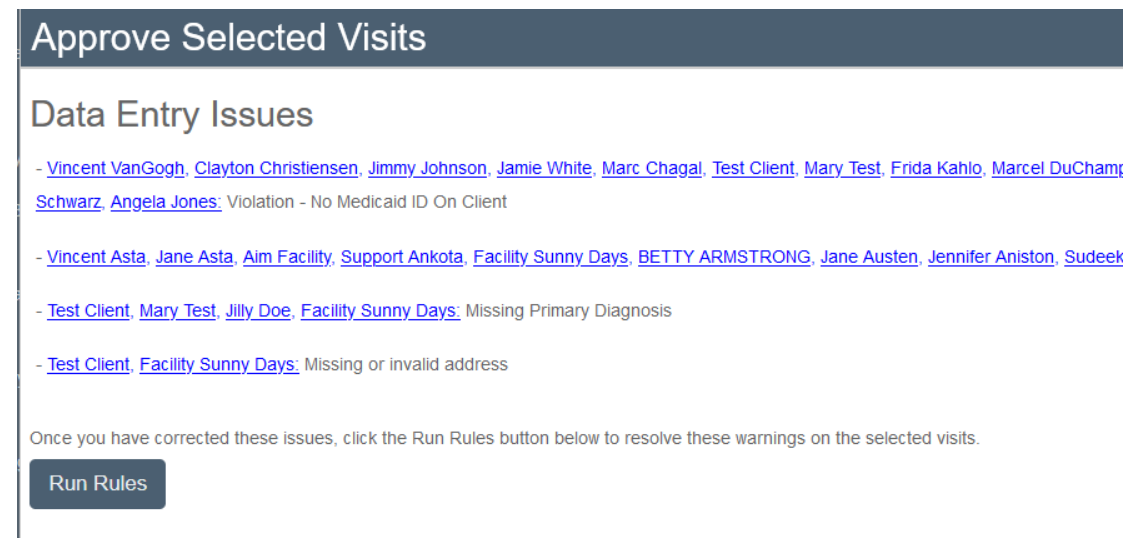
A summary of the names of clients and caregivers and their data entry issues is provided. Each name is linked, so clicking the client or caregiver name opens their profile in a new browser tab, where the issue can be corrected.
For example, if Mary Test is missing her primary diagnosis code, clicking her name opens her profile in a new tab. Switching to the new tab allows entry of the missing primary diagnosis code. After saving, return to the Approval Assistant and move to the next data entry issue.
After all issues are resolved, click Refresh, then Run Rules and all the selected visits will have rules run again and resolved issues will be updated in those visits.
A few important notes about this section:
- An Ankota warning will not be listed unless there is a data entry issue; if there is no issue, it will say "No data entry issues were identified."
- Possible Ankota data entry warnings include:
- Client name(s): No authorization for this visit
- Client name(s): Missing Client ID
- Client name(s): Missing Primary Diagnosis
- Client name(s): Missing or invalid address
- Client name(s): Missing or invalid phone number
- Client name(s): No Admission ID
- Client name(s): No Medicaid ID on Patient
- Client name(s): No Physician and Physician NPI
- Caregiver name(s): No SSN on Worker
- Caregiver name(s): No FCSR ID on Worker
- Caregiver name(s): No Worker Code
- Caregiver name(s): No Worker ID on Worker
IMPORTANT NOTE: Visits in this filtered list with ANY unresolved Ankota warnings (INCLUDING WARNINGS NOT IN THE LIST ABOVE, such as visits exceeding expected duration) are excluded from approval when mass approving visits from the Approval Assistant. A pop-up note will remind you of this each time visits are approved with the Approval Assistant. These remaining unresolved visits will require individual visit management and approval.
Reason Coding
With the Approval Assistant configured, go to the Visit Approval Dashboard and filter for all Needs Action visits for the last period.
First complete the Data Entry section until no issues remain.
Then, select all remaining Needs Action visits, then click the Approval Assistant button. Suggestions will be made for each group of visits on an error-by-error basis. Leave the boxes checked for each reason code to be applied. To add a different note for each reason code applied, select one reason code at a time and add the note, then apply the reason code. It is recommended to leave the checkbox checked to exclude previously approved visits.
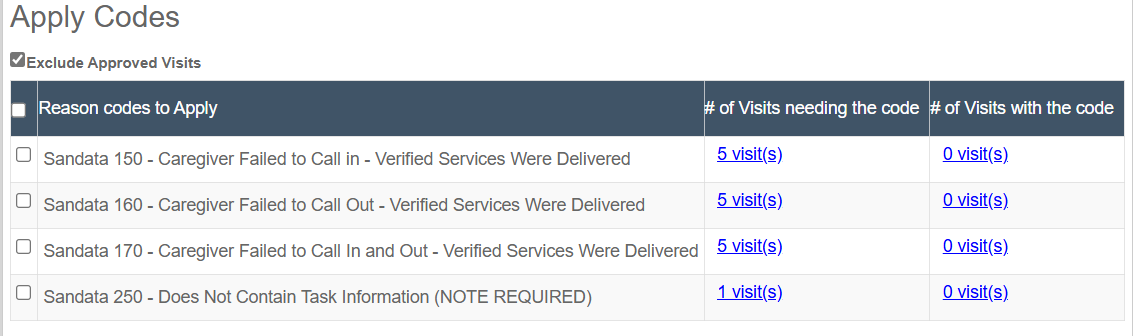
If desired, a note may be added below these visits which will be universally applied.
Finally, click the Apply Selected Reason Codes button.

Adjust Duration
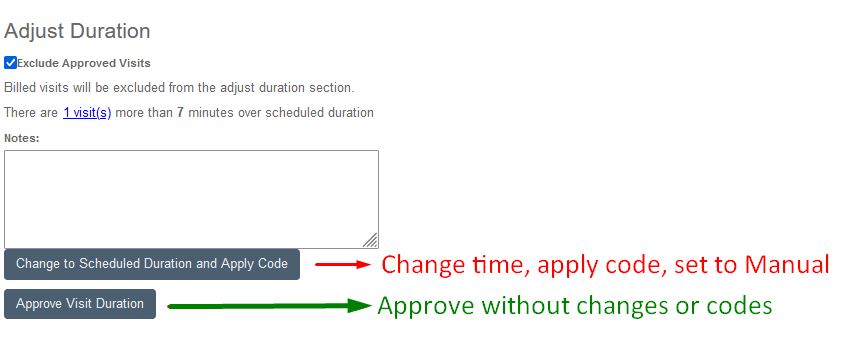
For customers who provide services with strict limitations on the amount of work allowed per day, the Approval Assistant will also allow adjustment of duration to the scheduled time automatically. Click the button to Change to Scheduled Duration and Apply Code. (Filter for a single visit type when using this function to avoid shortening duration on the wrong visit types.) It is recommended to leave the checkbox checked to exclude previously approved visits.
Alternately, the visits may be approved with the long duration. No codes will be applied, no times will be changed, and the visit method (FOB, IVR, mobile app, or manual) will not be altered.
Summary of Differences in Duration Buttons
| Change to Scheduled Duration and Apply Code (CHANGE) | Approve Visit Duration (NO CHANGE) |
|---|---|
| Change visit method to MANUAL | Does not affect visit method |
| Change duration to scheduled duration/change end time | Approves times as they are/does not change times |
| Applies reason code if appropriate to your state/aggregator | Does not apply any reason codes |
Approval Assistant View
Approve Visits
When missing or wrong data is corrected, visits are coded, and any time adjustments that are needed are made, visits can be mass approved as desired.
- Scroll to the bottom of the Approval Assistant pop-up
- Select the preferred approval status
- Click Approve Visits
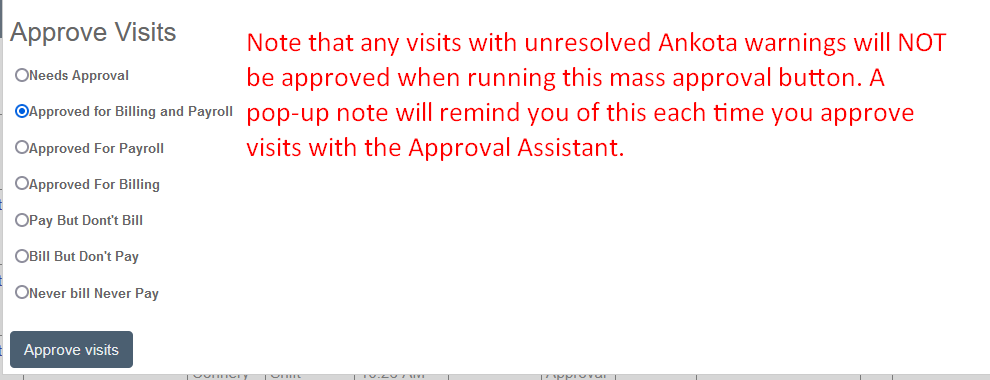
IMPORTANT NOTE: Any visits with unresolved Ankota warnings will NOT be approved when running this mass approval button. A pop-up note will remind you of this each time visits are approved with the Approval Assistant. These remaining unresolved visits will require individual visit management and approval.